What to Do If Your Sump Pump Line Is Frozen
Urgent, practical guide on what to do if your sump pump line is frozen, with safe thaw steps, diagnostic flow, and prevention tips for homeowners.

The most likely cause of a frozen sump pump line is cold outdoor temperatures that freeze the discharge pipe. The quick fix is to thaw the line safely, then insulate and protect it from future freezes. According to Sump Pump Check, thawing with safe methods and improving insulation minimizes damage and backups. If thawing fails or you detect cracks, contact a professional.
Why the sump pump line freezes in cold weather
In winter, the discharge line outdoors is exposed to freezing temperatures, snow, and wind. When water in the line hits freezing air, it can ice up at the outlet, inside bends, or along the exposed piping. The result is reduced or blocked flow, which makes the sump pump work harder, short-cycle, or run continuously. If you are looking for what to do if your sump pump line is frozen, the starting point is understanding where ice tends to form and why. Sump Pump Check has seen this issue frequently in colder regions, and the most effective response combines careful thawing with long-term protection like insulation and proper drainage. Recognizing the signs—slowed water discharge, frost on the exterior pipe, or an unusual buzzing from the pump—helps homeowners act quickly to prevent basement flooding and pump wear.
Immediate safety steps you should take now
First, switch off the sump pump at the circuit breaker or unplug the unit to prevent the pump from running against a frozen line. Do not touch metal parts if the line is icy or wet, as there is a risk of electric shock. Keep children and pets away from the outdoor discharge area. Gather supplies you’ll need: a hair dryer or heat gun, towels, warm water, and a flashlight. If you smell gas or suspect a gas line near the sump, evacuate and call emergency services. These safety steps are essential and time-sensitive: they protect you while you work to thaw and diagnose the issue.
Safe thawing methods you can use today
The goal is to melt ice gradually, not to force the line open with heat. Start by applying warm towels around the exterior discharge pipe and using a hair dryer on a low heat setting to warm the pipe from the inside out. You can run a slow stream of warm (not boiling) water over the exterior line to melt surface ice, but avoid using an open flame or torch. If the ice is near the exterior vent or outlet, gently remove snow around the area to improve airflow and drainage. Regularly check the thaw progress and stop if you see cracking or leaking. After thawing, test the line by pouring water into the sump pit and watching for a steady discharge.
Diagnostic flow overview
Use a simple flow to identify the most probable cause and the right fix. Symptoms guide you toward the likely culprit, then you apply the corresponding solution. If discharge remains blocked after thawing, recheck the outdoor area for new ice formation and verify the line’s slope to ensure gravity helps water exit. This approach minimizes unnecessary repairs and keeps your basement dry.
Step-by-step fixes for the most common cause
Most frozen-line issues come from ice at the exterior discharge. Follow these steps: 1) Turn off power to the sump pump. 2) Thaw the exterior ice using warm water and a hair dryer from a safe distance. 3) Inspect the discharge line for cracks or crushed sections; replace if damaged. 4) Clean ice and debris from the outlet area and ensure the line slopes downward away from the house. 5) Insulate exposed piping and add heat tape if you live in an area that freezes regularly. 6) Reconnect power and perform a test with a small amount of water in the pit. 7) Monitor for leaks and call a pro if the line won’t thaw or shows damage.
Prevention strategies to avoid future freezes
To prevent recurring freezes, consider these practical measures: Insulate the discharge line with foam sleeves or pipe insulation, especially the exposed outdoor portion. Install heat tape or a thermostatically controlled heater around the pipe. Check that the line slopes correctly away from the foundation to carry water away. Keep the discharge outlet clear of snow, ice, and debris; redirect if necessary. Schedule annual sump-pump maintenance to check seals, backflow prevention, and wiring. If your home is in a severe cold zone, consider relocating the discharge further from the foundation or into a basement drainage system.
When to call a professional and what they will do
If thawing without success, if you notice cracks or leaking, or if the line remains frozen for more than a few hours, contact a licensed plumber or sump-pump technician. A professional can assess pipe integrity, re-route the discharge, install proper backflow prevention, or recommend a higher-capacity pump or a battery backup system for power outages. In some cases, persistent freezing indicates insulation gaps or drainage problems that require building or grading adjustments. The sooner you involve a pro, the lower the risk of basement flooding and costly repairs.
Steps
Estimated time: 30-60 minutes
- 1
Power down and assess safety
Turn off the sump pump at the circuit breaker or unplug the unit. Confirm there is no water contact with live electrical components. Wear insulated gloves and keep others away from the area.
Tip: Never touch a frozen pipe with bare hands; it can cause burns or skin damage. - 2
Locate the frozen section
Inspect the exterior outlet and visible portions of the discharge line to locate where the ice is forming. Gently probe with a gloved hand only if you can do so without forcing ice.
Tip: Use a flashlight to inspect dark crawlspaces or basements. - 3
Start safe thawing
Apply warm towels around the exterior pipe and use a hair dryer on low heat, keeping a distance to avoid overheating plastics. You may run warm water over the pipe’s exterior to melt surface ice.
Tip: Avoid open flames or torches; they can damage pipes. - 4
Check for damage
While thawing, look for cracks, bulges, or leaks in the discharge line. If you see damage, stop and prepare for replacement by a professional.
Tip: Document damage with photos for insurance or contractor quotes. - 5
Reinstall and insulate
Once ice melts, reassemble any components and seal the line. Add foam sleeve insulation and consider heat tape to maintain warmth during cold snaps.
Tip: Ensure heat tape is rated for outdoor use and follows manufacturer guidelines. - 6
Test discharge
Restore power and slowly pour water into the sump pit to verify a steady discharge. Listen for normal pump cycling and watch that water exits freely.
Tip: If the line immediately refreezes, reassess insulation and slope. - 7
Prevent future freezes
Schedule seasonal maintenance, verify drainage away from the foundation, and consider relocating the discharge or upgrading insulation for harsher winters.
Tip: Set reminders for annual checks and keep a simple maintenance log.
Diagnosis: Discharge line is frozen and water does not exit outdoors during a pump cycle
Possible Causes
- highOutdoor line iced over due to cold temperatures
- mediumIce buildup at discharge elbow or near the outlet
- lowDamaged, crushed, or kinked discharge pipe
- lowImproper line slope causing standing water that freezes
Fixes
- easyThaw the line safely and clear the exterior outlet
- mediumInspect and replace damaged pipe sections, if needed
- easyImprove insulation and add heat tape for ongoing protection
- easyRecheck slope and ensure proper drainage away from the house
FAQ
Why does my sump pump line freeze in winter?
Freezing happens when cold outdoor temperatures cause ice to form in the discharge line, blocking flow. Elevate the line and insulate to reduce ice buildup. If you see repeated freezing, consider upgrades to insulation or routing.
Freezing is usually caused by cold outdoor temperatures freezing the discharge line. Improve insulation and consider rerouting if it keeps happening.
Can I thaw the line safely without calling a pro?
Yes, you can thaw safely using warm water and a hair dryer on a low setting. Do not use open flames and monitor for leaks. If thawing fails or you see damage, call a professional.
You can thaw it safely at home, but stop if you see damage or if it won’t thaw after careful steps.
Will a frozen line damage my sump pump?
Prolonged freezing can cause back pressure, overheating, or wear on seals and joints. Inspect for cracks after thawing and replace any damaged sections before normal use.
Frozen lines can stress the pump and seals, so check for damage after thawing.
When should I call a professional?
If the line remains frozen after a thorough safe thaw, if you see cracks, leaks, or if you smell gas near the discharge, contact a licensed plumber or sump-pump technician.
If thawing fails or you notice leaks or cracks, call a professional.
How can I prevent freezing in the future?
Improve insulation, add heat tape, ensure proper slope, and keep the discharge area clear. Consider relocating the discharge or installing a backup system for power outages.
Prevent future freezes with insulation and proper setup; plan for power outages too.
Watch Video
Top Takeaways
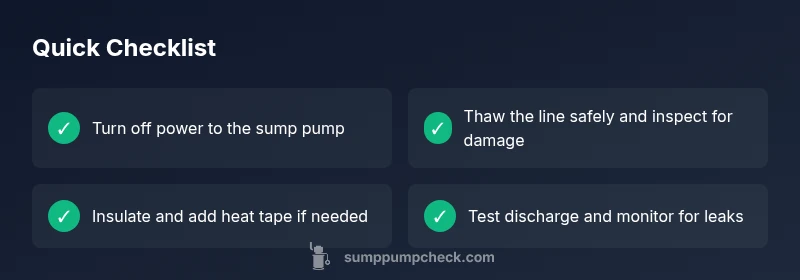
- Identify the frozen section quickly and thaw safely.
- Insulate and protect outdoor lines to prevent re-freeze.
- Test discharge after thawing to confirm flow.
- Know when to call a pro for damage or persistent freezes.
- Schedule regular maintenance to avoid future outages.