How to Get Rid of Basement Sump Pump Smell
Discover practical, step-by-step methods to remove basement sump pump odors, prevent recurrence, and keep your space fresh. Includes safety tips, cleaning strategies, and maintenance routines.

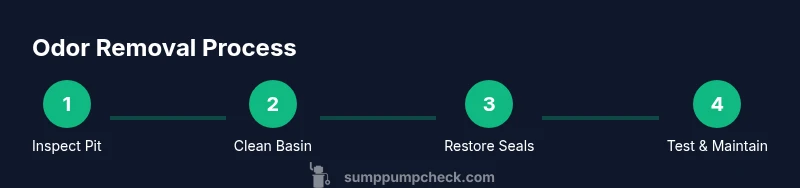
By identifying odor sources, cleaning the sump pit, and restoring proper drainage and ventilation, you can eliminate basement sump pump smells. Start with safety checks, remove standing water, seal the trap, and sanitize the pit. This 60-minute routine prevents recurrence and protects your home's air quality. Keep monitoring for new odors, perform periodic cleaning, and ensure the discharge line remains free from clogs.
Why basement sump pump smells happen
Odors in basements with a sump pump typically arise from a few common sources. Sewer gas can enter the pit if the trap seal is dry or compromised, especially after a long dry spell. Bacteria thrive in standing water and organic residues, producing sour, sulfurous smells. Moist concrete pores can also transfer damp odors from the surrounding soil into the sump area. A clogged or leaky discharge line can allow gases to back up into the pit rather than vent outdoors. Finally, an aging or dirty sump lid, failed check valve, or insufficient venting can trap moisture and odor in the basin. Understanding these sources helps you target the right fix rather than applying generic cleaners. According to Sump Pump Check, odors are often tied to an incomplete trap seal or stagnant water; addressing both sides of the problem yields the cleanest result. By diagnosing whether the smell is primarily from sewer gas or damp organic matter, you can choose a deodorizing approach that is effective and safe.
Safety first: before you start
Safety comes first when you work around a sump pit. Start by turning off the sump pump at the power switch and unplugging the unit to prevent accidental activations while you’re handling the lid and interior. If there is any natural gas odor or you suspect a gas leak, evacuate the area and call the gas company or emergency services—odor from gas is not something to treat as a DIY project. Wear protective gloves, eye protection, and a mask if your space is damp or dusty. Keep children and pets clear of the area during cleaning. Ensure adequate ventilation by opening doors or running a fan to move air through the basement, which helps carry away fumes and odors during and after cleaning. Finally, confirm that you have a stable, well-lit workspace and a clean-based approach for handling chemicals. This preparation reduces risk and makes it easier to complete the odor removal steps safely.
Inspect the pit and components
Start by removing the sump lid and visually inspecting the basin for residue, standing water, and corrosion. Check the discharge pipe for cracks and blockages, and inspect the check valve for proper operation—a malfunctioning valve can allow gases to backflow. Look at the trap seal: if the water level is too low, sewer gas can escape into the basement. Inspect the lid gasket for cracks and replace as needed. Make sure the pit has a clean, dry area around it and that there is no mold growth on the concrete walls. If you notice any cracks in the basin, the system may need professional assessment. Finally, test the pump by briefly powering it on to ensure the outlet is clear and water is being discharged away from the foundation. This diagnostic step helps you decide whether a simple cleaning is enough or if a part needs replacement.
Clean and deodorize the sump area
Begin by removing standing water with a bucket or wet-dry vacuum, then scrub the basin with a non-abrasive brush and a gentle cleaner. Use baking soda as a deodorizer: sprinkle, scrub, and rinse. For tougher odors, rinse with a solution of white vinegar and warm water, then rinse again with clean water. If you choose a sanitizer, use a mild bleach solution only according to label directions and never mix with ammonia or other cleaners. After rinsing, wipe the interior dry and allow the pit to air-dry for a few minutes. Freshen the space around the lid and vent using odor absorbers or activated charcoal briefly placed nearby. Remember, never pour cleaners directly into the sump where electrical components are present. This cleanup reduces biological odor sources and prepares the pit for sealing and maintenance.
Restore seals and drainage to prevent odor
Refill the trap with a small amount of clean water to restore the seal, ensuring that it covers the trap’s opening. Reinstall the lid securely and check the gasket for a snug fit. If your discharge line is long or has bends, ensure it drains away from the foundation and is free of obstructions. Replace a worn check valve or damaged seals as needed; proper sealing prevents sewer gases from escaping into the basement. Consider adding a venting option if your local code allows it, or upgrading to a sealed, purpose-built sump cover. Finally, run the pump briefly to verify that odors do not reappear and that water is moving away from the house. This step stabilizes odor sources and reduces future risk.
Maintenance to prevent future smells
Establish a regular maintenance routine: inspect the sump cover, check valve, and discharge line every 3–6 months; run the pump and inspect the outlet during the dry season. Keep the pit clean and free of debris; wipe down with mild cleaner after each major cleaning. Refill the trap with water between pump cycles if the house has long dry spells. Use baking soda or activated charcoal near the pit as a non-toxic deodorizer, but avoid overuse that could clog components. Schedule a professional check every year if your system is older or shows signs of wear. Routine maintenance reduces the chance of odors and helps protect indoor air quality over time.
When to call a pro
Persistent odors after cleaning, cracks in the basin, or recurring odors despite maintenance indicate a professional assessment is needed. A licensed plumber can inspect the basin for structural damage, verify the integrity of the discharge line, and recommend hardware replacements such as a new check valve, lid, or trap seal. If you smell gas or hear beeping alarms tied to your system, contact a pro immediately for safety. Timely intervention can prevent more serious issues and ensure your sump pump functions correctly.
Authoritative sources
Visit these reputable sources for more guidance on sump pump safety and maintenance:
- U.S. Environmental Protection Agency: Water and Sewer Odors guidelines, https://www.epa.gov
- U.S. Occupational Safety and Health Administration: Safety around household utilities, https://www.osha.gov
- Centers for Disease Control and Prevention: Household water safety, https://www.cdc.gov
Tools & Materials
- Gloves (rubber or nitrile)(Protect hands during cleaning and handling dirty water)
- Goggles or eye protection(Prevent splashes from cleaners and debris)
- Sump lid and gasket(Inspect for cracks and replace if needed)
- Sump pump brush or stiff-bristled scrub brush(Clean interior surfaces effectively)
- Bucket(For transferring water and cleaners)
- Wet-dry vacuum or siphon(Helpful for removing standing water)
- White vinegar(Deodorize and sanitize (do not mix with bleach))
- Baking soda(Deodorizer and odor neutralizer)
- Non-abrasive cleaner(Gentle surface cleaner for basin)
- Bleach (unscented) or oxygen bleach(Optional sanitizer per label; never mix with ammonia)
- Old towels or rags(Cleanup and drying surfaces)
- Ventilation fan or window(Helps air circulation during cleaning)
Steps
Estimated time: 60-90 minutes
- 1
Power down and safety check
Turn off the sump pump and unplug it from power. Confirm there is no active discharge while you access the pit. Put on gloves and eye protection before opening the lid. If you detect a gas odor, evacuate and call the proper utility or emergency services.
Tip: Lock out and tag the circuit if you’re working in a shared space to avoid accidental re-energizing. - 2
Remove lid and inspect components
Carefully lift the lid and inspect the interior for standing water, sediment, mold, and cracks. Check the discharge line for obstructions and confirm the check valve is sealing properly.
Tip: Take photos of any damage before you move parts so you can reference replacements. - 3
Clean the basin surface
Remove standing water with a bucket or vacuum. Scrub the basin with a non-abrasive cleaner and brush. Rinse thoroughly and dry with towels; allow to air-dry briefly.
Tip: Avoid harsh chemicals near electrical parts and never mix cleaners. Test odors with a distance from the pit to gauge progress. - 4
Deodorize and sanitize
Sprinkle baking soda, scrub, then rinse. For heavier odors, use white vinegar solution and rinse. If using bleach, dilute per label directions and never mix with ammonia.
Tip: Let surfaces dry completely to prevent microbial growth. - 5
Restore seals and check drainage
Refill trap with water to re-seal, reattach lid, and inspect gasket. Ensure discharge line drains away from the foundation and is free of kinks or blockages.
Tip: Replace worn gaskets or a faulty check valve as needed. - 6
Test and monitor
Run the pump briefly and watch for proper discharge away from the house. Reassess the pit for any lingering odors after the test.
Tip: Keep an eye on odors for the next day or two to confirm success. - 7
Establish ongoing maintenance
Schedule routine checks every 3–6 months and perform a quick clean when needed. Consider annual professional inspection if the system is older.
Tip: Maintain a simple log to track maintenance history.
FAQ
What causes a basement sump pump to smell?
Odors usually come from sewer gas entering the pit when the trap seal dries or leaks, plus bacteria in standing water. Poor ventilation and a clogged discharge line can worsen smells. Inspecting trap seals, discharge paths, and the lid helps identify the main source.
Odors come from sewer gas or bacteria in standing water; check trap seals and discharge paths to find the source.
Is it dangerous if there’s a sewer gas smell from a sump pit?
Yes. Sewer gas can be hazardous. If you detect a strong sewer odor, evacuate and contact local emergency services or the gas company before continuing any DIY work.
A strong sewer gas smell can be dangerous—evacuate and call authorities if it’s persistent.
Can cleaning remove smells permanently, or will they come back?
Cleaning and resealing the trap, venting properly, and maintaining the discharge line greatly reduce odors. Odors may return if the trap dries again or if components wear out; regular maintenance helps prevent this.
Cleaning plus proper sealing and maintenance usually stops odors, but keep up with routine checks.
Do I need to replace the sump pump to stop the smell?
Replacement is rarely required. Most smells come from seal failure, stagnant water, or venting issues. Replacing worn valves or resealing the trap is often enough.
Usually you don’t need a full replacement—fix the seals and venting first.
How often should I maintain the sump pit to prevent smells?
Aim for a basic check every 3–6 months, with a deeper cleaning annually or after heavy use. Regular maintenance helps catch problems early and keeps odors from developing.
Check every few months and clean yearly to stop smells from returning.
Watch Video
Top Takeaways
- Identify odor sources before acting
- Restore and maintain trap seals
- Clean, deodorize, and exhaust odors safely
- Regular maintenance prevents recurrence
- Call a pro for persistent or dangerous odors