How to Check Your Sump Pump: A Homeowner's Guide
Learn how to check your sump pump thoroughly, test the float switch, inspect discharge, and establish a maintenance routine to prevent basement flooding. This homeowner-focused guide from Sump Pump Check walks you through safety, checks, and when to replace.

You’ll learn how to check your sump pump for reliability in minutes: verify power and outlet safety, test the float switch, inspect the discharge line for clogs, and confirm alarms or backups function. This quick method helps prevent basement flooding and is suitable for DIY homeowners.
Why Regular Sump Pump Checks Matter
A sump pump is a frontline defense against basement flooding, especially during heavy rain or rapid snowmelt. If you’re wondering how to check your sump pump, this guide walks you through a practical, homeowner-friendly process to verify that the unit starts, runs smoothly, and discharges water away from your foundation. According to Sump Pump Check, proactive maintenance reduces emergency calls and mitigates costly water damage. A simple, routine check can save you from a wet basement and ruined belongings. In this guide, you’ll learn how to spot common issues before a storm hits and how to plan your checks so you’re prepared.
Most homes rely on core components: a pump in a sump basin, a power source, a float switch or sensor, a discharge line, a check valve, and an optional battery backup. Over time, debris, corrosion, or a stuck float can prevent operation when it matters most. Regular checks help you catch issues early—before storms, power outages, or freezing temperatures complicate matters. By performing a standard check, you gain confidence in your system and can plan maintenance around a fixed schedule. We’ll outline the steps, explain the rationale, and provide safety tips to protect you and your family.
Key Components of a Sump Pump You Should Inspect
Your sump pump relies on several components that all need occasional attention. The most important parts to check include the power supply and outlet (preferably a GFCI-protected outlet), the float switch or sensor (which triggers pump activation), the discharge line and check valve (to prevent backflow), and any backup battery or alarm system. Inspect for corrosion, loose electrical connections, rust around the motor housing, and any debris that could impede movement. A failing float switch is a common cause of inaction during storms, so focus on its free movement and secure mounting. Finally, confirm that the pit is clean and dry around the pump to allow unobstructed operation. Regular visual checks can catch issues before they escalate and help you plan service or replacement when needed.
Safety First: Before You Begin
Safety is the top priority when you inspect or test a sump pump. Always start with a clear area around the sump pit and ensure the power is handled safely. Use a GFCI outlet or a transfer switch if you’re testing near potential moisture. Wear rubber- or neoprene-soled shoes, and avoid leaning into the pit. If you’re uncomfortable with electrical components or if your system uses a more complex setup (like a submersible pump with a high-water alarm), consider consulting a licensed electrician. The Sump Pump Check team emphasizes never sacrificing safety for speed; gradual, careful checks reduce the risk of electric shock or water exposure.
Quick Home Checks You Can Do Right Now
Even without tools, you can perform several quick checks that illuminate obvious problems. Check that the power cord and plug are intact and that the outlet is dry. Look for signs of leakage around the pump housing and pit lid. Ensure the discharge piping is connected and free of visible obstructions. If your pump has a backup battery, confirm the battery is seated correctly and inspect the terminals for corrosion. Finally, reset any visible alarm indicators and verify their status lights or beeps when tested. These quick checks help you spot red flags before a storm.
Step-by-Step Preview: What You’ll Do
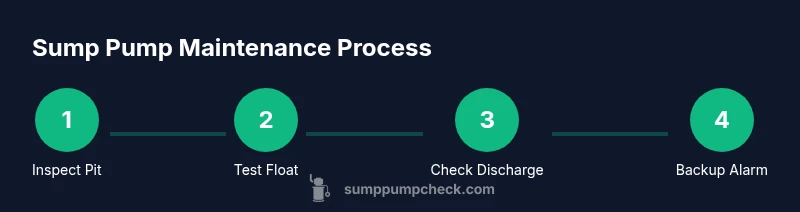
This section previews the core actions involved in the hands-on check. You’ll confirm power safety, inspect components in the pit, test the float switch, run water to trigger the pump, observe discharge flow, and verify the backup system if present. By breaking the process into clear stages, you’ll reduce guesswork and ensure you cover all critical elements. The following STEP-BY-STEP section provides precise actions, tips, and timing to keep you on track.
Maintenance and Troubleshooting: Common Scenarios
Common sump pump problems include a stuck float, clogged discharge, or a pump that runs but doesn’t remove water efficiently. Debris in the pit, a bad check valve, or an overflow near the discharge point can lead to backflow or air lock. In freezing climates, discharges can be blocked by ice, requiring additional insulation or discharge routing adjustments. If you notice a persistent odor, beeping, or the unit hums without pumping, there’s likely an electrical fault or mechanical wear. Troubleshooting usually begins with a power check, then moves to sensor and valve inspections. For persistent issues, replace worn components or the entire unit.
When to Replace vs Repair Your Sump Pump
Sump pumps have a finite lifespan, typically many years with proper maintenance, but performance declines over time. If you notice frequent failures, persistent clogs, rust on the housing, excessive vibration, or motor overheating, replacement is often the most reliable option. Repairs can be suitable for minor issues like a stuck float or a blocked discharge, but if the motor or impeller shows wear, replacing the pump may be more cost-effective in the long run. Establish a replacement plan before the next heavy rain so you’re prepared.
Creating a Maintenance Schedule That Works
A simple quarterly check can be enough for some homes, but a semi-annual or annual schedule is common in many climates. Tie your sump pump checks to seasonal weather patterns—before spring rain and after winter thaw—and refresh batteries and safety devices as part of annual home maintenance. Create a checklist that includes visual inspection, cleaning the pit, testing the float switch, discharging water, and verifying alarm systems. Keeping a log of inspection dates, issues found, and actions taken helps you track performance over time and justify replacements when needed.
Authoritative Sources and Additional Resources
For broader electrical and safety guidance, consult reputable sources such as:
- https://extension.psu.edu/
- https://extension.illinois.edu/
- https://www.osha.gov/
These resources offer practical, ground-truth information on electrical safety, pump maintenance, and household repairs that complement hands-on sump pump checks.
Tools & Materials
- Safety gear (rubber gloves, safety glasses)(Protect hands and eyes from debris and splashes)
- Flashlight or headlamp(Illuminate the pit and connections)
- GFCI-protected outlet or transfer switch(Safe power source for testing)
- Water source (bucket or hose) for simulating water in the pit(Use clean water; pour gently to avoid splashing)
- Sump pump manual (if available)(Helpful for model-specific steps)
- Basic tools (screwdriver, pliers)(Only if you need to adjust wiring or clamps)
Steps
Estimated time: 30-45 minutes
- 1
Prep and safety check
Clear the area around the sump pit, put on safety gear, and ensure the testing area is dry. Confirm the power source is accessible and the breaker is on or the transfer switch is ready. This stage reduces the risk of electric shock and helps you work confidently.
Tip: If you’re unsure about wiring, consider asking a partner to monitor while you inspect. - 2
Inspect the pit and components
Remove the sump lid and visually inspect the pit for debris, standing water, or signs of wear on the pump housing. Check the discharge line for cracks or obstructions and ensure the check valve is intact. Confirm the float switch can move freely without catching on debris.
Tip: Use a flashlight to inspect hard-to-see areas around the edges of the pit. - 3
Confirm power and test the pump
Plug the pump into a GFCI outlet or ensure the transfer switch is engaged. Confirm the outlet is dry and test that the pump engages when power is supplied. Listen for the motor start and observe any unusual buzzing.
Tip: Do not touch the pump while it’s running; keep hands clear of moving parts. - 4
Test the float switch and activation
Manually raise and lower the float to ensure the pump starts and stops at appropriate water levels. The switch should move smoothly without sticking. If the pump doesn’t respond, inspect the float rod and linkage for obstructions.
Tip: If you have a modern electronic sensor, perform a simulated water rise to trigger it. - 5
Run water to trigger the discharge
Pour several gallons of water into the pit to simulate a rising groundwater level. Observe that water is pumped out and that the discharge line carries water away from the foundation. Check for backflow or leaks at joints.
Tip: Stand to the side to avoid splashing; ensure the discharge path remains clear during testing. - 6
Check backup systems and alarms
If your system includes a battery backup or alarm, test them according to the manufacturer’s instructions. Verify battery terminals are clean and connections are tight. Ensure audible alarms trigger and that backup power engages if applicable.
Tip: Replace the backup battery per the manufacturer’s schedule, not just when it fails.
FAQ
How often should I check my sump pump?
Most homeowners benefit from a formal check at least twice a year, plus a pre-storm inspection. Seasonal checks help catch wear and ensure readiness when water levels rise.
A good rule is to check twice a year and before the rainy season to stay prepared.
What are signs my sump pump needs replacement?
Frequent clogs, unusual noises, the motor overheating, or water not being discharged reliably are strong indicators replacement may be necessary.
If the pump struggles to move water or makes strange noises, plan a replacement.
Do I need a professional to check my sump pump?
For most routine checks, a confident DIY homeowner can inspect and test. If you encounter wiring, electrical safety concerns, or a non-draining discharge, consult a licensed electrician or plumber.
If you’re unsure about electricity or plumbing, it’s smart to call a professional.
How do I test a backup sump pump?
Follow the manufacturer’s manual to test the backup battery or secondary pump. Ensure it engages when main power is unavailable and confirm it can discharge water properly.
Test the backup as you would the primary pump, following the manual.
Is water in the sump pit normal?
Yes, a small amount of water can be normal after rain. If the pit stays full or water level rises rapidly, investigate the drainage and the pump’s capacity.
Some water in the pit is okay, but persistent pooling means action is needed.
What maintenance should I do monthly?
Check for debris, clean the pit, ensure the float moves freely, and confirm alarms function. A quick monthly check keeps minor issues from becoming big problems.
Do a quick debris check and test the alarm each month.
Watch Video
Top Takeaways
- Inspect regularly to prevent basement flooding.
- Test power, float switch, and discharge for reliable operation.
- Document maintenance to guide future replacements.
- Use backup power and alarms for added protection.