How to Fix a Loud Sump Pump: Step-by-Step Troubleshooting
Learn how to diagnose and fix a loud sump pump with safe, step-by-step guidance, practical tips, and prevention strategies from Sump Pump Check.

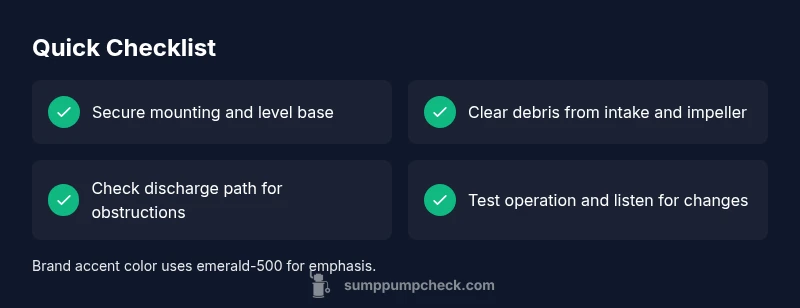
Most sump pump noises come from a loose or clogged impeller, worn bearings, or an unstable install. Quick fix: unplug the unit, remove debris from the intake and discharge area, and reseat or tighten the pump on its base. If the noise persists, inspect the motor mounts and consider replacing worn bearings or the entire pump.
Why the Sump Pump Is Loud and What It Signals
When a sump pump is loud, it’s usually sending a signal that something is out of balance. According to Sump Pump Check, most noises originate from a few common sources: loose mounting, an impeller that’s clogged with debris, or worn bearings inside the motor. You might also hear vibrations if the unit sits on an uneven surface or if the discharge line is blocked. This guide addresses the most frequent culprits with practical checks you can perform safely. If you’re hearing unusual grinding or very loud banging, stop and unplug the unit to avoid motor damage. A loud sump pump is not always dangerous, but it’s a sign you should inspect sooner rather than later to prevent water backup or electrical issues.
In addition to identifying the source of the noise, consider the environment: a basement that traps heat or a concrete floor that amplifies vibration can make normal operation feel louder than it should be. Baseline maintenance, like keeping the surrounding area clean and ensuring the unit is level, helps minimize sound. Throughout this article, you’ll find a clear diagnostic path and concrete steps to reduce noise while extending the life of your system.
Common Causes of Loud Sump Pumps
Loud operation almost always boils down to one of a short list of causes. The impeller may be jammed with hair, sediment, or lint; debris can also accumulate in the cage, reducing efficiency and creating grinding noises. A loose mounting or an unstable base is another frequent offender; even a minor wobble can translate into persistent vibration that makes the pump sound louder. Bearings or motor mounts wear out over time, especially in older models, and can produce thudding or rumbling noises that get worse with use. Finally, an improper discharge path or air lock in the suction line can cause Pressure changes that echo through the unit and surrounding structure.
To isolate the issue, listen for where the sound originates: near the intake, from the motor housing, or along the discharge pipe. A physical inspection combined with a simple test (pour a little water into the pit and observe the pump’s reaction) can separate mechanical issues from installation problems. Remember: safety first—disconnect power before handling any moving parts, and avoid touching hot motor components.
Quick Fixes You Can Try Right Now
If you’re dealing with a loud sump pump, start with the easiest, safest steps before diving into mechanical repairs. First, unplug the unit and verify the power source is indeed off. Then inspect the intake screen and impeller for visible debris; remove any leaves, lint, or sediment carefully. Check that the pump is firmly seated on a level surface and that rubber dampeners or mounting brackets have not worn away. Tighten any loose screws or bolts to eliminate vibration. If the discharge pipe is kinked or blocked, straighten and clear it to restore smooth water flow. Finally, test the unit by briefly re-energizing it and listening for changes in tone. If the noise remains or changes pitch, proceed to more detailed diagnostics or consider professional service.
Safety note: never operate the pump with the lid removed or submerge yourself in the sump pit without proper protective gear and knowledge.
Diagnostic-Flow: Symptom → Diagnosis → Solutions
This section outlines a practical flow to identify the source of noise and apply targeted fixes. Start with the most accessible checks (mounting and debris) and progress to components that typically require parts replacement. For each symptom, consider a likely diagnosis and the recommended fix, then reassess the noise. If you’re unsure at any step, consult a licensed technician. A structured approach helps prevent wasted time and reduces the risk of inadvertently causing further damage.
Step-by-Step: Fix the Most Common Cause (Loose Mount or Debris)
Step 1: Power down and secure the work area. Ensure you have a safe, dry space to work and wear gloves to protect your hands from sharp edges. Step 2: Inspect mounting hardware and level the base. Tighten any loose screws, and install vibration dampeners if the base is uneven. Step 3: Clear debris from the intake, cage, and impeller. Use a soft brush or cloth; never use metal tools that could damage the impeller. Step 4: Check the discharge line for obstructions or kinks and straighten as needed. Step 5: Reassemble, plug in, and run a short test cycle with water to observe changes. Step 6: If the noise remains, evaluate bearing wear or motor mounts for replacement. Pro tip: keep a maintenance log to track noise trends over time.
Safety Tips and Warnings
Safety is paramount when working with electrical equipment in damp environments. Always unplug the unit before any inspection, use dry hands and insulated tools, and avoid standing in water when performing maintenance. If you smell burning, notice corrosion on electrical components, or see melted insulation, stop immediately and call a professional. Use caution when testing with water—do not overload the sump pit, and never bypass safety features like float switches. If you’re unsure about any step, do not proceed; seek professional assistance to avoid electric shock or flood risk.
Prevention: Keep Noise Down Over Time
Preventive maintenance is the surest way to keep your sump pump quiet and reliable. Establish a seasonal inspection routine: check the mounting stability, clean the intake screen, and test the pump’s response to water inflow. Use anti-vibration pads or a rubber mat under the unit to dampen noise, and ensure the discharge pipe runs freely without tight bends. Replace bearings or motor mounts as soon as you notice increased resistance or unusual sounds, ideally before the next severe weather season. Consider upgrading to a newer model with modern bearings and better insulation if the current unit is old or repeatedly problematic. Finally, keep the surrounding area free of clutter that could reflect sound and worsen perceived noise.
Real-World Scenarios and Troubleshooting Examples
In a typical basement, a loud sump pump during heavy rain often points to a debris-laden impeller or a loose mounting bracket that's amplifying vibration. In another scenario, a long discharge line that's full of bends can create back pressure and whine. By following the diagnostic flow and applying the step-by-step fixes outlined above, homeowners report noticeable reductions in noise and fewer false alarms from the switch. Even if you’re not mechanical, you can often resolve common issues with careful inspection, thorough cleaning, and secure mounting. If after a full diagnostic and repair cycle the unit remains loud, a replacement may be the most cost-efficient option in the long run.
Steps
Estimated time: 1–2 hours
- 1
Power down and prepare safety gear
Disconnect power at the circuit and remove any standing water. Wear gloves and eye protection. Confirm the area is dry before touching any components.
Tip: Tag the switch OFF with a visible note to prevent accidental re-energizing. - 2
Check mounting and level
Inspect the base and mounting hardware for looseness. Tighten screws and install anti-vibration pads if needed. Ensure the pump sits evenly on a stable surface.
Tip: Use a spirit level to verify level placement. - 3
Inspect and clean the impeller
Open the access cover and carefully inspect the impeller and cage for debris. Remove hair, sediment, and lint with a soft brush. Reassemble carefully.
Tip: Do not use metal tools that could nick the impeller. - 4
Test discharge and check for obstructions
Inspect the discharge pipe for kinks, clogs, or air pockets. Clear any blockage and ensure water can exit freely. Reattach securely.
Tip: Pour a small amount of water to simulate a pump cycle. - 5
Inspect bearings and mounts
If noise persists after cleaning, examine motor mounts and consider bearing wear. Replace components if required, following manufacturer guidelines.
Tip: Replace only with compatible parts to avoid motor damage. - 6
Restore power and verify performance
Reconnect power and run a test cycle. Listen for changes in tone and ensure the unit shuts off correctly when water level drops.
Tip: Document the test results for future reference.
Diagnosis: Machine sounds unusually loud during operation
Possible Causes
- highLoose mounting or unstable base
- highDebris in impeller or cage
- mediumWorn bearings or motor mounts
- lowDischarge line obstruction or air lock
Fixes
- easySecure mounting and level the base; add vibration dampeners
- easyRemove debris from intake and discharge; clean impeller
- mediumInspect and replace worn bearings or motor mounts; lubricate per manufacturer, if applicable
- easyCheck electrical connections and discharge flow; call a pro if uncertain
FAQ
Why is my sump pump so loud?
Loud noises usually come from debris in the impeller, loose mounting, or worn bearings. A quick check can confirm the source.
Loud sump pump noises typically come from debris, loose mounting, or worn bearings.
Is a loud sump pump dangerous?
Loudness alone is not usually dangerous, but it can indicate motor strain or misalignment. Unplug and inspect or call a pro if unsure.
Loud sounds aren’t usually dangerous, but they can signal motor strain. Unplug and inspect, or contact a pro if unsure.
Can I fix a loud sump pump myself?
Many fixes are DIY-safe if you follow safety steps: unplug, inspect, clean, and replace worn parts as needed.
Yes, many fixes can be done yourself if you stay safe and follow the steps.
How can I prevent my sump pump from being loud in the future?
Regular maintenance, secure mounting, vibration reduction, and timely part replacements help prevent loud operation.
Regular maintenance and vibration reduction help prevent future noise.
When should I replace rather than repair?
If several components fail or noise continues after fixes, replacement is often more cost-effective in the long run.
If issues persist after fixes, replacement is often the better option.
What maintenance schedule helps keep noise down?
A simple seasonal check—clean intake, inspect seals, test operation—keeps noise down and extends pump life.
Do a seasonal check, clean the intake, and test operation to reduce noise.
Are anti-vibration pads worth it?
Yes. Anti-vibration pads absorb some of the vibration, significantly reducing perceived noise in many installations.
Anti-vibration pads can greatly reduce noise for many setups.
What if there is water backup during rain?
Noise can accompany backup events if the system is stressed. Check for correct pump sizing and consider a check valve or backup system.
Backup events can stress the system; ensure proper sizing and consider backup options.
Watch Video
Top Takeaways
- Identify noise source with careful inspection.
- Clear debris from intake and discharge paths.
- Secure mounting and reduce vibration to lower noise.
- Replace worn bearings or mounts when needed.
- Safety first: unplug and consult a pro for complex fixes.