Proper Sump Pump Installation: A Complete Step-by-Step Guide
Learn how to perform proper sump pump installation with a safe, code-conscious, and durable setup. This guide covers pit prep, pump sizing, discharge routing, electrical safety, backup options, and maintenance tips for homeowners and DIY enthusiasts.

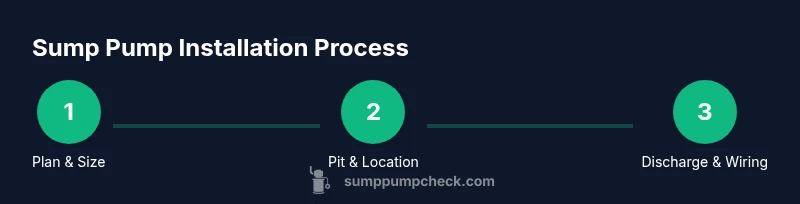
Achieve proper sump pump installation by planning the pump location, sizing for your basement, and ensuring a code-compliant discharge. This guide walks you through essential steps—pit prep, electrical readiness, valve placement, and testing—so you can protect your basement from flooding with confidence. Always prioritize safety and consider professional help for water pressure or electrical concerns.
What proper sump pump installation entails
Proper sump pump installation involves selecting the right pump, preparing a compliant pit, routing discharge away from the home, and ensuring safe electrical connections. According to Sump Pump Check, the most reliable installations start with accurate sizing and a clear plan for where water will go during a flood event. A well-planned setup reduces basement flood risk, protects foundations, and minimizes loud operation. In practice, you’ll verify the pump’s rating against your basement size, ensure the sump pit is watertight, and confirm that the discharge line leads water away from the building and toward an appropriate drainage area. You’ll also factor in any backup power options, seasonal changes, and potential interference from landscaping. The end result is a self-contained system that activates automatically when water collects, runs efficiently, and is accessible for maintenance. This section sets the foundation for safe, durable installation that protects your home and family. As noted by the Sump Pump Check team, adherence to a planned layout reduces unexpected failures and simplifies future upkeep.
Key decisions before you start
Before you drill or buy, decide on pump type (submersible vs pedestal), horsepower, and whether to add a battery-backed backup. Submersible pumps sit inside the pit and are quieter; pedestal pumps mount above the pit and can be easier to service. In most homes, a 1/3 to 1/2 horsepower model offers sufficient capacity for typical basements, but sizing depends on groundwater and pit size. If you live in a flood-prone area or have power outages, plan a backup pump or water-powered backup. Also decide on a check valve to prevent backflow and on a discharge path that avoids backflow into the foundation or neighbor’s yard. Finally, check local codes and whether a permit is required; when in doubt, consult a licensed professional.
Pit location, size, and drainage planning
Selecting the right pit location and size is essential in a proper sump pump installation. The pit should be positioned in the lowest interior area of the basement, away from utilities and with stable surrounding concrete. The opening should be wide enough to accommodate the chosen pump’s footprint and float switch without restricting movement. Drainage planning includes the discharge line: it must slope away from the foundation and terminate at a location where water will not pool near the home. Consider whether to extend the line above grade or direct it to a storm sewer or daylight outlet, complying with local regulations. The plan should include a check valve or backflow preventer to stop water from re-entering the pit. Document the layout to simplify future maintenance and inspections.
Sump pump types and accessories to consider
When selecting a sump pump, you’ll weigh submersible versus pedestal configurations, bearing in mind noise, access for service, and space constraints. Submersible pumps work well in tight pits and are quieter during operation, while pedestal pumps can be easier to service and replace. Accessories to consider include a reliable check valve, appropriate discharge piping, a back-up power option (battery or water-powered), a flotation switch that matches the pump type, and a sturdy sump pit cover to prevent debris entry. Also plan on an anti-backflow device and corrosion-resistant materials to extend longevity. A well-chosen combination of pump and accessories supports dependable water removal for many years.
Safety, codes, and common pitfalls
Electrical safety is non-negotiable: use a GFCI-protected outlet, ensure wiring is properly protected, and avoid overloading circuits. Follow local building codes and obtain any required permits before installation. Avoid common mistakes such as undersized piping, improper slope, or mixing metal components with incompatible materials. The Sump Pump Check team emphasizes documenting connections and ensuring the discharge does not direct water toward foundations or neighboring properties. Regular inspection of piping joints, seals, and the pit cover helps prevent leaks and blockages. Remember—improper installation can void warranties and create safety hazards.
Maintaining and testing after install
Maintenance should be proactive rather than reactive. After installation, fill the pit with water to test the pump and float switch, listen for abnormal noises, and confirm that the discharge runs freely. Schedule monthly visual checks and annual comprehensive tests, including backup power readiness. Clean the intake screen, verify there’s no obstruction in the pit, and replace seals or gaskets if wear is evident. Keep a simple maintenance log and note the pump’s run frequency, which can indicate clogging, heavy inflow, or failing components. Regular maintenance extends life and reduces the risk of failure during heavy rain events.
Tools & Materials
- Sump pump (submersible or pedestal)(Choose based on pit size and space; ensure capacity matches typical water inflow)
- Sump pit (with cover)(Check pit dimensions to fit pump footprint and float switch)
- Discharge piping (PVC or flexible)(Use proper fittings and ensure a continuous slope away from the home)
- Check valve (backflow preventer)(Install on discharge line to stop re-entry)
- PVC cement and primer(For connections in rigid piping)
- GFCI-protected electrical outlet(Dedicated circuit preferred; avoid shared outlets)
- Float switch (if not included)(Ensure compatibility with chosen pump)
- Hose clamps and adapters(For securing external discharge connections)
- Shovel, level, tape measure(Site prep and accurate placement)
- Silicone sealant or concrete sealant(Seal around pit or pipe penetrations)
- Safety gear (gloves, eye protection)(Personal protective equipment)
- Bucket or wet-dry vacuum(Clean up and pit cleanup)
Steps
Estimated time: 2-4 hours
- 1
Assess space and choose pump
Survey the basement area to identify the lowest point for the pit and ensure enough clearance for the pump and lid. Select a pump type and size based on anticipated inflow and pit dimensions. If in doubt, consult manufacturer guidelines and local codes.
Tip: Double-check clearances under joists and utilities before you mark the pit location. - 2
Power down and gather tools
Shut off the power to the area or circuits that may be affected. Gather all required tools and materials, and review the discharge path to avoid future backflow or corrosion. Prepare a clean workspace to minimize debris entering the pit.
Tip: Use a labeled circuit breaker to prevent accidental re-energizing during work. - 3
Install or prepare the sump pit
If retrofitting, ensure the pit is level and sealed. Place the pit in the chosen location, then verify that the surrounding concrete is intact. Install any liners or seals to prevent water from bypassing the pit.
Tip: A tight seal around the pit improves efficiency and reduces leaks. - 4
Mount the pump and check float
Lower the pump into the pit and ensure the float has full range of motion without obstruction. If using a pedestal unit, position it for easy access to service. Confirm mounting hardware is secure.
Tip: Test float movement by manually lifting to confirm it triggers the switch. - 5
Install discharge piping and check valve
Connect the discharge pipe to the pump outlet, install the check valve, and route the line away from the foundation with a steady slope. Seal penetrations and ensure no kinks or sags in the pipe.
Tip: Keep the discharge pipe insulated where it passes through unheated spaces to prevent freezing. - 6
Run electrical connections safely
Install a dedicated GFCI-protected outlet nearby; avoid extension cords. Wire the pump according to the manufacturer’s instructions and keep all electrical components dry and accessible. Do not hard-wire into a lighting circuit unless specifically allowed by code.
Tip: Consider a battery backup for power outages to maintain operation during storms. - 7
Test the system
Add water to the pit or simulate actual inflow to test pump operation, float switch activation, and discharge flow. Listen for unusual noises and watch for leaks. Verify that water drains away from the foundation.
Tip: Document test results and address any abnormal behavior before finalizing. - 8
Finalize and maintain
Install the lid securely and clean up the work area. Create a maintenance schedule, and inspect regularly for wear, clogs, or corrosion. Keep spare parts handy and review local codes for any updates.
Tip: Keep a little maintenance log in a visible spot near the sump area.
FAQ
What size sump pump do I need for a typical basement?
Sizing depends on how much water enters the pit and the height water must be pumped. Most homes use a model in the 1/3 to 1/2 HP range, but a professional assessment ensures you match capacity to inflow. Consider backup power options for outages.
Sizing depends on water inflow and required lift. A professional assessment helps ensure you choose the right capacity, and backup power should be considered for outages.
Is it legal to install a sump pump myself?
In many areas DIY installation is allowed, but codes vary and permits may be required. Check with your local building department and follow manufacturer instructions. When in doubt, hire a licensed plumber or electrician to ensure compliance.
DIY installation is often allowed, but local codes vary. Always check permits and follow guidelines; consider a pro if unsure.
Should the discharge go to a storm drain or daylight outlet?
Discharge should lead water away from the home’s foundation and comply with local regulations. Some jurisdictions require daylight outlets or connection to a storm system; verify with authorities before routing.
Discharge should point away from the house and follow local rules. Check with local authorities about drainage requirements.
What maintenance is needed after install?
Inspect the pit and discharge line for clogs, test the float switch, and clean intake screens monthly. Schedule a more thorough annual check and replace worn seals as needed.
Regularly inspect, test, and clean the system. Annual checks help prevent unexpected failures.
Do I need a backup sump pump?
Backups are recommended for homes in flood-prone areas or where power outages are common. A backup can be battery-powered or water-powered to provide continued operation during storms.
A backup pump is often a smart safeguard in flood-prone areas or during outages.
Are submersible and pedestal pumps interchangeable?
Submersible pumps sit in the pit and are quieter; pedestal pumps stay above the pit and are easier to service. Choose based on space, noise tolerance, and maintenance preferences.
Submersible sits in the pit and is quiet; pedestal sits above and is easier to service.
Watch Video
Top Takeaways
- Plan before you drill: sizing and discharge routing matter most.
- Use a GFCI outlet and proper wiring for electrical safety.
- Discharge water away from the foundation with a clean slope.
- Regular testing and maintenance extend pump life and protect your home.