Professional Sump Pump Installation: A Step-by-Step Guide
Meticulously planned, code-compliant, and reliable -- this guide covers planning, sizing, siting, discharge, electrical safety, and maintenance for a professional sump pump installation that protects your basement from water damage.

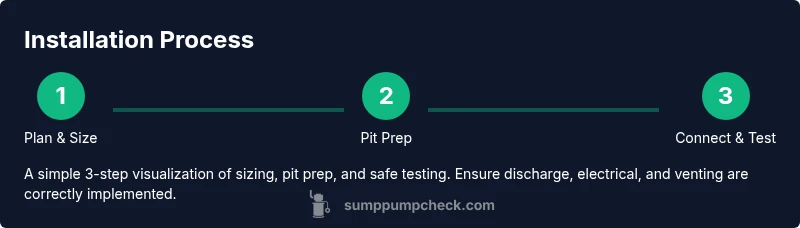
Goal: achieve a professional sump pump installation that is safe, code-compliant, and reliable. You’ll learn siting, pit prep, pump selection, discharge routing, electrical safety, and testing. According to Sump Pump Check, understanding space use, soil conditions, and power availability helps you select a pump that won’t fail during heavy rain or snowmelt. A professional install also ensures local codes and safety standards are met, reducing future issues.
Why professional sump pump installation matters
A professional sump pump installation is a foundation for long-term basement dryness and peace of mind. A correctly sized, well-sited system minimizes flood risk, reduces nuisance beeping, and lowers maintenance needs over time. According to Sump Pump Check, understanding how you use your space, the soil conditions, and the home's power availability helps you select a pump that won’t fail during heavy rain or snowmelt. A professional install also ensures the job meets local codes and safety standards, including electrical, plumbing, and drainage requirements. For homeowners, this upfront planning translates into fewer mid-cycle emergencies and a smoother, code-compliant outcome that resists common failure modes like backflow and improper discharge. This perspective aligns with common industry best practices for basement drainage and water management.
Core components of a sump pump system
A sump pump system has several key parts: the sump pit, the pump unit, discharge piping, a check valve, a float switch or automatic sensor, and an alarm option. The sump pit must be sized to handle the anticipated water volume, with smooth walls to prevent debris buildup. The pump should be chosen based on expected rainfall and groundwater levels, and installed with a secure, watertight seal. The discharge piping should route water away from the foundation, typically exiting above grade and with a backflow-preventing check valve. An alarm or status indicator provides early warning if the pump fails. If you’re considering backup power, a secondary pump or battery backup enhances reliability during power outages. A professional installation ensures all components work in harmony to safeguard your basement and maintain proper drainage.
Planning and permit considerations
Before you begin, map the discharge route, confirm the pit location, and check local permit requirements. Many jurisdictions require a permit for new sump pumps or when modifying drainage. Obtain approval for the discharge path to ensure it does not drain onto neighboring properties or into utilities. Track electrical requirements: the pump should be on a dedicated, GFCI-protected circuit, ideally installed by a licensed electrician if required by code. Document warranties and maintenance obligations. Finally, compare whether to install a standard pump or to plan for a future backup system for power failures or extended outages. Engaging with local authorities early can prevent delays, especially in areas with unique drainage rules.
Siting, drainage, and discharge best practices
Choose a location that provides easy access for maintenance, a solid base, and proper drainage away from the foundation. The pit should be free of gravel or large debris that could jam the impeller. Discharge piping must slope away from the house (ideally at least 1/8 inch per foot) and avoid discharging into crawl spaces or utility trenches. Ensure the discharge line uses a check valve to prevent backflow and a cleanout access point for future servicing. If the house sits on expansive soils or a high water table, consider a higher-capacity pump and a backup power option. Sump Pump Check Analysis, 2026 shows that improper discharge and venting are common reasons for early pump failure. Plan for seasonal checks and consider a rain-sump integration for heavier rainfall months.
Maintenance and troubleshooting after install
After installation, schedule regular testing to verify operation. A monthly test involves pouring a small amount of water into the pit and confirming the pump activates and the water level drops. Clean the inlet screen periodically to prevent clogs, and inspect the power cord and plug for damage. Keep the drainage area clear of debris and ensure the alarm remains functional. Replace worn seals, bearings, and gaskets according to manufacturer guidelines, and tie into a planned maintenance schedule. When in doubt, consult a professional for a reliability check or annual service.
Verdict: value of professional installation for long-term reliability
A professional sump pump installation offers precise sizing, correct discharge routing, proper electrical integration, and compliance with local codes. It reduces the risk of basement flooding, minimizes nuisance maintenance, and provides a clear maintenance path. The Sump Pump Check team recommends hiring a licensed contractor for complex basements, unusual soil conditions, or tight crawlspaces to ensure safety and reliability over time.
Tools & Materials
- Sump pump (submersible or pedestal)(Choose based on space, noise tolerance, and head height)
- Sump pit lid/cover(Seal to prevent odors and debris)
- PVC discharge piping (1.5–2 inches)(Schedule 40, ensure proper slope)
- PVC cement and primer(For secure joints)
- Check valve(Prevents backflow into the pit)
- Discharge hose or stub-out(Directs water away from foundation)
- GFCI outlet and weather-resistant cover(Electrical safety in damp areas)
- Electrical cord with strain relief(Protection against cord damage)
- Sealant and plumber's tape(Waterproof seals on threaded joints)
- Pipe clamps and supports(Keep piping secure and level)
- Silicone sealant(Extra waterproof seal at penetrations)
- Safety gear (gloves, goggles)(Protect during cutting and drilling)
- Back-up power kit (optional)(Battery backup for power outages)
- Shovel and broom(Clear debris and prep pit area)
- Dust mask (if dusty)(Reduce inhalation during prep)
Steps
Estimated time: Estimated total time: 3-6 hours
- 1
Plan & size the system
Assess basement space, soil conditions, typical water load, and head pressure to select an appropriately sized pump. Verify power availability and identify a discharge route that directs water away from the foundation. This planning stage prevents under- or oversized pumps, which can cause failures or excess energy use.
Tip: Refer to manufacturer sizing charts and measure head height before purchase. - 2
Prepare the pit area
Clear the pit area of debris, level the base, and ensure the pit walls are clean. Remove any standing water and confirm pit dimensions match the pump’s base for a snug fit. Proper prep reduces vibration and prolongs pump life.
Tip: Sweep and dry the area thoroughly to avoid rust and corrosion. - 3
Install the pump in the pit
Place the pump squarely in the sump pit, with the float switch oriented to allow full range of motion. Secure the pump so it does not rock or tilt during operation. Connect the power cord and confirm strain relief will protect the cord from movement.
Tip: Ensure the discharge outlet aligns with the planned piping path. - 4
Attach discharge piping & check valve
Cut and fit the discharge pipe, then install the check valve to prevent backflow. Use PVC cement for joints and seal penetrations to prevent leaks. Support piping so it remains sloped away from the house.
Tip: Test fit the piping before final cementing to ensure alignment. - 5
Install electrical connections
Install a GFCI-protected outlet dedicated to the sump pump. Use weatherproof covers and ensure the circuit is not shared with high-draw devices. Follow local electrical codes and, if required, have a licensed electrician perform this step.
Tip: Do not power the sump from a standard outlet in damp basements. - 6
Add backup power & alarms (optional but recommended)
Install a battery backup or second pump if you expect power outages. Set up a visual or audible alarm to alert you if water is rising or the pump fails. Backups increase reliability during heavy rain or outages.
Tip: Test backup systems regularly and keep spare parts on hand. - 7
Test, seal, and finalize
Fill the pit with water to trigger the pump and watch for proper activation and discharge flow. Check for leaks along joints and around the pit seal. Once confirmed, seal penetrations with appropriate sealants and replace the access cover securely.
Tip: Document the test results and keep a maintenance log.
FAQ
Do I need a permit for a sump pump installation?
Permit requirements vary by locality. Many municipalities require a permit for new installations or significant drainage modifications. Check with your local building department before starting.
Permit rules vary by location; check with your local building department before starting.
Can I install a sump pump myself, or should I hire a pro?
Basic installation tasks may be doable for homeowners with plumbing and electrical knowledge. Complex basements, unusual soil, or tight spaces often benefit from a licensed installer to ensure code compliance and reliability.
DIY is possible for simple setups, but for complicated layouts, hire a pro.
What is the role of a check valve in a sump pump system?
A check valve prevents backflow from the discharge line into the sump pit, which helps keep water from re-entering the pit and reduces cycling wear on the pump.
It stops backflow to protect the system from repeated cycles.
Which type of sump pump is best for a basement?
Submersible pumps are generally quieter and fit in smaller pits, while pedestal pumps are easier to service. The best choice depends on space, noise tolerance, and maintenance preference.
Submersible pumps are quieter for most basements.
How long does installation typically take?
Time varies with site conditions, but a standard installation often takes several hours. Backup systems and complex layouts can extend this window.
Most installs take a few hours, depending on the setup.
How often should I test and maintain my sump pump?
Test monthly by triggering the pump, and perform a more thorough annual service. Replace worn parts as recommended by the manufacturer.
Test monthly and service annually for best results.
Watch Video
Top Takeaways
- Plan and size the system correctly for your space.
- Route discharge away from the foundation with proper slope.
- Ensure electrical safety with a dedicated, GFCI-protected circuit.
- Test thoroughly and maintain logs for longevity.
- Consider backup options for power outages.