DIY Sump Pump Install: Step-by-Step Guide for Basements
Learn how to install a sump pump yourself with a practical, safe, step-by-step approach. Cover pump selection, pit prep, wiring safety, discharge routing, and routine testing to protect your basement from flooding. This guide follows best practices from Sump Pump Check and emphasizes DIY readiness, safety, and reliability.

Goal: Install a sump pump yourself to protect your basement from flooding. This guide covers pump selection, pit preparation, sizing, wiring safety, discharge routing, and testing. You’ll need basic tools, a properly sized pit or basin, a check valve, and a GFCI-protected outlet. According to Sump Pump Check, a correct install minimizes clogs and water backups when you follow these step-by-step instructions.
Assessing the Need for a diy sump pump install and Readiness
If your basement is prone to moisture or flooding, a sump pump can be a practical defend against water intrusion. A diy sump pump install is feasible for homeowners who understand basic plumbing and electrical safety. According to Sump Pump Check, starting with a properly sized pump and following local codes reduces backflow risk and repeated backups. This section helps you decide if a DIY approach is right for you and outlines the core prerequisites before you begin.
Sump Pump Types and Sizing: Choosing the Right Tool for Your Basement
There are two common types in residential basements: submersible and pedestal pumps. Submersible units live underwater within the sump basin and tend to be quieter and more compact, while pedestal pumps sit above the basin and can be easier to service. Sizing should balance your basement square footage, expected water inflow, and the pump’s ability to cycle without wearing out. Based on Sump Pump Check analysis, selecting a pump that aligns with your typical water load and pit dimensions reduces nuisance beeping and short cycling. This section introduces the concepts you’ll apply when shopping for a unit.
Pit Prep and Location: Where to Put the Basin and How to Fit It
Choose a location that is near the lowest point of your basement floor and away from walls or utilities that could hinder pit access. The pit should sit on solid, level ground and be sized to accommodate the chosen pump with room for the float mechanism to move freely. You’ll seal the area around the pit to prevent groundwater from leaking into the basement during installation. Proper pit preparation minimizes future maintenance and leaks.
Electrical Safety and Wiring: Do It Right, Do It Safely
A sump pump must be wired to a GFCI-protected outlet to guard against shock in damp spaces. Route the power cord neatly, avoid water contact, and never run the cord through doorways or wet areas. Install a dedicated circuit if possible, and use strain relief where the cord enters the outlet. Always shut off power at the breaker before handling any connections and confirm with a voltage tester before touching wires.
Discharge Planning and Backflow Prevention: Directing Water Without Backups
Plan a discharge path that carries water away from the foundation—typically to a storm drain or exterior drainage point. Install a check valve in the discharge line to prevent septic backflow or rainwater from re-entering the basin. Ensure the discharge line remains free of kinks and debris, and that it slopes slightly away from the house for proper drainage. This setup protects your home from recurring backups and keeps the system reliable.
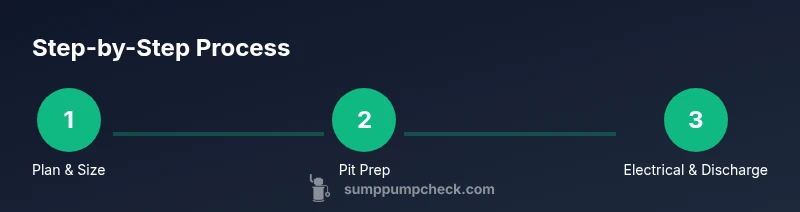
Installation Steps Overview: What You’ll Do, in Order
A typical install follows a repeatable sequence: prepare the pit, place the pump, secure piping, connect electrical, test operation, and finalize with sealing and a maintenance plan. Each step reduces the risk of leaks, electrical faults, or backflow. Use the step-by-step guide to keep the process organized and safe.
Testing, Maintenance, and Troubleshooting: Keep Your System Healthy
After installation, run a full test: fill the pit with water to trigger the float, observe the pump’s activation, and verify that water exits the discharge line without backflow. Schedule regular maintenance: test monthly, clean intakes, and inspect float switches and power connections. If the pump refuses to start, check the power source, fuses, and the float mechanism for obstructions.
Common Mistakes to Avoid: Lessons from Experience
Avoid overcomplicating the discharge route or burying wiring in concrete. Do not skip a proper check valve, and never power a sump pump from an extension cord on a wet surface. Ensure the pit is accessible and sealed to prevent groundwater intrusion. These best practices reduce calls to a plumber and help your DIY project stay reliable.
Tools & Materials
- Sump pump unit (submersible or pedestal)(Choose based on access and serviceability.)
- Sump basin/pit(Precast or poured concrete basin preferred.)
- PVC discharge pipe and fittings(Sized to fit pump outlet and exterior path.)
- Check valve(Prevents backflow into pit.)
- PVC cement and primer(For secure pipe joints.)
- Silicone sealant or caulk(Seal around the pit rim and fittings.)
- GFCI-protected 120V outlet(Outdoors or damp basement recommended.)
- Pipe wrench / adjustable wrench(For fittings and clamps.)
- Screwdriver set(For mounting and adjustments.)
- Tape measure(Verify distances and fit.)
- Silicone/EPDM gasket material(Ensure a watertight seal.)
- Bucket and rags(Cleanup and residue removal.)
- Voltage tester(Confirm power is off before wiring.)
Steps
Estimated time: 2-4 hours depending on layout and accessibility
- 1
Plan sizing and layout
Assess basement water exposure and determine pump size. Identify a suitable pit location and establish the discharge path before starting. Create a simple checklist to ensure you don’t miss critical connections.
Tip: Document measurements and sketch the route for reference. - 2
Prepare the pit and location
Clear the area, level the pit, and prepare the floor opening. Ensure the pit is accessible for maintenance. Check for utility lines to avoid damage during installation.
Tip: Use a level to confirm the pit sits flat. - 3
Install the pump in the basin
Place the pump in the sump basin with the float mechanism unobstructed. Position the outlet toward the discharge piping to minimize bends. Secure the unit so it won’t shift during operation.
Tip: Test float movement by lifting and lowering manually. - 4
Attach discharge piping and check valve
Connect the discharge pipe to the pump outlet and install the check valve upstream of the run to exterior. Dry-fit first, then cement joints securely. Ensure piping slopes away from the foundation.
Tip: Avoid sharp bends; use gentle turns. - 5
Make electrical connections safely
Run a dedicated circuit if possible and install the outlet in a damp-rated location. Connect the pump to a GFCI outlet and verify power off before wiring checks. Use strain relief where the cord enters the outlet.
Tip: Never work on electrical components with wet hands. - 6
Test the system and adjust
Fill the pit with water to trigger the float and confirm the pump activates and drains efficiently. Observe for leaks at joints and verify no backflow occurs. Adjust float height if needed.
Tip: Keep a log of test results for future maintenance. - 7
Seal, protect, and finish
Seal around the pit rim and pipe penetrations to prevent groundwater entry. Secure all cables and pipes and clean up the workspace. Restore any flooring or walls as needed.
Tip: Check for any corrosion or leakage after sealing. - 8
Establish maintenance plan
Create a routine to inspect the pump, clean the intake screen, and test monthly. Note replacement parts and keep emergency contacts handy.
Tip: Schedule annual professional inspection if you’re unsure.
FAQ
Is it legal for homeowners to install a sump pump themselves?
In many areas, homeowners can install a sump pump themselves, but local codes and inspections may apply. Always check your city or county requirements before starting.
Many homeowners can install a sump pump themselves, but check local codes first.
Do I need a backflow check valve on the discharge line?
Yes. A check valve prevents water from flowing back into the basin after the pump stops, reducing repeated cycling and potential backups.
Yes, install a check valve to prevent backflow.
What maintenance tasks are essential after installation?
Regularly test the unit, clean the intake screen, inspect connections, and ensure the discharge path stays clear. Schedule at least a yearly check.
Test, clean, and inspect yearly, and keep the path clear.
Can I add a battery backup?
A battery-backed system adds resilience during power outages, but wiring and maintenance requirements increase. Consider it if outages are common in your area.
Battery backup helps during power outages, but adds complexity.
What signs indicate I should replace my pump?
Frequent cycling, reduced flow, unusual noises, or persistent leaks are signs it’s time to replace the pump.
Frequent cycling or poor performance means replace it.
Can I install a sump pump in a finished basement?
Yes, but execution is more complex. You’ll need access to the pit and careful routing of discharge and electrical work.
It’s possible, but harder with finished spaces.
Watch Video
Top Takeaways
- Select a pump size that matches your basement needs.
- Plan the discharge path to avoid backflow and foundation damage.
- Always use a GFCI outlet and proper electrical precautions.
- Test and maintain the system regularly for reliability.