How to Install a Sump Pump in a Dirt Basement
Learn how to install a sump pump in a dirt basement with a practical, code-aware approach. This step-by-step guide covers pit prep, discharge routing, electrical safety, backup options, and maintenance to protect your basement from flooding.

Installing a sump pump in a dirt basement helps prevent basement flooding by actively removing groundwater. This guide covers pit preparation, discharge routing, and safe electrical connections, plus how to choose the right pump and backup options. Gather basic tools, a sump kit, and a clean workspace before you begin.
Why installing a sump pump in a dirt basement matters
Water intrusion is a common challenge in dirt basements where the soil beneath and around the foundation can push moisture upward. A properly installed sump pump provides an active defense against damp conditions, reducing mold risk and property damage. According to Sump Pump Check, homeowners who invest in a well-planned sump system can see a noticeable decrease in basement moisture and flood-related issues when the system is designed for the site. In a dirt basement, the sump pit sits below floor level, demanding attention to both the pit and surrounding soil to create a reliable drainage path. Beyond preventing water entry, a sump pump stabilizes the basement environment, protecting belongings and improving long-term home value. The goal is to move water away efficiently while reducing hydrostatic pressure that drives leaks. This article presents a practical, code-aware approach that works with typical dirt-basement conditions.
Planning and safety considerations
Successful installation starts with a solid plan that aligns with local codes and safety practices. Before you dig or buy equipment, map your drainage path, choose a pump with a suitable capacity, and decide where the discharge will go (yard, storm drain, or dry well). Ensure you have a dedicated GFCI-protected outlet or a properly wired circuit, and consider a battery-backed backup pump for power outages. The Sump Pump Check team emphasizes planning for accessibility, future maintenance, and room to service the unit without moving furniture or stored belongings. Safety is paramount when dealing with water and electricity indoors, so lock in a conservative layout that keeps electrical components dry and away from living spaces.
Pit location, size, and digging in dirt basements
Choose a pit location that is central to the area most prone to standing water, ideally away from utility lines and foot traffic. The pit should accommodate the sump basin and allow for easy removal for cleaning or replacement. In dirt basements, you may encounter subsoil that requires careful excavation and a stable base. Prepare a clean, dry base for the basin, and consider lining the pit to prevent soil from clogging the sump’s intake. Refer to the pump’s installation manual for basin dimensions and recommended clearance around the unit. The goal is a stable, level installation with good access for service and future maintenance.
Sump pump selection and sizing
Select a pump that matches the expected water load from the basement and any accompanying drains. Look for a pump with a reliable float-switch design, a check valve to prevent backflow, and a durable housing rated for basement use. If you’re unsure, prioritize pumps designed for home basements and moderate flows, and plan for a backup option for power outages or pump failure. The key is to balance upfront cost with long-term reliability and to ensure the unit will fit the chosen pit footprint and piping layout. Always follow the manufacturer’s recommendations for installation and operation.
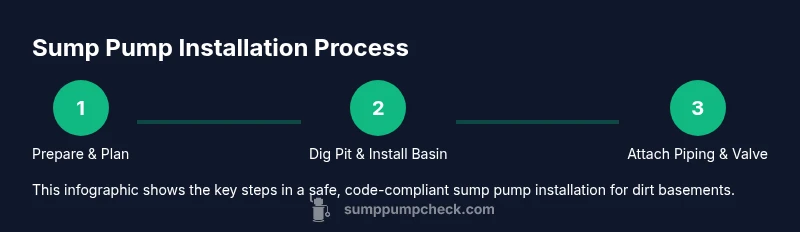
Step-by-step installation overview
This overview provides a cohesive sequence to install a sump pump in a dirt basement. It covers pit preparation, pump placement, discharge routing, and electrical safety. Detailed, actionable steps are provided in the dedicated STEP-BY-STEP block so you can follow a proven process and minimize error. Remember to collect all required tools and materials before starting, and verify that local codes are followed at every stage. The goal is a reliable, serviceable system that protects the space from groundwater intrusion.
Step-by-step overview (detailed steps follow in the STEP-BY-STEP block)
In this section, you’ll see a concise outline of actions that the STEP-BY-STEP block expands upon. Each action is a discrete task designed for clarity and safety, from selecting the right pump to testing the fully installed system. Focus on one task at a time, confirm fit and clearance, and document connections as you go. The process emphasizes robust discharge, clean pit preparation, and secure electrical connections to sustain long-term performance.
Pit testing, discharge routing, and backflow prevention
After installation, test the pump with a controlled water fill to confirm proper operation and verify that discharge piping directs water away from the foundation. Check the valve, seals, and joints for leaks, and ensure the outlet has a clear path to the intended drainage area. A well-planned discharge path reduces the risk of re-entry through cracks and helps protect the surrounding soil and landscaping from erosion. Ongoing maintenance—especially after heavy rainfall—will help mitigate recurring issues and extend the life of the system.
Maintenance, troubleshooting, and common issues
Maintenance is essential to keep a dirt-basement sump pump working reliably. Regularly inspect the check valve, clean the intake screen, and verify float operation. If the pump runs continuously or triggers beeps, inspect for clogged lines or a stuck switch. The most common issues include clogged intake, blocked discharge, and power supply problems. Addressing these quickly minimizes downtime and protects your basement from future flooding risks.
Final checklist before covering the pit
Before you finish, perform a final check: confirm the pump is level, ensure the discharge path is clear, test the unit one last time, and verify the electrical safety setup with a GFCI outlet. Mark the area around the pit for future access and replace any soil or concrete around the pit with care to avoid interfering with the pump’s intake. After confirming all steps, you can responsibly cover or conceal the pit while preserving serviceability.
Tools & Materials
- Sump pump (submersible or pedestal)(Choose a model compatible with your pit size and expected flow.)
- Check valve(Prevents backflow into the pit when the pump stops.)
- PVC piping (1-1.5 in diameter)(For discharge line connections and elbow fittings.)
- PVC cement and primer(Seal joints for a leak-free discharge path.)
- Discharge hose or pipe(Directs water away from the foundation.)
- Sump basin/pit liner(Keeps soil from falling into the pit and helps with cleaning.)
- Gravel or crushed stone(Provides drainage and a stable base in the pit.)
- Shovel and digging tools(Prepare the pit footprint and base.)
- Hydraulic cement or waterproof patch(Seal any gaps around the pit edges.)
- Silicone sealant(Waterproof seal around fittings and pipe penetrations.)
- Gloves, eye protection(Personal protective equipment for safe digging and handling.)
- Tape measure(Accurate measurement for pit, piping, and pump placement.)
- Chisel and hammer(Assist with shaping the pit edge if needed.)
Steps
Estimated time: 3-6 hours
- 1
Choose the right pump and accessories
Select a pump with a suitable capacity for your basement and a float-switch design you trust. Verify that the pump, check valve, and discharge components are compatible with your pit and piping layout. Ensure you have a backup option for power outages or pump failure.
Tip: Read the manufacturer’s installation manual before purchasing to confirm fit and required clearances. - 2
Mark the pit location and footprint
Identify a central location in the basement area prone to water intrusion, ensuring accessibility for maintenance. Use a chalk line and measuring tape to outline the pit footprint, taking care to avoid existing utilities. Confirm that the planned pit allows for a level base and proper pump orientation.
Tip: Double-check clearance to walls and utilities to prevent awkward piping or installation constraints. - 3
Dig the pit and prepare the base
Excavate the pit to fit the sump basin with a stable bottom surface. Place a layer of gravel at the base for drainage and to prevent soil from clogging the basin. Line the pit with a liner or clean smooth sides to ease pump placement.
Tip: Wear proper footwear and gloves to protect against sharp soil and hidden debris. - 4
Install the sump basin and set the pump
Insert the pump into the pit, ensuring it sits level and the intake is unobstructed. Position the basin so the discharge outlet aligns with the planned piping route. Secure the unit to prevent movement during operation.
Tip: Check that the float switch can move freely without rubbing against pit walls. - 5
Attach discharge piping and check valve
Connect the discharge pipe to the pump’s outlet and install a check valve to prevent backflow. Route the pipe toward the exterior or toward a designated drainage area with a gradual slope. Seal joints with PVC cement and primer.
Tip: Keep the discharge line above grade where possible to prevent backflow during heavy rain. - 6
Set up electrical supply and safety features
Plug the pump into a GFCI-protected outlet or have a licensed electrician wire a dedicated circuit. Use a weatherproof, properly grounded connection if the outlet is near the exterior. Consider a battery-backed backup pump for outages.
Tip: Test the electrical system by simulating a power loss to ensure the backup activates correctly. - 7
Test the system and adjust float switch
Fill the pit with water to start the pump and observe the cycle. Ensure the float triggers reliably and water drains away as intended. Make adjustments to float height or piping as needed for smooth operation.
Tip: Run multiple tests at different water levels to confirm consistent performance.
FAQ
Do I need a permit to install a sump pump in a dirt basement?
Permit requirements vary by location. Check local building codes or your city’s permit office to determine if you need approval for the sump pump installation and any trenching or electrical work. In many cases, basic installation may not require a permit, but electrical work often does.
Check local codes to be safe. Permits depend on your city or county rules.
Can I install a sump pump without hiring a professional?
Many homeowners install sump pumps themselves if they’re comfortable with basic plumbing and electrical work. Follow the manufacturer’s instructions, use proper safety precautions, and ensure all electrical connections are GFCI-protected. If you’re not confident, consult a licensed professional.
It’s possible to do it yourself if you’re comfortable with plumbing and electricity, but don’t hesitate to hire help if unsure.
What maintenance does a sump pump require?
Regular maintenance includes inspecting the discharge line for blockages, cleaning the intake screen, testing the float switch, and checking for corrosion or leaks. Perform a full function test at least twice a year and after heavy rain events.
Keep an eye on the intake and discharge, and test the unit periodically.
Should I add a backup sump pump?
A backup system, such as a battery-powered sump pump or water-powered backup, provides protection during power outages or if the primary pump fails. This is highly recommended for basements prone to flooding.
A backup pump is a smart safeguard in case of outages or pump failure.
How do I discharge water safely to avoid basement flooding?
Route discharge water away from the foundation and through approved outlets or dry wells. Keep the discharge above grade when possible and avoid directing water toward walkways or exterior walls.
Make sure the water goes to a safe, approved drainage area.
What signs indicate a pump needs replacement?
If the pump runs continuously, fails to start, makes unusual noises, or shows persistent leaks, replacement is likely needed. Regular maintenance can extend life, but older units may eventually require replacement.
If it won’t start or keeps running, consider replacing it.
Watch Video
Top Takeaways
- Plan for safe electrical and drainage configurations
- Choose a pump sized for basement conditions and add a backup option
- Ensure a dry pit base and clear discharge path for reliable operation
- Follow manufacturer instructions and local codes for a compliant install
- Test the system thoroughly before fully covering the pit