How to Check Sump Pump Discharge Line
Learn how to check your sump pump discharge line for clogs, leaks, and proper flow. This guide covers essential tools, safety, step-by-step checks, maintenance, and what to do if problems appear to prevent basement flooding.

Goal: learn how to check the sump pump discharge line for clogs, leaks, and proper flow. This quick answer highlights the essential checks, safety gear, and the basic actions to verify that your line exits away from the foundation. You’ll inspect the exterior discharge, perform a simple test, and identify blockages that need cleaning or repair.
Why checking the discharge line matters
A properly functioning sump pump discharge line is a critical line of defense against basement flooding. When you ask how to check sump pump discharge line, you’re ensuring that water is expelled away from your foundation, that the line is free of obstructions, and that the pump can operate without backflow or pressure buildup. According to Sump Pump Check, neglecting this part of the system is a common weak point in home drainage. They note that even a short clog or a crushed section can cause backpressure, reduced pump efficiency, and, in a heavy rain, an overwhelmed sump pit. The keyword how to check sump pump discharge line underscores several practical checks—inspecting exterior outlets, verifying the line’s slope, and confirming that there is a functional check valve to prevent reverse flow. A disciplined approach to discharge-line checks integrates with broader sump pump maintenance and basement drainage planning, helping homeowners minimize risk and protect their living spaces.
Safety and basic principles of a discharge line
Before you touch any part of the discharge line, prioritize safety and a basic understanding of how the system works. Shut off the sump pump power at the breaker to avoid accidental starts while you’re inspecting the line. Wear gloves and eye protection, because you may encounter sharp clamps or sediment. Work in a dry area and keep a bucket handy for catching any residual water. Understand that the discharge line is not just a pipe—it’s a controlled path that moves water away from the home. A clean, well-routed line reduces the risk of water damage and mosquito breeding around a damp foundation. As you proceed, stay mindful of outdoor electrical outlets and avoid standing water near outlets. If you’re unsure about electrical safety, consult a licensed professional rather than attempting risky repairs.
Common discharge-line problems homeowners encounter
Discharge lines can fail in several ways: blockages from debris, crushed or kinked piping, inadequate slope that slows drainage, frozen sections in cold weather, or a failed check valve that allows backflow. Clogs often form where the pipe passes through or near the foundation, or where mulch and soil accumulate near the exterior outlet. A damaged outdoor cleanout or a loose clamp can also create leaks or pressure loss. When you know what to look for, you can spot issues quickly: unusual odors near the discharge area, slow water movement during a pump test, or water pooling around the external outlet after a rainfall. These signs merit a closer look and, if needed, a more thorough cleaning or replacement.
Tools and safe setup before you start
Gather basic tools and gear to support a smooth inspection. A bright flashlight helps you see inside the pipe or joint; gloves protect your hands from sharp edges and dirty water; a small bucket can collect drips; pliers and a screwdriver help loosen clamps and detach protective covers. If you plan a controlled discharge test, have a garden hose ready to flush the line or a short section of clean pipe to redirect flow away from sensitive areas. Position yourself so you can reach exterior outlets safely, and consider having a helper to steady equipment or block access to wet areas. Taking a quick photo record of each connection can simplify reassembly.
How the discharge line is supposed to work
Most residential sump pumps push water from the sump pit through a discharge line that runs to an exterior outlet or grading point. The line should slope slightly downward away from the building, with a check valve near the pump to prevent backflow when the pump stops. Connections should be tight, with clamps in good condition and no obvious cracks. In winter, the pipe can freeze if it’s not insulated or properly routed; that can stall drainage and force water back into the pit. A well-designed discharge path helps ensure that peak flow during heavy rain does not compromise basement integrity, and it also reduces hydrostatic pressure around the foundation.
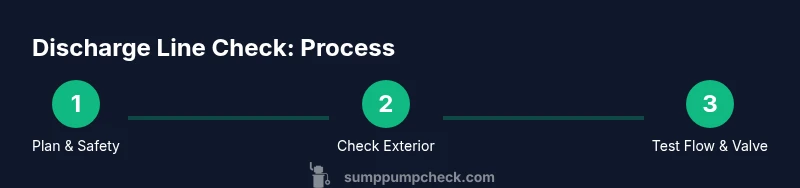
Step-by-step overview of the checks
Note: This section provides a high-level sequence you’ll use in the detailed steps that follow. Start by confirming power is off, then locate the exterior discharge point and any cleanouts. Inspect for visible damage, kinks, and obstructions. Test flow by triggering the pump or by pouring a controlled amount of water into the pit while observing the discharge. Finally, check that the line remains free-flowing after the test and that any clamps or fittings remain secure. Record your findings to guide future maintenance.
Inspect exterior discharge and cleanouts
Go outside to the discharge point and inspect the exterior stub-out. Look for obstructions at the outlet, and ensure the hose or pipe terminates away from sidewalks, foundations, and planting beds. Clear debris such as gravel, leaves, or mud that might impede water release. If there is a cleanout, open it carefully to remove buildup, then reseal securely to prevent leaks. Verify that there is no pooling around the exterior area after a test, and confirm the slope continues to direct water away from the structure. If you find a damaged cap or cracked pipe, plan for replacement and consider upgrading to a sturdier check valve system.
Test flow and verify drainage
Perform a controlled discharge test to evaluate flow performance. With power off, you can simulate a moderate pump cycle by carefully introducing water into the sump pit or by briefly powering the pump under supervision. Observe the discharge stream; it should be strong, continuous, and directed away from the foundation. Listen for unusual noises that could indicate a loose connection or a failing check valve. After the test, power the pump again and observe for a full cycle. If flow is weak, backpressure, or there is backflow, reassess fittings and potential blockages and consider flushing the line.
Troubleshooting common scenarios and when to replace components
If you encounter a blockage, start by removing debris from the exterior outlet and inside the pipe. If you notice kinks, replace the damaged section and restore proper slope. A failed check valve may require replacement to prevent backflow; inspect and, if necessary, install a new valve following manufacturer instructions. Leaks around clamps and joints typically indicate loose fittings; reseal with the appropriate clamps and plumbing tape. If persistent problems remain after your checks, plan a professional assessment, especially if you suspect cracks in the pipe or structural foundation concerns that require specialist equipment.
Maintenance plan and documentation
Create a simple maintenance plan that aligns with your climate and home age. Schedule discharge-line checks at least once a year, ideally before the rainy season, and after any major pump service. Keep a log of findings, actions taken, replacements made, and the date of the next check. The Sump Pump Check team recommends treating the discharge line as a living part of your drainage system—regular checks help prevent basement flooding and protect your home’s value.
Tools & Materials
- Flashlight(Bright, waterproof preferred for low-light areas and outdoor checks)
- Gloves(Protect hands from sharp edges and dirty water)
- Bucket(Catch drips during exterior work or disassembly)
- Pliers(Loosen clamps and grip small parts)
- Screwdriver set(Phillips and flat-head for clamps and caps)
- Wrench or adjustable pliers(Tighten or loosen fittings securely)
- Garden hose(Flush or redirect water during testing)
- Tape or pipe sealant(Seal small joints if you reseal fittings)
Steps
Estimated time: 45-60 minutes
- 1
Power down and prepare safety
Turn off the sump pump at the breaker and confirm with a non-contact tester if available. Wear gloves and eye protection, and dry the area as much as possible before handling the line. Have a helper if you’ll be working near water or at elevation.
Tip: Always verify power is off before touching any electrical components. - 2
Access the discharge line
Locate the exterior discharge point and any cleanouts. Remove any protective covers to gain full access, ensuring you won’t trip or slip on wet surfaces. Keep a bucket ready to capture any residual water.
Tip: A second person can hold tools and stabilize equipment during the exterior check. - 3
Inspect for visible blockages or damage
Look for kinks, cracks, crushed sections, or clogging at joints and the exterior outlet. Check that clamps are tight and that the line is sloped away from the foundation. Remove obstructions with gloved hands or pliers.
Tip: Document any damage with photos for reference when ordering parts. - 4
Test flow with a controlled discharge
Pour a small amount of water into the sump pit or trigger a short pump cycle under supervision. Observe the discharge stream; it should be strong and directed away from the foundation. If the flow is weak or erratic, check for additional blockages or leaks.
Tip: Avoid standing directly in the path of the discharge stream. - 5
Check valve and fittings
Verify the check valve opens when the pump runs and prevents backflow when it stops. Tighten clamps and reseal joints as needed. If the valve sticks or leaks, plan for replacement.
Tip: Replace worn components with compatible parts to maintain warranty coverage. - 6
Document results and plan next steps
Record findings, actions taken, and any parts replaced. Schedule the next check seasonally or after major pump service. If issues persist, consider professional assessment.
Tip: Keep a running maintenance log to simplify future checks and repairs.
FAQ
How often should I check the discharge line?
Ideally, inspect the discharge line at least once a year and after major pump work or severe weather. If you notice signs of backflow or leakage, check sooner. Regular checks help prevent costly basement water issues.
Check the discharge line at least annually and after big storms or pump work. If you see backflow or leaks, inspect sooner.
What signs indicate a blocked discharge line?
Look for slow drainage, damp soil near the exterior outlet, pooling water around the discharge area, or a noisy pump struggling to push water. These signs often point to blockages or a failing check valve.
Look for slow drainage, damp soil near the outlet, or pooling water. These suggest blockages or valve problems.
Can I check the line safely without turning off power?
No. For safety, always disable power to the sump pump before inspecting electrical connections or clamps. If you’re unsure, stop and consult a professional.
Power must be off before inspecting electrical parts. If unsure, get help.
What should I do if I find a clog?
Remove surface debris from the exterior outlet and clear interior sections carefully. If debris persists, you may need to disassemble a short pipe section or call a pro for deeper cleaning.
Clear the clog from the outlet first. If it won’t clear, call a pro.
Is upgrading the check valve advisable?
If the current check valve shows wear or backflow, upgrading to a higher-quality valve can improve reliability. Follow manufacturer instructions and ensure compatibility with your pump.
Consider a better valve if the current one leaks or sticks. Check compatibility first.
When should I call a professional?
If you detect persistent leaks, damaged piping, or foundation concerns, or if you’re uncomfortable with electrical safety, contact a licensed plumber or sump-pump technician.
Call a licensed pro if you have persistent leaks or damaged pipes or you’re unsure about safety.
Watch Video
Top Takeaways
- Verify discharge line is clear and properly routed
- Inspect for kinks, leaks, and backflow indicators
- Test flow when the pump runs and confirm water exits away from the foundation
- Replace damaged fittings or clogged sections promptly
- The Sump Pump Check team recommends annual discharge-line checks