Sump Pump Valve Check: A Step-by-Step Home Guide for You
Learn how to perform a safe, thorough sump pump valve check. Locate, inspect, and maintain your valve to prevent backflow and basement flooding. By Sump Pump Check.

This guide will teach you how to safely check your sump pump valve, locate the discharge valve, test for backflow, and reseal or replace worn parts. You’ll use basic hand tools and protective gear to prevent basement flooding. Follow these steps for a reliable, maintenance-friendly valve check.
Understanding the role of the sump pump valve
The sump pump valve controls water flow out of your sump pit and helps prevent backflow into the pit. According to Sump Pump Check, regular valve checks are a key component of effective basement drainage and pump longevity. A well-maintained valve reduces back-pressure on the pump, minimizes backflow, and lowers the risk of basement flooding. In most homes, the valve also acts as a barrier to backflow when the main discharge is blocked or overwhelmed by heavy rain. When you perform a valve check, you verify that the valve seals properly, the linkage moves freely, and the discharge path remains clear. This reduces wear on the pump and gives you a clearer picture of your drainage health.
Valve types and why the check matters
There are several valve configurations used on sump pumps, most notably the check valve and the foot valve. The check valve prevents backflow along the discharge line, while the foot valve sits at the pump intake and stops water from returning to the pit. The type you have will influence how you test and service it. A faulty or missing valve can allow water to flow back into the pit, causing the pump to cycle more often and wear out faster. Regular checks help ensure the valve’s orientation and seating are correct, preserving efficiency and reducing flood risk.
Safety and preparation before you start
Before you touch anything, prioritize safety. Turn off power to the sump pump at the circuit breaker and unplug the unit if possible. Wear protective gloves and safety goggles, and place a bucket and towels nearby to catch any residual water. If your system is outside or in a damp area, use non-slip footwear and work with a partner to manage hoses and clamps. Confirm that the area around the sump pit is dry and free of water to avoid slips and accidental contact with live electrical components.
Common issues and how to diagnose them
Common valve problems include leaks at joints, a stiff or stuck valve, noises indicating a loose linkage, and backflow after a pump cycle. If you notice water in the pit after the pump runs, or if the discharge line shows signs of leakage, inspect the valve for wear, corrosion, or loose fittings. Corrosion and mineral buildup can also impede valve operation. In many cases, cleaning fittings and reseating the valve solves the issue, but stubborn leaks may require replacement.
Interpreting test results and next steps
During testing, you should see water move through the discharge line without backflow. A slow or absent flow, or any backflow when the pump cycles, indicates a seating problem or a damaged valve. If you detect backflow or leaks, reseal threaded fittings with PTFE tape and/or replace the valve if necessary. After any service, run the pump for several minutes to verify smooth operation. Record the date of the check so you can schedule the next inspection.
Establishing a valve maintenance routine
Create a simple maintenance calendar: check the valve every 3–6 months and after major rainfall events or power outages. Keep notes of any signs of wear, corrosion, or leaks, and replace parts promptly to extend pump life. Regular inspections also help you detect blockages or mineral buildup early, which can save you from costly repairs later.
Authority sources
- HUD basement drainage guidelines: https://www.hud.gov/
- University extension resources on pump maintenance: https://extension.arizona.edu/
- EPA water safety tips: https://www.epa.gov/
Tools & Materials
- Non-contact voltage tester(Confirm power is off before touching electrical components.)
- Screwdriver set (flathead and Phillips)(For disconnecting screws and fittings on the valve housing.)
- Adjustable wrench(Loosen/tighten fittings without rounding edges.)
- PTFE tape (thread seal tape)(Seal threaded pipe connections after reseating valve.)
- Bucket and towels(Catch drips and keep the work area clean.)
- Safety goggles and work gloves(Protect eyes and hands from splashes.)
- Replacement valve kit (optional)(Keep on hand if the valve shows wear or damage.)
Steps
Estimated time: 30-60 minutes
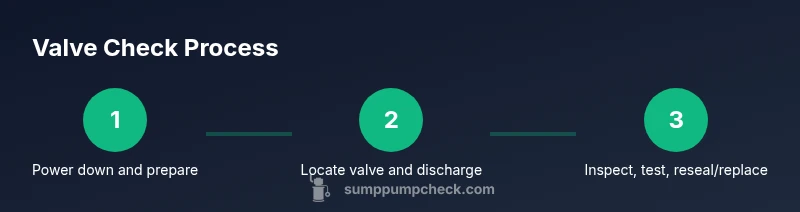
- 1
Power down and prepare
Shut off the sump pump at the circuit breaker and unplug the unit if possible. Remove nearby obstacles and lay towels to catch water. This prevents electrical shocks and keeps your work area safe.
Tip: Use a non-contact voltage tester to verify there is no current before touching any wires. - 2
Locate the valve and discharge path
Find the discharge line and the valve assembly. It is usually on the outside of the sump pit or along the horizontal discharge pipe above the unit. Note orientation and any labels.
Tip: Consult the manual if the valve isn’t immediately visible; some models place the valve near the pump housing. - 3
Inspect for obvious damage
Visually inspect joints for cracks, corrosion, or leaks. Wiggle fittings gently to test for looseness. If you see rust or mineral buildup, plan for cleaning or replacement.
Tip: Take a photo before disassembly to compare fitment later. - 4
Test seating and movement
Operate the valve to confirm seating. For a check valve, rotate or toggle the disc until it seats firmly. For a foot valve, ensure the float or ball moves freely with no sticking.
Tip: Do not force a stiff valve; if resistance persists, plan for replacement. - 5
Perform a backflow test
Carefully pour water into the sump pit and watch the discharge. There should be forward flow with no water running back into the pit. If backflow occurs, reseal fittings or replace the valve.
Tip: Pour water slowly and observe the first few seconds closely. - 6
Tighten and reseal joints
Apply PTFE tape to threaded connections and snug fittings with a wrench. Do not overtighten as this can crack pipes or damage threads.
Tip: Always recheck for leaks after tightening. - 7
Replace worn components
If seals, gaskets, or the valve body show wear, replace them with a kit designed for your model. Compatibility matters for proper sealing and performance.
Tip: Keep the original part numbers handy to match replacements. - 8
Reconnect power and verify
Plug the unit back in and restore power. Run the pump for 5–10 minutes to confirm continuous operation, no leaks, and consistent flow. Observe for unusual noises.
Tip: If anything sounds off, stop and reassess before leaving it to run unattended. - 9
Document and schedule the next check
Record the date, steps taken, and any parts replaced. Set a reminder for the next valve check in 3–6 months or after significant weather events.
Tip: A maintenance log helps you catch trends and plan proactive care.
FAQ
How often should I perform a sump pump valve check?
Most homeowners benefit from a valve check every 3-6 months and after major storms or power outages. Keeping a routine helps detect leaks and seating problems early.
Check your valve every few months, especially after storms or outages.
What is the difference between a check valve and a foot valve?
A check valve prevents backflow along the discharge line; a foot valve sits at the pump intake to stop water from returning to the pit. They serve complementary roles.
Check valve stops backflow on discharge; foot valve prevents return flow at the intake.
Can I replace the valve myself?
Yes, you can replace a valve if you shut off power and follow the manual. If you notice heavy corrosion or persistent issues, consider a pro.
You can replace it yourself if you have the right parts and follow safety steps.
What are signs of valve failure?
Backflow into the pit after pumping, persistent leaks at joints, or unusual noises indicate valve wear or seating problems.
Backflow or leaks are common signs of a failing valve.
Should I replace the entire pump if the valve leaks?
Often you can replace just the valve or seals; full pump replacement is only needed if the motor or impeller fails.
Usually you can fix the valve without replacing the whole pump.
Watch Video
Top Takeaways
- Test valve function during dry weather to avoid surprises during storms.
- Know your valve type and location before starting work.
- Power down first to prevent shocks and injuries.
- Document maintenance dates to build a proactive schedule.
- Replace worn parts rather than forcing a faulty valve to last.