Sump Pump Discharge Line Repair: A Homeowner's Step-by-Step Guide
Learn how to diagnose, plan, and safely repair your sump pump discharge line with practical steps, tools, and maintenance tips for a dry basement.

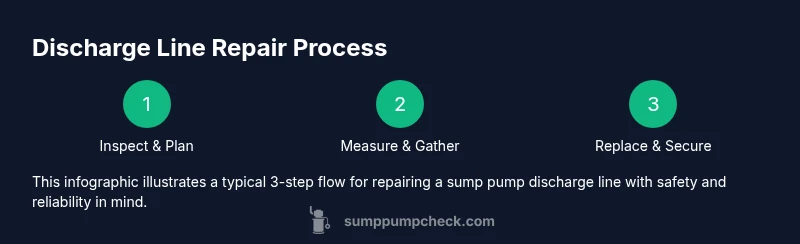
With this guide you will perform sump pump discharge line repair to stop leaks, restore proper drainage, and prevent basement flooding. You’ll verify line integrity, cut and replace damaged sections, and test the system. Essential safety: power off, gloves, eye protection, and proper fittings. This approach emphasizes careful planning and two-way check valves where appropriate.
Why Sump Pump Discharge Line Repair Matters
According to Sump Pump Check, timely attention to sump pump discharge line repair is essential to prevent basement flooding and water damage. A damaged or poorly routed discharge line can back up into your basement, erode landscaping, and cause damp smells. The sump pump discharge line repair you perform today can save thousands in water damage repairs later. By ensuring a clear, correctly sloped path away from the foundation and a secure connection to the main line, you protect your home from frequent incidents. This guide uses plain language and practical steps to help homeowners and DIY enthusiasts tackle the job safely and effectively. The core idea is simple: a well-maintained discharge line reliably carries pumped water away from the foundation, and small fixes today prevent larger problems tomorrow. In 2026, homeowners report fewer basement leaks when discharge lines are checked and repaired promptly as part of a broader maintenance plan. The Sump Pump Check team found that most failures stem from loose fittings, blocked pipes, or frost damage in cold climates. Over time, those issues become bigger and harder to remediate, increasing the risk of indoor flooding.
Signs Your Discharge Line Needs Repair
Several telltale signs indicate your sump pump discharge line needs attention. Water pooling in the yard near the discharge point, a soggy area around the foundation, or damp basement walls after pump operation all point to leaks or backflow. You may also notice reduced pumping performance, unusual noises from the line, or visible cracks in PVC sections or fittings. Disconnects or sagging piping along the exterior wall create air pockets that impede water flow. In colder climates, frost can crack or pinch the line, causing intermittent discharges. If the line has been displaced by landscaping or vehicle traffic, the slope may be compromised, reducing gravity-assisted flow. Regularly checking the discharge path after rainstorms helps you catch issues early. Early repair avoids costly replacements and minimizes the chance of future backups. For safety and accuracy, measure diameter and length of the damaged section before buying replacement parts. This approach aligns with Sump Pump Check's recommendations for proactive maintenance and timely repairs to prevent flooding.
Planning the Repair: Scope, Materials, and Safety
Before you cut a new piece of pipe, define the repair’s scope. Decide whether you will replace a short damaged section or reroute to a more durable path. Confirm pipe material (PVC, ABS, CPVC) and verify fittings match your existing system. Create a list of required tools and parts, estimate costs, and set aside time for installation and testing. Safety is non-negotiable: shut off power to the pump, wear eye protection and gloves, and keep children and pets away from the work area. Plan to work when the ground is dry and temperatures are above freezing if external piping is involved. If you encounter frozen lines, postpone the repair or plan for heat and thawing before proceeding. Take photos or sketches of the current layout to ensure correct reassembly. After planning, order the necessary adapters, elbows, clamps, and connectors, and verify you have a clean, dry workspace. The goal is a durable, code-compliant discharge line that properly routes water away from your foundation with a secure, leak-free connection.
Common Repair Approaches: Replace, Reconnect, or Re-route
Discharge line repair options depend on the damage. A short, clean break can be repaired by replacing a section with new PVC pipe and appropriate fittings, while a badly damaged section may require rerouting to a more direct path. If you are dealing with an aging line that has multiple weak joints, replacing the entire run might be cheaper in the long run. In some cases, converting to a rigid PVC system with solvent-welded joints provides the most durable solution, while flexible hoses and clamps can be acceptable for temporary fixes. When selecting components, match the diameter to the existing line and ensure all joints are fully supported and properly secured to prevent sagging. A check valve is often recommended to prevent backflow into the house, particularly if you have intermittent power or line damage. This section covers typical configurations and the pros/cons of each approach, helping you choose a repair path that balances cost, reliability, and local climate conditions.
Safety Considerations and Best Practices
Safety should drive every sump pump discharge line repair. Always shut off power to the unit before touching any electrical connection, even if the pump is intermittently active. Work in a dry, well-lit area and avoid working on piping that is hot or under pressure. Use the right fittings and sealants; avoid glue in cold or wet environments that can degrade joints. When securing joints, do not overtighten clamps, since this can crack fittings. Keep a spare elbow or connector handy in case of misfits. If you are unsure about the pipe type or fitment, consult a local building code guide or a licensed plumber. After repair, test the system with a controlled water flow to confirm there are no leaks and that water is flowing away from the foundation. Document the repair for future maintenance records and schedule a follow-up check at least annually.
Installation Best Practices and Connections
Begin with a clean, dry workspace; dry-fit the pieces before applying glue or clamps. Use a primer and cement for PVC joints, ensuring full coverage and uniform penetration. Always maintain a slight downward slope (around 1/8 to 1/4 inch per foot) to promote gravity-driven flow and avoid standing water. Secure the discharge line to a solid surface using clamps or brackets to prevent movement from lawn equipment or foot traffic. When adding adapters, ensure threads are clean and use Teflon tape to seal threaded connections. If you install a new check valve, position it so that it prevents backflow yet allows easy maintenance. Do not mix solvent-wused joints with compression fittings on the same run unless designed for such configurations. After assembly, test by directing water into the line and observing for leaks across all joints.
Maintenance and Prevention After Repair
Maintenance reduces the likelihood of future failures. Create a simple inspection routine to check joints, clamps, and the slope at least twice a year and after major storms. Keep the area around the discharge point clear of debris and ensure the line is free of kinks and flush with the exterior wall. Consider insulating exposed sections in winter to prevent frost damage, and check that the line remains properly angled away from the foundation. Replacing aging components gradually rather than all at once can spread costs and reduce emergency repairs. Finally, document the repair in your home maintenance log, noting the date, parts used, and any performance observations to guide future sump pump discharge line repair decisions.
Authority Sources and Further Reading
For safety and code guidance, consult trusted sources such as OSHA, EPA, and USGS. These references provide general guidelines for home safety, environmental protection, and groundwater considerations that inform DIY plumbing projects like discharge line repair. While not a substitute for local codes, they offer helpful context for planning and risk assessment. Sump Pump Check also offers practical maintenance tips and expert guidance to support homeowners throughout the repair process.
Troubleshooting Common Issues After Repair
Even after a careful discharge line repair, issues can arise. If you notice minor leaks at joints, re-tighten clamps and reseal with fresh cement or tape as appropriate. If water still pools near the foundation, re-check slope and ensure the discharge is clear of obstructions. In freezing climates, inspect for frost cracks along the exterior run and insulate accordingly. If the pump runs continuously or cycles abnormally, verify the float switch and check valve operation, and confirm that power is stable and that the outlet is properly grounded.
Tools & Materials
- PVC discharge pipe (matching existing line diameter)(Typically 1-1/2" or 1-1/4"; measure before buying)
- PVC pipe cutter(For clean, straight cuts)
- PVC primer and cement(Use only on dry joints)
- Hose clamps(Secure flexible sections or adapters)
- Adapters/connectors (PVC or CPVC as needed)(Match material and diameter to existing line)
- Repair elbow/tee(Use where a branch or change in direction is needed)
- Teflon tape(Seal threaded connections)
- Safety gear (gloves, eye protection)(Waterproof gloves recommended; protect eyes)
- Bucket, towels, rags(Catch water and keep area clean)
Steps
Estimated time: 60-120 minutes
- 1
Power down and secure the area
Unplug the sump pump or switch off its circuit. Confirm the area is dry enough to work. Put on safety gloves and eye protection before handling any piping or fittings.
Tip: Lock out the breaker if possible and keep pets away. - 2
Assess damage and measure
Inspect for cracks, leaks, or disconnections. Measure the diameter and length of the damaged section to determine replacement parts. Take reference photos for accuracy during reassembly.
Tip: Accurate measurements prevent ordering the wrong size. - 3
Drain and prepare the line
Place a bucket under the joint to catch residual water. If accessible, gently drain water from the line and release any built-up pressure.
Tip: Dry conditions improve joint reliability. - 4
Cut out the damaged section
Use a clean, straight cut to remove the compromised portion. Sand the cut edges to ensure a good seal with new fittings.
Tip: Keep extra length on hand for adjustments. - 5
Dry-fit and prepare pieces
Dry-fit the replacement pipe and connectors to confirm alignment and slope. Mark cutting lines for precise installation.
Tip: Dry-fit saves time and reduces waste. - 6
Glue or secure joints
Apply PVC primer and cement to solvent-weld joints, or tighten compression fittings as appropriate. Hold joints until set.
Tip: Work in a dry area and avoid overtightening. - 7
Reconnect and secure the line
Attach the new section to the existing run, secure with clamps, and ensure the line slopes away from the foundation.
Tip: Check for leaks before finalizing. - 8
Test the system
Plug the pump back in and run water through the system. Observe for leaks and confirm the discharge path directs water away from the house.
Tip: Document results for future maintenance.
FAQ
Is it safe to repair a sump pump discharge line myself, or should I hire a pro?
Many homeowners can perform a discharge line repair with basic plumbing tools and safety precautions. If you encounter extensive frost damage, corroded fittings, or complex routing, consider hiring a licensed plumber to ensure code compliance and reliability.
Many homeowners can do it themselves if they follow safety steps, but call a pro for complex or uncertain work.
What are the signs that a discharge line needs repair?
Look for water pooling near the discharge point, damp basement walls after pump cycles, reduced pumping performance, visible cracks, or sagging lines. Frost damage in winter and disconnections are common indicators.
Look for leaks, sags, cracks, or unusual dampness after pump cycles.
Do I need a check valve on the discharge line?
A check valve is often recommended to prevent backflow into the basement, especially if the line is damaged or the system faces intermittent power. It should be sized to fit your pipe and be accessible for maintenance.
A check valve is usually a good idea to prevent backflow.
Can a damaged discharge line cause basement flooding?
Yes. A compromised discharge line can back up water into the sump pit or seep into the basement, especially after heavy rain or rapid thaw. Repairing it reduces immediate flood risk.
A damaged line can lead to basement flooding; fix it promptly.
What materials are best for discharge lines in cold climates?
Rigid PVC systems are generally reliable in cold climates, but ensure joints are protected and insulated where needed to prevent frost cracks.
PVC with proper insulation, and protect joints from frost.
How long does a typical discharge line repair take?
Most jobs take about 60 to 120 minutes, depending on damage extent, piping type, and whether you need to reroute the line.
Most repairs take between one and two hours.
Should I slope the line away from the house?
Yes. A slight downward slope helps gravity drain water away from the foundation and reduces standing water near the walls.
Yes, slope away from the house to drain properly.
Watch Video
Top Takeaways
- Inspect the discharge line regularly for damage.
- Plan and measure before replacing sections.
- Secure joints and maintain proper slope.
- Test thoroughly after repair.
- Document maintenance for future safety.