How to Check Sump Pump for Failure: A DIY Guide
Learn how to check your sump pump for failure with a practical, step-by-step guide. Safety first, then test power, float, discharge, and motor operation to prevent basement flooding.

You can verify a sump pump's readiness by checking power, testing the float, inspecting the discharge line, and listening for motor noise. Gather a flashlight, bucket, and a clean, dry area. Perform the test during dry weather to spot clogs, jams, or weak switches before a flood risk. This quick check helps catch problems early. No special tools beyond common household items are needed.
Why checking sump pumps for failure matters
Regularly verifying that your sump pump is ready to work is a simple, cost-free defense against basement flooding. According to Sump Pump Check, a quick at-home assessment can catch small issues before they become big problems. The goal of this guide is to give homeowners a practical, safe routine to determine whether the unit will perform when it matters most—during heavy rain, power outages, or melting snow. Even a modest malfunction in a float switch, impeller, or discharge line can derail drainage and allow water to back up into living space. By learning how to check for failure, you gain confidence, protect your foundation, and reduce the risk of costly repairs. This mindset, reinforced by the Sump Pump Check team, turns a once-a-year task into a simple, repeatable habit you can fit into a weekend maintenance routine.
Safety and planning before you start
Before touching any equipment, establish safety first. Ensure the area around the sump basin is dry and clean, and wear gloves and eye protection to guard against splashes. Verify that the electrical outlet supplying the pump is a grounded GFCI-protected circuit, and switch off or unplug the unit to avoid electric shock while inspecting components. If you’re uncertain about wiring, contact a licensed electrician rather than attempting hazardous work yourself. Planning also means choosing a dry day for testing so you can observe drainage without rushing. Keep a flashlight handy, a bucket to catch drips, and a notepad to record findings. By laying this groundwork, you create a safe, controlled environment that reduces risk while you perform checks and tests.
Essential tools and materials
A quick check uses everyday items, plus a couple of safety tools. You’ll want a flashlight to illuminate the basin, a non-contact voltage tester to confirm no live current, and a bucket to catch any water during testing. A pair of rubber gloves helps you handle wet parts, and a basic screwdriver set may be needed to access the pump housing. If you need to flush the discharge line, have a garden hose ready. Optional but helpful items include a spare pump cover gasket, replacement floats, and a small fan to dry the pit after testing. All of these tools keep the process efficient and minimize the chance of accidental spills.
Understanding common failure modes
Most sump pump failures fall into a few broad categories: power supply issues, float-switch problems, impeller jams, and discharge-path blockages. A damaged cord or a tripped GFCI can cut power to the unit. A float that sticks or travels too slowly may prevent the pump from turning on at the right time. Impellers can become clogged with sediment, reducing flow or causing overheating. A blocked discharge line or a faulty check valve can back up water even when the pump runs. Recognizing these failure modes helps you target the right component during diagnosis and decide whether a repair or replacement is warranted.
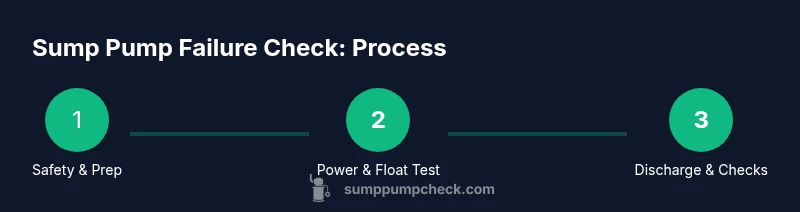
Step-by-step inspection framework
Think of this as a diagnostic framework rather than a single test. Start with safety checks, then verify power and connections, inspect the moving parts, examine the discharge pathway, and finally perform a controlled water test. This section outlines the approach you’ll implement in the STEP-BY-STEP block, which provides detailed actions you can perform in sequence.
Testing the power, float, and switch operation
To verify readiness, first ensure the unit is powered off. Then test the float switch by manually lifting the float to its high position and listening for the pump to activate. Next, reconnect power and add water to the basin until the float trips; observe that the pump starts promptly and that water is discharged away from the foundation. If the pump hesitates, stalls, or runs continuously, note the abnormal behavior and proceed to deeper checks.
Checking the discharge line and check valve
Inspect the discharge line for kinks, clogs, or sediment buildup. Make sure the line leads away from the house and out through the exterior wall. A faulty or missing check valve can allow water to flow back, defeating the pump’s effort. Flush the line with a small amount of water to verify smooth drainage and monitor for any leaks at joints. If you find a partial blockage, clear it with a flexible wand or brush; never use sharp objects that could damage the pipe.
Interpreting results and next steps
If the pump starts reliably, cycles normally, and drains water without backflow, your sump pump is in good shape for the moment. If you detected any lag, noise, or repeated cycling during the test, schedule maintenance or consider replacing components such as the float switch or impeller. For persistent issues or uncertain results, contact Sump Pump Check or a local professional to avoid risking basement damage.
Authority sources and additional resources
To supplement this guide, consult safety and maintenance resources from reputable sources: U.S. Consumer Product Safety Commission (CPSC) https://www.cpsc.gov, Occupational Safety and Health Administration (OSHA) https://www.osha.gov, and University extension programs such as https://extension.illinois.edu. These sources provide general electrical safety and home maintenance guidelines that apply to sump pump work.
Tools & Materials
- Power outlet tester(Check that the outlet is properly grounded and GFCI-protected)
- Flashlight(Bright beam to illuminate the basin and components)
- Bucket or container(Catch water during testing without spills)
- Gloves (rubber)(Protect hands from wet parts)
- Screwdriver set(Access pump housing if needed)
- Garden hose(Flush discharge line if you suspect blockage)
Steps
Estimated time: 45-60 minutes
- 1
Power down and verify safety
Locate the sump pump’s power cord and switch off at the outlet, then unplug the unit to prevent electrical shocks during inspection. If your setup is hardwired, switch off the corresponding circuit breaker before touching any components.
Tip: Always double-check with a non-contact voltage tester before handling wires. - 2
Inspect the power cord and outlet
Look for fraying, cracking, or melted insulation on the cord. Check the outlet for scorch marks or moisture; do not proceed if damage is present.
Tip: Damaged cords or outlets require replacement by a qualified electrician. - 3
Access the pump and float mechanism
Carefully remove the basin cover or screen to reach the impeller and float. Support the unit during handling and avoid tugging on hoses.
Tip: Take a photo before disassembly to aid reassembly. - 4
Test the float switch manually
With power still off, gently lift the float to simulate rising water and feel for resistance. Confirm the switch engages the internal contacts but do not run the motor yet.
Tip: Document how far the float travels before activation. - 5
Check the impeller and housing
Inspect for debris or sediment in the impeller chamber. Remove obstructions with a non-metallic tool and spin the impeller to ensure it moves freely.
Tip: Avoid metal tools that could scratch the plastic housing. - 6
Inspect the discharge path and check valve
Examine the discharge pipe for kinks or buildup. Verify the check valve moves freely and seals when closed to prevent backflow.
Tip: If blockage is suspected, flush gently with water rather than forcing objects through. - 7
Reconnect power and perform a controlled test
Plug the unit back in and slowly add water to trigger the float. Watch for a clean startup and steady drainage away from the foundation.
Tip: Stand clear and keep children and pets away during the test. - 8
Document findings and plan next steps
Record whether the test was normal or if issues appeared. Decide whether to repair or replace components and consult a pro if uncertain.
Tip: Keep a maintenance log for future reference.
FAQ
What are common signs my sump pump is failing?
Common signs include unusual noises, frequent cycling, failure to start, or water around the sump area. If you notice these issues, perform a controlled inspection or consult a professional.
Common signs include unusual noises, frequent cycling, or the pump failing to start. If you notice these, you may need a thorough check or professional help.
Can I test a sump pump without water in the basin?
Testing without water only checks the switch and power path. It won’t verify pumping performance or flow, so always test with a small amount of water present in the basin.
Testing without water only checks the switch and power; it won't show whether the pump can move water. Add a little water for a full test.
What safety precautions should I take?
Always unplug the unit and wear protective gloves. Use a GFCI outlet and avoid touching live wiring. If you’re unsure, hire a licensed electrician.
Unplug the unit, wear gloves, and use a GFCI outlet. If you’re unsure, contact a professional for safety.
When should I replace a sump pump?
Replace components or the unit if tests show unreliable startup, persistent clogs, or obvious wear. Older units often benefit from replacement rather than difficult repairs.
If startup is unreliable or wear is obvious, consider replacement rather than risky repairs.
Should I hire a professional?
If you’re unsure about electrical safety, discover persistent failures, or encounter rusted components, hire a licensed professional to avoid basement damage.
If you’re unsure about electrical work or see persistent issues, it’s best to hire a pro.
Watch Video
Top Takeaways
- Assess safety and power connections before inspection
- Test the float and discharge path for reliable operation
- Clear clogs and check backflow risk in the discharge line
- Document results and plan maintenance or replacement
- Consult a professional if results are uncertain