Why Does My Sump Pump Keep Failing? A Practical Troubleshooting Guide
A practical, step-by-step guide to diagnose and fix a sump pump that keeps failing, with safe tips, maintenance schedules, and when to call a pro.

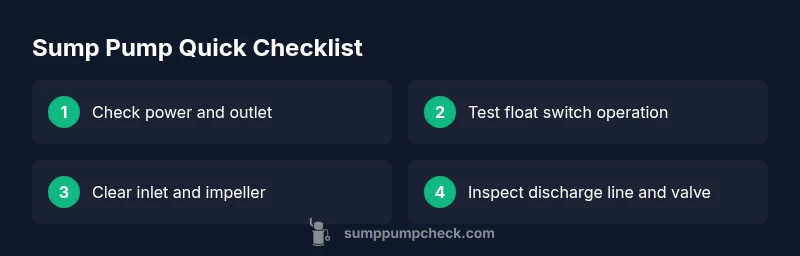
Most sump pump failures start with power or sensor issues, clogged impellers, or worn components. Begin by checking the circuit, outlet, and switch, then inspect the float and inlet for debris. If it still won’t run or stops unexpectedly, replace the float switch or seek professional help. Regular maintenance can prevent most of these issues.
Why does my sump pump keep failing? Common patterns
According to Sump Pump Check, most sump pump failures follow a few recognizable patterns: an easy-to-mix of power issues, clogs, and worn components. Homeowners often notice the problem during heavy rainfall or after a long dry spell when the pump runs constantly. In many cases, symptoms like frequent cycling, unusual noises, or a sudden failure to start point to root causes that are both simple to address and preventable with a routine maintenance plan. This section outlines the most frequent patterns so you can spot the signs early and act before the basement floods.
- Pattern: power or electrical problems (tripped breaker, GFCI nuisance). This is common and quickly fixable.
- Pattern: debris and clogs in inlet, impeller, or check valve causing poor flow.
- Pattern: worn bearings or motor wear after years of use.
- Pattern: incorrect installation or improper discharge routing that creates backflow.
By recognizing these patterns, you can prioritize checks and avoid a cascade of failures. The goal is to stabilize operation and extend the life of your sump system through proactive care and timely part replacement.
Most common failure modes
Sump pumps fail for these main reasons: 1) power issues, 2) a stuck or faulty float switch, 3) clogged impeller or intake screen, 4) a blocked discharge line or bad check valve, and 5) aging motors or seized bearings. Rain-driven surge can reveal weak links in a system that seemed fine during dry weather. A failing unit may run briefly without pumping water, cycle on and off rapidly, or repeatedly hum without delivering water. Debris like gravel, roots, or sediment can jam moving parts; a damaged check valve can leak and siphon water back, making the pump work harder or run continuously. If your unit is underground, moisture intrusion and corrosion can also degrade wiring and sensor components. Remember that even a high-quality pump will struggle if installation wasn’t matched to your basement size or if the pit is too small or too full.
Identifying the exact mode requires careful observation: what happens first, what changes after a reset, and whether noise or smell changes with operation.
What to check first (before you dive in)
When your sump pump acts up, start with the simplest checks. Confirm the power supply by testing the outlet with a lamp or using a multimeter. Reset GFCI outlets and verify breakers aren’t tripped. Listen for the float’s movement and ensure it rises freely when water enters the pit. Inspect the intake screen and the impeller for obstructions. Look at the discharge line for kinks, clogs, or debris. If you have a check valve, verify it closes properly to prevent backflow. These checks require only basic tools and take about 10-15 minutes, but they can save you from a costly repair if performed early.
Diagnostic approach you can trust
A methodical diagnostic flow helps you isolate the issue without guessing. Start with the user-visible symptoms: pump not starting, short cycling, water level not dropping, or odd noises. Then map the symptom to probable causes: power/electrical, float switch, impeller, discharge path, or motor wear. For each likely cause, test a quick fix and observe results: power check -> test switch -> clean components -> verify discharge -> test run. If the pump remains unreliable after these steps, the fault may be internal or due to aging components that require replacement. For safety, always unplug the unit before handling wiring and never work on electrical components in standing water. If you're unsure, contact a licensed professional.
Preventive maintenance and best practices
Preventing failures starts with a simple maintenance routine. Schedule a yearly inspection that includes cleaning the pit, lubricating moving parts if your model requires it, and testing the float switch in water. Replace worn parts and the check valve according to the manufacturer’s recommendations, not just when problems arise. Keep the discharge line free of obstructions and verify that the pit has adequate space to allow water to collect and drain. Install a backup system where practical, such as a battery backup, to cover power outages. Finally, maintain an operating log so you can spot trends such as rising cycle frequency or performance declines over seasons.
When to call a professional
If you’re unsure about electrical safety, or if tests indicate a possibly damaged motor, cracked housing, or persistent leaks, call a professional. A licensed plumber or sump-pump technician can perform a pressure test, inspect the wiring, verify code compliance, and replace worn components with the correct parts for your system. In some jurisdictions, DIY work on a sump pump might void warranties or create safety hazards if misapplied. The Sump Pump Check team recommends prioritizing safety and reliability, especially in flood-prone homes, and using professional help when the fault lies beyond basic maintenance.
Steps
Estimated time: 45-60 minutes
- 1
Power off and safety check
Begin by disconnecting power and ensuring the area is dry. Use a non-contact tester to verify there’s no voltage in the switch or pump housing. This keeps you safe while you inspect components.
Tip: Always wear gloves and safety glasses when handling electrical components near water. - 2
Inspect power supply and outlet
Check the circuit breaker or fuse first. Test the outlet with a simple lamp or a multimeter to confirm it’s delivering power. If the outlet is dead, resolve the electrical issue before touching the pump.
Tip: If the outlet is on a GFCI, reset it and test again; sometimes the reset is all that’s needed. - 3
Test the float switch movement
Manually raise and lower the float to ensure it moves freely and triggers the switch. If the switch sticks or feels sticky, it may need cleaning or replacement.
Tip: Lubricate only if the manufacturer allows it and use the recommended lubricant. - 4
Check discharge path and valve
Inspect the discharge pipe for kinks or blockages. If you have a check valve, ensure it seals properly to prevent backflow. Remove any debris that could impede water flow.
Tip: Backflow can silently negate pumping efficiency; test by pouring water into the pit and watching the discharge flow. - 5
Clean inlet and impeller
Remove the pump safely if accessible and clear the inlet screen and impeller of debris. A clogged inlet is a common cause of reduced pumping capacity and stalling.
Tip: Use soft brushes and avoid metal tools that could nick the impeller. - 6
Test run and verify operation
Reconnect power and run a test by pouring water into the pit. Observe startup, cycling, and water removal. Confirm there are no leaks and that water is being discharged efficiently.
Tip: Document the test results to track improvements or recurring issues. - 7
Maintenance plan and replacements
If any component shows wear or is unreliable, replace it now and schedule regular maintenance. Maintain a log of parts and maintenance dates for future reference.
Tip: Keep spare float switches and impeller screens on hand to reduce downtime.
Diagnosis: Sump pump won't start or stops pumping water
Possible Causes
- highPower issue (tripped breaker, unplugged outlet, GFCI interference)
- highStuck or defective float switch
- mediumClogged inlet/impeller or debris in pit
- mediumDischarge path blockage or faulty check valve
- lowWorn motor or bearings due to age
Fixes
- easyCheck circuit, reset breaker, test outlet
- mediumInspect and replace float switch if stuck or damaged
- easyClear debris from inlet and impeller; clean screen
- easyInspect discharge line and check valve; clear blockages
- hardEvaluate motor health; consider replacement if aged
FAQ
Why does my sump pump keep failing after a heavy rainfall?
Heavy rainfall can overwhelm an inadequately sized or poorly maintained pump. Debris buildup and backflow from a blocked discharge line frequently appear after storms, stressing the motor and switch components. Regular checks help prevent flood risk during wet seasons.
Heavy rain can overwhelm an under-maintained sump pump. Clogged intakes or backflow are common after storms, so regular checks help prevent floods.
How often should I service a sump pump?
Aim for an annual professional inspection and a quarterly homeowner check of the pit, float, and discharge line. If you live in a flood-prone area or have frequent outages, increase the cadence to bi-monthly self-checks.
Service once a year with a professional, and check the pit and discharge every few months, especially in flood-prone areas.
What if my float switch is beeping or stuck?
A beeping float usually indicates a sensor or switch issue. Inspect for debris, test movement, and replace the switch if it doesn’t operate smoothly. Do not bypass safety features.
If the float beeps or sticks, clean it and test. If it won’t operate smoothly, replace the switch and avoid bypassing safety features.
Can a sump pump fail even if it’s new?
Yes. New pumps can fail due to improper sizing, incorrect installation, or a bad power supply. Verify sizing, pit dimensions, and discharge routing, and ensure the electrical supply is stable.
Even new pumps can fail from sizing or installation issues. Check the setup and power supply to avoid early problems.
Is installing a backup pump worth it?
A backup pump protects against power outages and equipment failure. It’s a prudent addition for flood-prone basements, but ensure proper wiring, interlock controls, and maintenance so both pumps operate reliably.
A backup pump is smart in flood-prone basements. Make sure it’s wired correctly and maintained so it runs when needed.
Watch Video
Top Takeaways
- Diagnose with a calm, step-by-step approach.
- Check power, float, and discharge first.
- Regular maintenance prevents surprises.
- Know when to bring in a professional.
- Document maintenance to spot trends.