What to Do If Sump Pump Fails: Troubleshooting Guide
Practical, step-by-step troubleshooting for sump pump failures—power checks, float issues, debris, and when to call a pro. Learn fast, stay dry with Sump Pump Check.

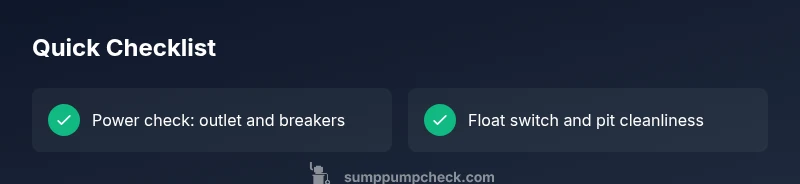
Most sump pump failures start with power or float issues. Begin by turning off power for safety, then verify the outlet is live and the circuit breaker is not tripped. If power is fine, check the float switch for sticking or obstruction and clear any debris from the pit. Finally, test the pump’s operation with a controlled drain.
Immediate safety and power basics
Safety is the first priority when a sump pump fails, especially during heavy rain or a rising basement water level. According to Sump Pump Check, accidents are most common when homeowners rush without protecting themselves from electrical hazards. Start by cutting power at the circuit breaker or unplugging the unit if reachable. Do not handle wet electrical components. Once power is isolated, assess the room for standing water and hazards. If water levels are high, evacuate people and pets from the area and put on non-slip footwear. After securing safety, verify the outlet is delivering power with a simple test device or a plugged-in lamp. If you find power, reset GFCI outlets if present and check the circuit breaker for tripping. If the outlet is dead, do not force the pump; proceed to inspect wiring and consider professional help if you’re unsure. This foundational check prevents mistakes that could cause further damage.
If you have a backup battery-powered unit, test it after restoring main power. The goal is to confirm power delivery and ensure the entire system is ready to operate. A silent pump could indicate a wiring issue or a failed switch rather than a seized motor. Throughout this process, keep a dry, accessible work area and document any signs of wear for later reference.
Common failure modes and quick checks
Sump pumps fail for several common reasons, and many are fixable with basic, careful checks. The most frequent issues involve power supply problems, a stuck or dirty float switch, and an obstructed intake or discharge path. Electrical faults can include a damaged cord, a faulty plug, or a tripped breaker. Debris in the sump pit—soil, sand, hair, and sediment—can jam the impeller or block the check valve, reducing flow or stopping the pump entirely. A clogged discharge line increases back pressure and may cause the motor to overheat and shut off. Less common but critical culprits include a burned-out motor windings, defective capacitor, or a failed pressure switch if you have a two-pump or backup system. Start by a visual inspection around the pump, then test each subsystem in sequence: power, float, intake, discharge, and backups. Document findings and approach repairs one by one to avoid overloading the system.
If you notice burning odor, melted plastic, or exposed wiring, stop immediately and call a professional. These are high-risk conditions that require trained technicians and potentially permit-compliant repairs.
Reading the signs: symptoms and what they mean
Recognizing symptoms helps narrow down the failure mode quickly. If the pump does not start when water rises, there is likely a power or switch issue. A humming motor with no water removal usually indicates a jam or seized impeller, or a float-switch problem. If the pump runs continuously, there may be a failing float switch or a wired control problem causing the unit to think water is always present. Frequent cycling (short on/off bursts) can signal an undersized pump for your basement volume, a clogged intake, or a miscalibrated float. A weak discharge or no visible water movement at the outlet often points to a blocked discharge line or a faulty check valve. By mapping symptoms to likely causes, you can prioritize fixes and prevent unnecessary disassembly. Safety remains essential: never reach into the pit while power is connected, and avoid lifting a running pump by the power cord. Collect any error codes or unusual sounds to share with a professional if needed.
Diagnostic flow overview
A structured diagnostic approach saves time and reduces risk. Start with the simplest checks and move toward more involved tests. The following flow aligns with most sump pump failure scenarios: 1) Is power present at the outlet? 2) Is the circuit breaker or GFCI tripped? 3) Is the float switch free of obstructions and moving freely? 4) Is the inlet and impeller clear of debris? 5) Is the discharge path open and the check valve functioning? 6) Are backups functioning (if installed)? 7) If all else fails, assess motor health and consider replacement. This sequence helps avoid unnecessary disassembly and ensures you catch the most common issues quickly. Document each step’s result to guide any professional you might hire later.
Step-by-step troubleshooting details
- Safety prep and power check: Turn off power to the sump pump at the breaker. Confirm no voltage is present at the outlet before touching any components. Tip: Use a non-contact voltage tester to minimize risk. 2) Verify outlet and breaker: Plug a known-good device into the same outlet to confirm power, and reset the circuit breaker or GFCI if it tripped. Tip: If the outlet is worn or warm, consider replacing it before reuse. 3) Inspect float switch: Remove the pump cover and ensure the float moves freely with the water level. Clear obstructions. Tip: If the float sticks, the pump may falsely sense water and shut off. 4) Clear intake and impeller: Remove debris from the grate and basin, then gently turn the impeller by hand to check for binding. Tip: Avoid using metal tools that could damage the basin. 5) Check discharge line and check valve: Make sure the pipe is not blocked and the valve is sealing properly. Test by running water through the line to observe flow. Tip: A blocked discharge can cause backpressure, triggering overheating. 6) Backup system test: If you have a battery back-up, test it per manufacturer instructions after verifying main power. Tip: Regularly exercise backups to ensure readiness. 7) Decide on repair or replace: If the motor hums but won’t start after all checks, the motor may be failing. Decide if replacement is more cost-effective than repair. Tip: Record all symptoms and repairs to compare lifetime costs.
Maintenance and prevention to avoid future failures
Prevention is the best strategy for sump pumps. Create a simple maintenance schedule with monthly visual inspections and quarterly functional tests. Clean the sump pit and grate to minimize debris buildup, and inspect the discharge line for kinks or blockages after storms. Regularly check the float switch’s travel and look for signs of wear on the power cord. Keep the area around the pump clear of clutter so access is easy during storms. If you rely on a backup, test it at least twice a year and replace batteries near the end of their rated life. A properly sized pump for your basement volume reduces stress on the motor. Consider upgrading to a model with an auto-fill feature and a fully sealed housing to limit corrosion. Finally, document your maintenance activities so every family member understands the system and knows how to respond during emergencies.
When to call professional help and safety considerations
If you are unsure about any step, if you smell burning or notice damaged wiring, or if water continues to back up after basic troubleshooting, stop and call a licensed plumber or sump-pump technician. Electrical safety is non-negotiable; avoid working on live circuits, and never bypass GFCI protection. A professional can assess motor health, inspect wiring, verify proper sizing, and confirm the integrity of the discharge system. When selecting a pro, ask for: certifications, references, and a written estimate that covers inspection, parts, and labor. For complex basements or homes with existing back-up systems, professional guidance is strongly recommended to ensure code compliance and long-term reliability.
Quick composite troubleshooting flow and decision points
This block synthesizes the critical steps into a practical reference so you can quickly decide what to do next during a water event.
Steps
Estimated time: 45-90 minutes
- 1
Power safety and outlet check
Turn off power at the main breaker, unplug the unit if reachable, and test the outlet with a known device to confirm power. Do not work with live electricity near water.
Tip: If the outlet fails, don’t force the pump—consider a GFCI-protected dedicated line. - 2
Verify breaker and safety devices
Reset the circuit breaker or GFCI and look for signs of wear or tripped indicators. If the breaker trips repeatedly, there may be an overload or short in the pump circuit.
Tip: If the breaker trips again after reset, stop testing and call a pro. - 3
Float switch inspection
Access the pump and move the float up and down to test for free movement. Clear any debris or slime that could bind the switch.
Tip: If the float doesn’t move smoothly, replace the switch or consider a new unit. - 4
Clean the pit and impeller
Remove standing water and debris from the sump pit, then inspect the impeller for obstructions. Spin the impeller manually to verify it rotates freely.
Tip: A cleaner pit prolongs pump life and improves efficiency. - 5
Check discharge path and valve
Inspect the discharge pipe for kinks, blockages, or frost in cold weather. Ensure the check valve seals properly to prevent backflow.
Tip: Test by running water through the line to confirm steady flow. - 6
Test the backup system
If you have a battery backup, connect and run a short test to confirm it engages correctly when main power is unavailable.
Tip: Keep backup batteries fresh and ready; replace as recommended by the manufacturer. - 7
Evaluate motor health and decision point
If the motor hums but won’t start after all checks, the windings may be damaged or the capacitor failed. Weigh replacement versus repair costs.
Tip: Document symptoms and get a written estimate before proceeding.
Diagnosis: Sump pump won't start or remove water
Possible Causes
- highPower issue
- highTripped circuit breaker
- mediumFaulty float switch
- mediumClogged impeller or dirty pit
- lowDischarge line blockage or bad check valve
- lowSeized motor or electrical failure
Fixes
- easyReset or replace the circuit breaker / GFCI and verify outlet power
- easyInspect float switch for obstruction and ensure it moves freely
- easyRemove debris from the pit, clean the inlet and impeller
- easyInspect discharge line and check valve; clear blockages or replace faulty valve
- hardIf motor is seized or electrical components fail, replace the pump or call a pro
FAQ
What should I do first when a sump pump fails during a storm?
Prioritize safety, cut power, and verify the outlet is live. Then check the float switch for obstruction and inspect the pit for debris. If the pump still won’t start, proceed with the diagnostic flow to identify the cause.
First, ensure safety and test power, then check float and debris before moving to deeper troubleshooting.
How can I tell if the float switch is stuck?
Watch the float as water rises: if it remains stuck or doesn’t rise with water, the switch may be jammed. You can gently free any obstruction and test movement while the power is off.
If the float doesn’t move freely, it’s likely stuck and needs cleaning or replacement.
Is a backup sump pump worth it?
Backups add protection during power outages or main pump failures. They require regular testing and battery maintenance to stay reliable.
Yes, a backup sump pump can prevent basement flooding during outages when tested regularly.
How often should I test my sump pump?
Test monthly during non-storm periods and perform a full test before the rainy season to ensure readiness.
Test it monthly, and do a full pre-storm check so you’re prepared.
Can a clogged discharge line cause a sump pump to fail?
Yes. A blocked discharge line creates back pressure and may cause the pump to overheat or fail to remove water properly.
Blocked discharge lines can stop your pump from moving water—clear it as part of regular maintenance.
When should I call a professional?
If you’re uncomfortable with electrical components, see burning smells, or the pump still won’t operate after basic troubleshooting, hire a licensed professional.
If you’re unsure about safety or basic fixes, it’s best to call a pro.
Watch Video
Top Takeaways
- Test power before anything else
- Clear float and debris for reliable operation
- Inspect discharge and valves to prevent backflow
- Use backups and schedule maintenance
- Call a pro if electrical or motor issues persist