What Causes Sump Pump Failure: Troubleshooting Guide
Discover common causes of sump pump failure and a practical, step-by-step diagnostic plan to keep your basement dry. Safe, fast fixes and when to call a pro.

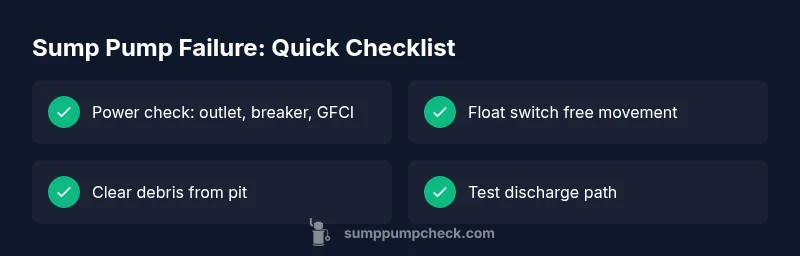
What causes sump pump failure most often? Power issues, a stuck float switch, or a clogged impeller top the list. Start by checking the outlet, breaker, and GFCI, then inspect the float and clean the intake. If it still won’t run or loses prime, replace the pump or call a pro. This quick check set the stage for deeper diagnostics.
What causes sump pump failure
Identifying the root causes behind the problem is the first step in any reliable troubleshooting process. The phrase what causes sump pump failure often points to three big culprits: power issues, a malfunctioning float switch, and a clogged or jammed impeller. In some homes, improper installation or a blocked discharge line can also lead to failure during heavy rain. Each factor affects how reliably the pump operates when water rises, so a systematic check is essential. According to Sump Pump Check, many failures begin with something simple you can fix without special tools, yet ignoring them allows the issue to escalate. Start with the smallest, safest checks and move toward more involved diagnostics.
Remember: safety first. Always disconnect power before touching the pump, and never work on live wiring. The goal is to restore control to the system without creating new hazards inside the pit or along the discharge line.
Common failure modes and symptoms
When you’re diagnosing a sump pump, look for telltale symptoms that point to specific failure modes. A pump that refuses to start after a rain event likely has a power issue or a stuck float switch. A pump that runs but doesn’t move water may have a clogged impeller or a blocked discharge pipe. If you hear grinding or grinding-like noises, the motor bearings could be failing. Beeping alarms (if your model includes one) can indicate a float issue, a low battery backup problem, or a safety fault. By mapping symptoms to likely causes, you create a practical troubleshooting path that reduces guesswork and speeds up resolution. Sump Pump Check analysis shows that addressing power and float issues first often resolves a majority of calls, saving time and money for homeowners.
Along the way, document symptoms and the steps you take. This record helps if you need to enlist professional support later and provides a history that can guide future maintenance.
Safe inspection steps you can perform
A safe, effective inspection starts with power isolation and a quick functional test. Basic steps include:
- Verify the power source is reliable: test the outlet with a lamp or another known-working device. If the outlet is controlled by a wall switch, ensure the switch is ON.
- Check the circuit breaker and GFCI: reset any tripped breakers and press the reset button on GFCI outlets serving the pump.
- Inspect the float mechanism: ensure the float can move freely without obstructions and that the switch activates as water rises. If the float is stuck, gently free it and test again.
- Look at the intake and impeller area: remove debris from the sump pit and ensure the impeller spins freely when you manually rotate it.
If any of these checks reveal a fault you can fix safely, perform the fix and retest. If the pump still fails to start after basic checks, you’re likely dealing with a more serious issue, such as a motor failure or wiring fault.
How to troubleshoot with a diagnostic flow
The diagnostic flow helps you move from symptom to solution in a structured way. Start with simple tests, then progress to targeted checks. If this doesn’t locate the fault, escalate to professional help. Remember, the goal is to restore function safely and prevent basement flooding.
- Step 1: Check power and outlet integrity.
- Step 2: Verify the float triggers the switch.
- Step 3: Inspect the discharge line for blockages.
- Step 4: Inspect wiring and the pump housing for corrosion.
- Step 5: Test the pump with controlled water input to observe performance.
If at any point you feel unsafe, stop and call a pro. Your safety matters most.
Step-by-step guide: fixing the most common cause
Below is a practical, end-to-end fix focused on power and float issues—the most frequent causes of sump pump failure. Follow these steps in order, and stop if you encounter any safety concerns or if the pump continues to fail after each fix.
- Power sanity check: unplug the pump, then reconnect to a known-good outlet. If the outlet is controlled by a switch, ensure it’s ON. 2) Reset breakers/GFCIs: locate the home’s main panel and reset any tripped breakers; press the GFCI reset button. 3) Free the float: gently move the float up and down to confirm it’s not stuck; adjust or clean as needed. 4) Clean the intake: remove debris, sediment, or hair in the sump pit that could impede water flow. 5) Test operation: pour water into the pit slowly and observe the pump cycle. If it still doesn’t operate, evaluate motor or wiring faults, which require professional service.
Tip: Keep a spare float switch or a small tool set handy for quick DIY fixes. If you’re unsure, skip to the professional option to prevent personal injury or property damage.
Preventive maintenance to extend life
Proactive maintenance reduces the chances of sudden sump pump failure. A well-planned routine helps you catch wear before it becomes a problem. Consider the following practices:
- Schedule periodic inspections: at least twice a year, check power, float movement, and discharge flow.
- Clean the sump pit regularly: remove sediment, silt, and debris that can accumulate and bog down the pump.
- Inspect the discharge path: ensure the line is clear and sloped away from the foundation; verify the check valve is functioning to prevent backflow.
- Test with a controlled water input: if your pump has a beeping alarm or runs intermittently, test under a known water load to confirm reliable operation.
By keeping notes of each maintenance session, you’ll spot patterns that indicate aging components or impending failure. Sump Pump Check emphasizes that regular maintenance is the best defense against what causes sump pump failure.
When to call a professional and what to expect
Some scenarios require professional intervention. If you perform the basic checks and still cannot get the pump to operate, or if the unit is older and showing signs of motor failure, indeed, professional service is warranted. A licensed technician will confirm power integrity, test the control system, verify the float switch, inspect the motor windings, and assess the discharge system. They can also advise on the suitability of a replacement if the pump is outdated or damaged beyond economical repair. For ongoing water problems, a pro may recommend a backup system to protect your basement during heavy rainfall.
Steps
Estimated time: 45-60 minutes
- 1
Power down and safety check
Unplug the pump from power and switch off the circuit breaker. Wear gloves and eye protection if debris is present. This prevents electrical shock and ensures a safe starting point for diagnostics.
Tip: Keep a flashlight handy; you may need a visual check in a dim sump pit. - 2
Test the outlet and breaker
Plug a known-working device into the outlet to confirm power. Check that the GFCI hasn’t tripped and reset as needed. If power is unstable, fix the panel wiring or call an electrician.
Tip: If the outlet shares a circuit with other devices, isolate it to avoid false negatives. - 3
Inspect float and switch
Lift and lower the float manually to see if a click occurs and the switch activates. Remove any obstructions that prevent movement. Replace the switch if it fails to engage.
Tip: Ensure the float has full range of motion without catching on cords or debris. - 4
Clear the intake and check the impeller
Remove visible debris from the sump pit and inspect the impeller wheels for obstruction. Spin the impeller by hand to verify freedom of rotation.
Tip: A small brush can help loosen compacted sediment without damaging the impeller. - 5
Test discharge path
Inspect the discharge pipe for kinks, obstructions, or frost. Ensure water exits away from the foundation and that the check valve seals properly to prevent backflow.
Tip: Run water through the pipe with a hose to confirm clear flow. - 6
Run a controlled test
Pour water into the sump pit and observe whether the pump starts, runs, and discharges water. Note any abnormal sounds or stalls.
Tip: If the pump cycles irregularly, it may indicate a faulty float or motor issue.
Diagnosis: Sump pump fails to start during a rainfall
Possible Causes
- highPower issue (outlet, breaker, or GFCI)
- highFloat switch stuck or failed
- mediumClogged intake or impeller obstruction
- lowWiring corrosion or loose connections
Fixes
- easyTest and reset power outlet, circuits, and GFCI; replace power source if needed
- easyFree or replace a stuck float switch and verify switch trips with water rise
- easyClear debris, clean the pit, and remove impeller blockages; test rotation
- mediumInspect and repair wiring, seal connections, and replace damaged cord if necessary
FAQ
What are the most common causes of sump pump failure?
The leading causes are power issues, a stuck float switch, and a clogged impeller. Other factors include worn bearings or faulty wiring. Regular checks help catch these problems before they flood a basement.
Power issues, a stuck float, and clogs are the most common sump pump failure causes. Regular checks help prevent floods.
How can I tell if the float switch is stuck?
Manually raise the float to see if the switch clicks and the pump starts. If it doesn’t respond, the float mechanism or switch may be faulty.
Lift the float to see if the pump starts. If not, the switch may be bad.
How often should I replace my sump pump?
Pumps typically last many years, but performance declines with age. If more than one major repair is needed within a season, replacement is often more cost-effective.
Pumps last years, but frequent repairs mean replacement may be best.
Can a beeping sump pump indicate a problem?
Beeping usually signals an alarm condition, often related to water level or battery backup. Check the manual for the specific alarm code and follow the recommended steps.
Beeping usually means an alarm condition; check the user manual for codes and solutions.
What maintenance should I perform monthly?
Inspect the power, test the float, and clear debris from the pit. Ensure the discharge path is clear and the check valve seals correctly.
Do a quick power test, float test, and pit cleaning every month.
When should I call a professional?
If basic checks don’t restore operation, or if you notice damaged wiring, persistent motor noise, or immediate flooding, a licensed technician should diagnose and repair the system.
Call a pro if basic checks fail or you see wiring damage or ongoing floods.
Watch Video
Top Takeaways
- Inspect power and safety first to restore function.
- Clear debris and test the float to prevent restart.
- Replace faulty components to prevent recurring failures.
- Schedule regular maintenance to extend pump life.