Broken Sump Pump Troubleshooting: Quick Guide
A practical, step-by-step troubleshooting guide for homeowners facing a broken sump pump. Learn safe diagnostics, common fixes, and prevention tips to protect your basement from flooding.

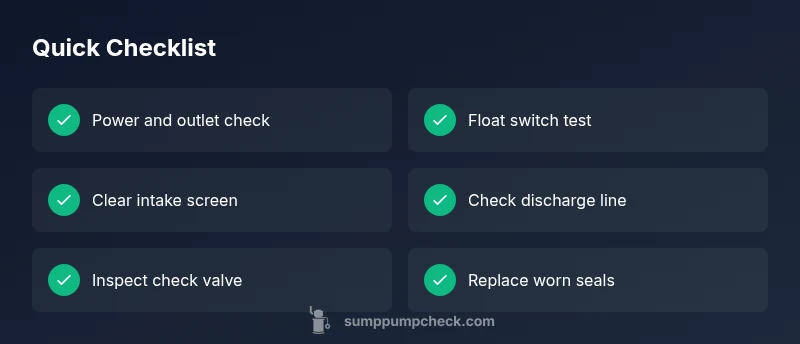
A broken sump pump is most often caused by a stuck float switch or a power issue. Start by confirming power at the outlet and testing the float switch. If the pump still won’t run, inspect the intake and discharge paths for debris, and reset or replace as needed. If in doubt, call a pro.
When a broken sump pump threatens your basement and peace of mind
A broken sump pump can flood a basement within minutes during a heavy rain or rapid groundwater rise. If you notice water creeping up, time is critical. The moment you suspect a failure, power down the unit and begin a quick check to determine if you can prevent damage. According to Sump Pump Check, a broken sump pump is one of the most common causes of basement flooding after storms, and acting fast can save thousands in repairs. This guide uses urgent, practical steps tailored for homeowners and DIY enthusiasts who want to protect their living space. You’ll learn how to diagnose safely, perform common fixes, and establish a simple maintenance rhythm to keep a broken sump pump from ruining a weekend or a basement full of belongings.
What you do in the first hour matters. If water levels are rising rapidly, evacuate the area, move valuables, and consider temporary flood barriers. If you can safely re-energize the system, use these checks as a structured plan rather than ad-hoc tinkering. Remember: power safety is non-negotiable when water is present, so never bypass GFCI protection or rush repairs.
Common causes of a broken sump pump and how to spot them
A broken sump pump is rarely a single problem. In most cases, homeowners encounter one of several frequent culprits. The most common are power issues (outlet, cord, or tripped breaker) and a float switch that fails to travel properly. Debris in the sump basin can jam the impeller, while a blocked discharge line creates backpressure that stops flow. Aging pumps may leak or overheat, especially in damp basements with seasonal use. Regular visual checks can spot worn seals, corrosion on wiring, or loose connections before they fail entirely. By understanding these root causes, you can triage quickly and decide whether you can fix it yourself or need professional help.
Safety first: electrical hazards and safe practices
Electrical safety is non-negotiable when dealing with a broken sump pump. Always unplug the unit or switch off the circuit feeding the sump pit before touching anything. Use a dry area to handle connections and wear rubber-soled footwear to reduce shock risk. If water is surrounding outlets or you cannot safely reach the device, evacuate and call for professional assistance. Never run a pump in standing water without proper protection, and ensure your GFCI outlets are functioning. Keep youngsters and pets away from the work zone. After performing any fix, test the system briefly with dry hands and a dry surface to confirm it’s restarted and cycling properly.
Simple tests you can perform to diagnose problems
You can run a few low-risk tests to narrow down the issue without specialized tools. First, verify power by plugging a known-good device into the outlet to confirm it’s live. Next, manually lift the float switch to see if the pump starts; if it doesn’t, the switch may be stuck or the wiring may be faulted. Inspect the pit for debris that could obstruct the impeller and remove any blockage. Check the discharge path to ensure it’s clear and not kinked or blocked. If you observe unusual sounds, overheating, or burning smells, stop immediately and call a professional. These steps help you decide whether you can safely fix the issue or if replacement is warranted.
Cleaning, maintenance, and component inspection to prevent future failures
Once you’ve confirmed basic operation, clean the pump and surrounding pit to prevent recurrence. Remove the pump from the sump and rinse the basket and intake screen to clear sediment and hair. Use a small brush to dislodge stubborn debris from the impeller housing. Reassemble carefully, ensuring the float moves freely and the wiring is properly secured. Inspect seals for signs of wear or moisture intrusion, and replace damaged components as needed. Establish a monthly inspection routine: test the float, listen for cycling, and keep the discharge area unobstructed. Proper maintenance reduces the chance of a repeat breakdown and preserves basement protection.
Check discharge piping and valve: ensuring proper flow
Blockages in the discharge piping or a faulty check valve can keep water from leaving the basin, making the motor work harder and eventually fail. Inspect the discharge line for kinks, ice buildup, or obstruction. A clogged valve or a stuck check valve can mimic a non-start, so testing flow after clearing blockages is essential. Reposition or replace any aging or damaged piping. Ensure the check valve is installed correctly to prevent backflow, which can cause the sump pit to fill faster than the pump can empty it.
When to replace vs repair: choosing the right path for a broken sump pump
If you’ve exhausted simple fixes and the unit continues to fail, it’s time to evaluate replacement versus repair. Consider the pump’s age, repair history, and the cost of parts relative to a new unit. A newer model with a reliable float switch, solid seals, and energy-efficient operation can be a wiser long-term choice than repeatedly patching an older motor. Also evaluate the need for a backup system to cover power outages. A professional can help you select a unit that matches your sump pit size and home drainage plan, ensuring you don’t end up with repeated failures.
Maintenance plan: a practical schedule to prevent future failures
Create a maintenance calendar that fits your climate and home. Schedule a monthly self-check of the float and a quarterly inspection of the pit and discharge, with a more thorough annual service by a technician. Keep spare parts such as f loat-switches and impeller components on hand for quick replacements. Document any fixes and the pump’s performance to spot trends that indicate wear or blockage. A consistent maintenance routine reduces the odds of a sudden breakdown and gives you confidence during heavy rain events.
Steps
Estimated time: 30-60 minutes
- 1
Power down and verify safety
Unplug the sump pump or switch off the circuit feeding the sump pit. Ensure your hands and work surface are dry before touching any components. This protects you from electrical shock while you inspect the unit.
Tip: Always test your power source with a separate device before touching the pump. - 2
Check the outlet and circuit
Test the outlet with a known-good device to confirm power is available. If the circuit is tripped, reset it and re-test. If the outlet is faulty, relocate to a functioning socket or install a dedicated line.
Tip: GFCI outlets are common in basements—if tripped, reset and test again. - 3
Inspect the float switch
Manually lift and lower the float to confirm it moves freely and activates the pump. If it sticks, clean and lubricate the mechanism if the design allows; replace if it remains unreliable.
Tip: Ensure the float has full range of motion and isn’t obstructed by debris. - 4
Clear debris from the basin
Remove the pump from the pit (careful, water level may be high). Clean the intake screen and the impeller housing. Re-seat the pump and verify the seal is intact.
Tip: Rinse components with clean water; avoid harsh cleaners that could damage seals. - 5
Test discharge path
Check the discharge line for blockages, kinks, or ice buildup. Clear obstructions and ensure the line is level and unobstructed so water can exit freely.
Tip: Ensure the check valve is installed in the correct orientation. - 6
Reinstall and power on
Reconnect the pump, restore power, and observe cycling. Listen for normal operation and verify no water remains in the pit after a run cycle.
Tip: Do not run the pump continuously if the water level is rising; seek pro help if flooding continues. - 7
Assess for leaks or wear
Check for dampness around seals, cranky bearings, or unusual heat. Look for signs of corrosion on wiring and housing; replace worn parts as needed.
Tip: Regularly inspect seals and wiring to prevent future shocks. - 8
Decide on repair vs replacement
If the unit is old or repeatedly fails after fixes, plan for replacement. Choose a pump size and features that fit your sump pit and climate, and consider a backup pump for outages.
Tip: A backup pump is a smart investment in flood-prone homes.
Diagnosis: Broken sump pump: unit won't start, runs without pumping water, or basement floods
Possible Causes
- highPower issue (outlet, cord, or tripped breaker)
- highStuck or failed float switch
- highClogged impeller or intake screen
- mediumBlocked discharge line or faulty check valve
- mediumWiring corrosion or damaged components
- lowOld, worn motor or seal failure
Fixes
- easyVerify outlet power and reset breakers; test with a known-good device
- easyInspect and free the float switch; replace if it won’t travel
- easyClear debris from intake and impeller; reassemble and test
- mediumInspect discharge pipe and check valve; remove blockages and reseal
- mediumInspect wiring for corrosion; replace damaged cables if safety permits
- hardIf the motor or seals are failing, consult a professional for repair or replacement
FAQ
What is the most common cause of a broken sump pump?
The most common causes are power issues and a stuck float switch. Debris in the sump or a clogged discharge line can also prevent proper operation. Start with power and float checks, then inspect for blockages.
Most often, a broken sump pump is caused by a power issue or a stuck float switch. Start with those checks, then look for debris or a blocked discharge line.
How can I tell if the float switch is stuck?
Manually lifting the float should trigger the pump to start. If it doesn’t move freely or the pump won’t start when the float rises, the switch may be stuck or defective.
If the float won’t move freely or you can’t get the pump to start as the float rises, the switch might be stuck or faulty.
Can a clogged impeller cause the pump to fail?
Yes. Debris or sediment can jam the impeller, reducing flow or stopping pumping altogether. Cleaning the intake and impeller often resolves this quickly.
A clogged impeller can stop the pump; cleaning the intake usually fixes it.
When should I replace instead of repair?
If the unit is old, frequently failing, or expensive to repair, replacement is often the smarter long-term choice. A newer model with a reliable float switch reduces future outages.
If it’s old or unreliable, replacing it is usually the better option.
Is it safe to use a sump pump during a flood event?
Operate only if you can do so safely. If water levels overwhelm the sump or electrical outlets are compromised, do not run the pump and call for help.
Only run it if it’s safe; if the flood is severe, call for help.
Do I need a professional to repair a broken sump pump?
Not always. For simple fixes like cleaning and float adjustment, a DIY approach can work. For motor issues, wiring, or extensive leaks, a licensed technician is recommended.
Often you can DIY small fixes, but call a pro for motor or wiring problems.
Watch Video
Top Takeaways
- Identify power, float, or blockage issues early.
- Prioritize safety before attempting any fix.
- Clean and inspect components regularly to prevent recurrence.
- Plan for replacement if the unit is old or repeatedly failing.