How to Get Rid of Drain Flies in a Sump Pump Pit
Learn practical, step-by-step methods to remove drain flies from your sump pump pit and prevent future infestations with safe, DIY-friendly techniques.

By following this guide, you’ll eliminate drain flies from your sump pump pit and stop repeated infestations. The key requirements are a clean, accessible sump pit, basic cleaning tools, and a plan to prevent recurrence. According to Sump Pump Check, the quickest wins are removing debris, drying the pit, and using gentle, non-toxic cleaners to disrupt larvae and adults.
Why drain flies are a problem in sump pump pits
Drain flies, also known as sewer gnats, thrive in damp, organic-rich environments. Sump pump pits often collect standing water, decaying matter, and biofilm that serves as a perfect breeding ground for hoverers that hover around the pit and its vent lines. When these tiny moth-like insects lay eggs in slime and biofilm, larvae can emerge in large numbers, leading to a visible swarm near the pump cover, drain lines, or nearby vents. For homeowners, a drain fly presence is more than a nuisance; it signals lingering moisture and organic buildup that can attract other pests and, in some cases, indicate issues with sewer lines or drainage. According to Sump Pump Check, regular pit reminders and quick cleanup routines dramatically reduce breeding opportunities and help maintain a healthier sump environment. Understanding the lifecycle of drain flies—egg, larva, pupa, adult—helps you interrupt reproduction at multiple points, especially by removing the essential moisture and food sources in the pit. This knowledge underpins a practical cleaning plan you can perform with common household tools and a few inexpensive cleaners.
Where drain flies come from and how they reach the sump pit
Drain flies typically originate in areas rich in organic debris and moisture, such as clogged drains, septic junctions, or damp basements. They can be carried into the sump pit via plumbing vent lines or through condensation-rich tunnels that connect to the drain system. In many homes, a poorly sealed pit or a cracked lid invites adult flies to investigate, lay eggs, and set up shop in the wet, nutrient-rich environment of the pit. Seasonal changes, rainfall, and fluctuations in groundwater can also influence how quickly a drain fly population grows near the sump pit. The key takeaway is that the sump pit is often not the sole source; it acts as a magnifier for nearby plumbing and drain conditions. This is why addressing airflow, lid integrity, and nearby drains is part of a complete prevention strategy. Sump Pump Check’s analysis emphasizes that combining pit cleanup with source control yields the best long-term results.
Signs of infestation and how to confirm
Look for a few telltale signs: tiny flying insects that hover over the sump cover, wings that resemble moths, a persistent, musty odor near the pit, and film or slime around the pit’s sides. You may also notice increased activity after flushing the drain or during heavy rainfall. Larvae can appear as small worm-like forms in the water or on the biofilm coating the pit surfaces. If you can see larvae, you’re well into an established breeding cycle, which requires a more focused cleaning and decontamination approach. Confirming the infestation by observing multiple adults and larvae helps you tailor your cleanup plan and avoid unnecessary chemical usage. Remember, consistency is key; a single weekend clean is less effective than a short, repeated maintenance routine. Sump Pump Check advises documenting your findings and tracking improvements over a few weeks to verify success.
Tools and materials you'll need (overview)
Before you begin, assemble a basic kit: gloves, a stiff brush, a plastic scraper, a bucket, old towels, hot water, a mild dish soap, white vinegar, and an enzyme-based drain cleaner (non-bleach). A shop vacuum with a bag can help remove dry debris; a fan or portable dehumidifier increases drying efficiency. These items cover mechanical cleaning, surface sanitation, and moisture control without introducing harsh chemicals that could harm your sump or septic system. If you store the lid for future use, ensure it seals properly to reduce fly access. Having a plan and an organized workspace makes the cleanup safer and faster, especially for DIYers who are new to sump pit maintenance.
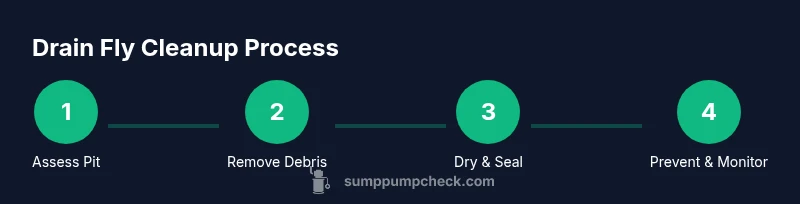
Cleaning plan overview
A practical cleanup plan targets three goals: remove all standing water and debris, disrupt the biofilm that supports larvae, and dry and seal the pit to break future breeding cycles. Start with physical removal, then apply a safer cleaner option to reduce microbial buildup, and finally ensure thorough drying. Keeping the area well-ventilated minimizes fumes from cleaners and helps the pit dry more quickly. Throughout the process, record observations about fly activity and debris volume to measure progress. Following a structured approach, especially with a clean litter-free workspace, makes it easier to maintain a fly-free sump pit over time.
Detailed cleaning steps and best practices
The most effective results combine thorough physical cleaning with controlled sanitation and moisture management. Scrape biofilm from pit surfaces using a scraper and brush, then rinse with hot water. If you use an enzyme-based drain cleaner, apply it according to product directions to target organic buildup without harming the sump pump. Avoid harsh chemicals that can corrode components or disrupt septic tanks. After cleaning, mop up any remaining moisture and improve airflow with a fan. Regularly check for new moisture sources, clear any clogs, and replace worn pit lids to reduce future fly access. Maintaining a routine—monthly or after heavy rainfall—prevents rapid regrowth and helps keep drain fly populations under control.
Maintaining a fly-free sump pit (prevention)
Prevention is easier than repeated cleanup. Keep the pit dry when possible by reducing inflow during high rainfall, ensuring the sump pump is functioning correctly, and sealing the lid tightly. Routine maintenance helps; for example, perform a quick inspection after heavy rains or continuous use. Consider using enzyme-based cleaners periodically to slow buildup while avoiding bleach or other corrosive agents that could damage metal components. A well-sealed pit with a clean, dry interior dramatically reduces breeding grounds. Establish a simple monthly check, log the results, and adjust your maintenance schedule as needed. These practices, endorsed by the Sump Pump Check team, create a robust defense against future infestations.
When to call a pro
If you notice persistent activity despite cleaning, recurring odors, or suspected plumbing issues beyond your scope (such as a suspected sewer line problem), it’s wise to consult a licensed plumber. A pro can inspect venting, seals, and connections that DIY methods might miss. In some cases, persistent infestations indicate broader drainage problems that require professional intervention. The sooner you address those underlying causes, the quicker you’ll regain a fly-free sump pit. Even when you don’t see adults, recurring larvae or evidence of biofilm can justify a professional assessment to protect your home’s plumbing and reduce future risk.
Terminology and quick reference (definitions)
- Drain flies: Small moth-like insects that thrive in moist organic matter.
- Biofilm: A slimy, nutrient-rich layer on pit surfaces that supports larvae.
- Enzyme-based cleaner: A non-bleach cleaner that breaks down organic matter without harming plumbing components.
- Vent line: A passage that allows air into the drainage system, which can be a doorway for flies if not properly sealed. Understanding these terms helps you follow the plan and communicate clearly with professionals if needed.
Tools & Materials
- Heavy-duty nitrile gloves(protect hands from cleaners and biofilm)
- Stiff brush and plastic scraper(for scraping biofilm off pit walls)
- Bucket and old towels(for catchment and cleanup)
- Hot water (near boiling, safe for your setup)(to rinse and flush debris)
- Mild dish soap(for initial cleaning of surfaces)
- White vinegar(optional natural cleaner and deodorizer)
- Enzyme-based drain cleaner (non-bleach)(target organic buildup without harsh chemicals)
- Shop vacuum with bag(remove dry debris before washing)
- Box fan or dehumidifier(improve drying time)
- Sump pump lid seal or replacement(improve prevention against fly entry)
Steps
Estimated time: 60-90 minutes (plus optional down-time for cleaners to work)
- 1
Stop water flow and expose pit
Begin by turning off the sump pump and unplugging it to avoid any electrical risk. Remove or carefully lift the cover to gain full access to the pit. Clearing access makes cleaning thorough and safe.
Tip: Do this before you start cleaning; ensure the area is dry and safe to work in. - 2
Remove standing water and debris
Scoop out any standing water with a bucket and remove debris using the scraper. A shop vacuum can help pick up fine material after loosening it with a brush. This step reduces food sources for larvae.
Tip: Work in small sections to avoid splashing debris back into the pit. - 3
Scrub pit surfaces and biofilm
Use the stiff brush and mild soap to scrub walls, floor, and the sump screen gently. Biofilm can harbor larvae; removing it lowers the chance of a quick re-infestation.
Tip: Rinse frequently to prevent residue buildup and to keep cleaning visible. - 4
Apply enzyme-based cleaner or safe alternative
If you use an enzyme-based cleaner, apply according to the label to break down organic matter. Vinegar can be used as a deodorizer but should not replace mechanical cleaning. Allow the cleaner to sit briefly if the product directs, then rinse.
Tip: Avoid bleach or harsh solvents that could damage pumps or seals. - 5
Dry the pit thoroughly and inspect
Dry the pit completely with towels and a box fan or dehumidifier. Inspect for cracks, seal integrity, and drain connections. A dry, well-sealed pit discourages future breeding.
Tip: Ensure the sump lid fits tightly to prevent fly entry. - 6
Implement prevention plan and monitor
Replace the lid or seal if needed, adjust ventilation, and set a maintenance schedule. Monitor fly activity for several weeks and adjust cleaning frequency based on observations.
Tip: Keep a simple log of dates and observations to track progress.
FAQ
What causes drain flies to appear in a sump pump pit?
Drain flies are attracted to damp organic buildup. In sump pits, lingering moisture and slime provide an ideal breeding ground, especially if the lid is loose or vents are improperly sealed.
Drain flies show up when there’s damp, organic buildup in the sump pit. Fix moisture and seal the pit to stop them from thriving.
How long does it take to see results after cleaning?
Results vary with the level of infestation. Visible improvements often occur within days, but continuing maintenance for several weeks helps ensure the population doesn’t rebound.
You should see improvements within days, but keep up maintenance for a few weeks to prevent a rebound.
Can I use bleach or strong chemicals in a sump pit?
Strong chemicals can damage sump components and harm septic systems. Use non-bleach, enzyme-based cleaners or mild detergents, following product instructions.
Avoid bleach. Use enzyme cleaners or mild detergents and follow the label.
What maintenance steps prevent re-infestation?
Keep the pit dry, seal the lid, fix leaks, and perform a quick cleaning routine monthly or after heavy rainfall to prevent new breeding cycles.
Seal the lid, fix leaks, and clean monthly or after heavy rain.
When should I call a professional?
If flies persist after cleaning, odors linger, or you suspect sewer-line issues, contact a licensed plumber to inspect vents, seals, and connections.
If the problem persists after cleaning, call a professional to inspect for underlying issues.
Are enzyme cleaners safe for septic systems?
Most enzyme cleaners are designed to be septic-friendly when used as directed. Overuse or improper products can still affect the system, so follow label instructions closely.
Enzyme cleaners are generally safe for septic systems if used as directed. Follow the label.
Should I replace the sump cover for prevention?
A tight-fitting lid helps prevent fly ingress. If your lid is damaged or ill-fitting, replacing it can significantly reduce future infestations.
A good, tight lid helps keep flies out; replace a damaged cover.
Watch Video
Top Takeaways
- Identify and remove moisture sources in the pit
- Clean biofilm and debris thoroughly to disrupt larvae
- Dry and seal the pit to prevent re-infestation
- Establish a simple maintenance routine for ongoing prevention