When to Turn On a Sump Pump: A Practical Timing Guide
Learn when to turn on a sump pump to prevent basement flooding. This practical guide covers triggers, testing, maintenance, backups, and seasonal considerations for homeowners and DIY enthusiasts.

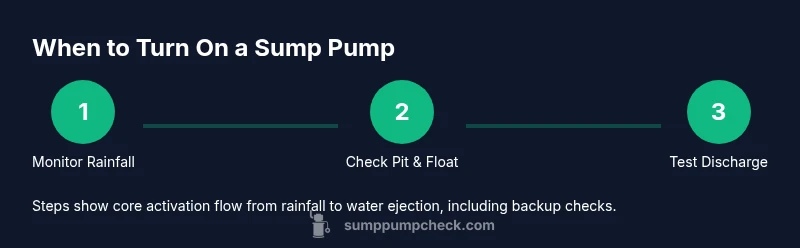
Knowing when to turn on sump pump helps prevent basement flooding and water damage. Your auto sump pump should start as groundwater or rainfall raises the pit level, not after flooding begins. According to Sump Pump Check, test both float-switch and alarm systems quarterly to ensure reliable activation before heavy rains.
Why timing matters for sump pump operation
Timing is more than a guess; it’s a proactive safety measure for your basement. A sump pump that starts too late may be overwhelmed by rising water, while one that activates too early can waste energy and wear. The optimal approach is to have the pump engage during the early stages of water rise—ideally before water reaches the bottom edge of your foundation—so you can direct water away from the house before it causes damage. For homeowners, this means knowing your local climate, drainage layout, and the pump’s trigger mechanism. According to Sump Pump Check, a consistent testing routine helps catch a stuck float or a failing switch before a storm.
How float-switch technology determines activation
Sump pumps rely on float switches to sense rising water. There are several designs, including vertical float switches that rise with the water level and tethered (float) switches that float on the surface. When the float reaches its shutoff point, the motor turns on and begins pumping. A reliable system uses a small amount of hysteresis—a deliberate gap between on and off points—to prevent rapid cycling. Over time, debris, algae, or slime can coat the float, preventing timely activation. Regular inspection keeps the switch responsive and extends the device’s life.
Reading your basement conditions: rainfall, groundwater, and pit size
Basement conditions influence when to turn on the pump. Heavy rainfall and saturated soil can raise groundwater levels surrounding the foundation, increasing the likelihood of water entering the pit. A larger pit and properly sized discharge line may tolerate longer pumping cycles without overheating. Consider the flood history of your area, the home's age, and the surrounding landscape. While precise numbers aren’t universal, a proactive homeowner notes higher water activity during forecasted storms and adjusts readiness accordingly.
Seasonal readiness and weather considerations for turning on
Seasonal changes alter risk. Wet seasons and spring thaw often bring frequent pumping demands, while freezing conditions can complicate discharge lines. Ensure discharge outlets are clear in winter to prevent backups, and consider temporary heating or insulation for exposed discharge pipes in freezing climates. In warm months, keep the intake screened to prevent debris from entering the pit. Planning ahead for seasonal patterns helps you avoid last-minute scrambles when storms arrive.
How to test your sump pump safely
Testing should be routine, not reactive. Start with a quick safety check: verify the power source is working, the outlet is GFCI-protected, and the discharge path is unobstructed. Then perform a controlled test: pour water into the sump pit until the float triggers the pump, observe the pump turn on, confirm water is discharged away from the foundation, and allow the pump to cycle off. Repeat this process during daylight hours to observe any unusual sounds or vibrations. Keep a log of results for future reference.
Common mistakes and guardrails
Avoid these pitfalls: (1) testing only during a rainstorm and hoping for luck; (2) ignoring the discharge path and letting water pool near the foundation; (3) neglecting the backup system or alarm; (4) ignoring debris in the pit that can hinder the float; (5) assuming a pump is working because water disappears quickly—visual checks are essential. Regular maintenance steps guard against these mistakes and improve reliability.
Backup options and automation controls
Automation is your ally when power outages strike. Battery backups and water-powered backups provide redundancy when the main pump cannot draw power. Pair backup systems with alarm notifications so you can respond quickly if the primary unit fails. Ensure that check valves, proper venting, and discharge routing are in place, and periodically test backups following the same procedure as the primary pump.
Maintenance checklist to ensure readiness
Create a seasonal checklist that includes: cleaning the pit and inlet screen, testing the float mechanism, inspecting wiring and plugs, verifying the discharge pipe is clear, and confirming the shutoff mechanism works. Replace worn gaskets and seals as recommended by the manufacturer. Keep a spare fuse or battery on hand for emergencies. Document maintenance dates to build a maintenance history.
Quick-start startup routine for first-use (new systems)
If you’re starting a new system for the first time, confirm power and discharge paths are secure, then perform a slow, staged test: power on, run the pump briefly, observe the outlet flow, and listen for normal operation. If any abnormal noises occur, stop the test and inspect for obstructions. Finally, set a routine testing schedule and log results.
Signs your pump isn’t turning on when needed
Warning signs include no movement when the water reaches the float, frequent cycling failures, strange grinding noises, or a beeping alarm indicating a fault. If you notice any of these, shut off power and inspect for clogs, debris, or a stuck switch. If the problem persists, seek professional service to prevent a flood.
Tools & Materials
- Sump pump(Ensure it matches your pit size and discharge hose)
- GFCI outlet tester(Verify power source is protected from shock)
- Shut-off switch or accessible power source(Know how to safely unplug during maintenance)
- Flashlight(Reliable lighting during night tests or outages)
- Buckets/towels(Contain water while testing and cleanup after)
- Owner’s manual(Reference for model-specific procedures)
Steps
Estimated time: Total time: 25-40 minutes
- 1
Check power and safety
Ensure the circuit is on, outlet is grounded, and the area around the sump is dry. Make sure you can safely unplug if needed. This prevents electrical hazards during testing.
Tip: If your outlet is not GFCI-protected, upgrade to a GFCI outlet for safety. - 2
Inspect the discharge path
Verify the discharge line is clear and directed away from the foundation. Remove any blockages and ensure the hose is secured to avoid tripping.
Tip: Tape or secure exposed hoses to prevent kinks that reduce flow. - 3
Activate the float switch
Manually raise the float to confirm the switch engages the motor. Listen for the pump motor starting and running smoothly.
Tip: If the switch doesn't respond, check for debris on the float and clean gently. - 4
Run a controlled water test
Pour water into the pit until the float triggers the pump, then observe discharge direction and rate. Ensure water continues to flow as long as the pit remains full.
Tip: Do not overfill the pit; stop the test once the pump starts and water ceases rising. - 5
Check for proper shutoff
Watch the pump stop after the water level recedes and the float returns to its resting position. Confirm the cycle repeats correctly.
Tip: Verify there is a small buffer between on and off points to avoid rapid cycling. - 6
Test alarms and backups
If you have an alarm or backup pump, test them in the same session. Confirm alerts are audible and backups engage when needed.
Tip: Battery backups require fresh batteries and periodic capacity checks. - 7
Document results
Record date, conditions, and outcome of the test. Use this log for trend analysis and annual maintenance planning.
Tip: Set reminders for quarterly checks and seasonal maintenance. - 8
Plan ongoing maintenance
Create a routine that includes cleaning, inspection, and professional service intervals. Regular care improves reliability.
Tip: Schedule a professional inspection if you notice persistent issues such as unusual noises or poor discharge.
FAQ
How often should I test my sump pump?
Test your sump pump at least quarterly and after any major storm. Regular tests help catch stuck switches, clogged intakes, and failing alarms before heavy rain.
Test your sump pump at least quarterly and after major storms to catch issues early.
What causes a sump pump to fail to start?
Common causes include a stuck float, a dirty intake screen, a blown fuse, or a tripped circuit. Inspect these components during regular maintenance and replace components as needed.
Failure can come from a stuck float or a clogged intake; check these during maintenance.
Should I add a battery backup for reliability?
A battery backup provides protection during power outages. Pair it with a backup sensor or alarm for proactive alerts during outages.
Yes, a battery backup helps you stay protected during power outages.
Can a sump pump operate without electricity?
Most standard sump pumps require electricity. For reliability during outages, use a backup pump or off-grid power solution.
Most pumps need power; backups are essential for outages.
How can I tell if the discharge line is blocked?
Check the line for kinks, ice, or debris that can restrict flow. Clear any obstruction and ensure the hose outlets water away from the house.
Look for blockages in the discharge line and clear them.
Do all homes need a sump pump?
Not every home requires one, but homes with basements that flood, high water tables, or poor drainage should consider a sump pump as a preventive measure.
Sump pumps are not required for every home, but are wise in flood-prone basements.
Watch Video
Top Takeaways
- Test pumps regularly to prevent surprises.
- Ensure automatic activation with a functioning float and alarm.
- Direct discharge away from the foundation to avoid basement moisture.
- Maintain backups and alarms for power outages.
- Document maintenance and test results for reliability.