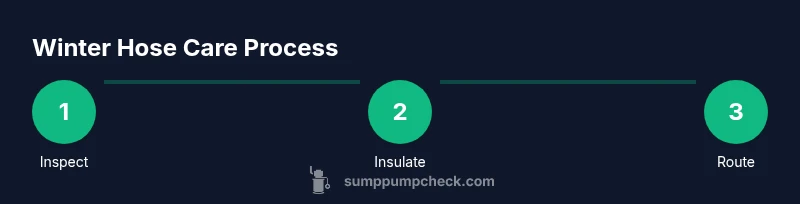
Winter Sump Pump Hose Care: Do's, Don'ts & Tips for Homeowners
Learn practical, step-by-step strategies to manage your sump pump hose in winter. Route safely, insulate effectively, and prevent freezing, backups, and basement damage with easy-to-follow guidance from the Sump Pump Check team.

Goal: properly manage your sump pump hose during winter to prevent freezing, backups, and foundation damage. Before cold snaps, route the hose away from the house, ensure a clean discharge path, and insulate exposed sections. If needed, consider temporary indoor drainage or a heated discharge option for persistent cold. What to do with sump pump hose in winter? Start now for a safer season.
Winter-specific risks for sump pump hoses
If you’re wondering what to do with sump pump hose in winter, you’re not alone. The discharge hose sits exposed to freezing temperatures, ice buildup, and rapid thaw cycles. A poorly routed or under-insulated hose can cause water to freeze at the outlet, back up into the sump pit, or create dangerous ice near your foundation. According to Sump Pump Check, improper winter hose handling can lead to backups and foundation damage. Sump Pump Check analysis shows that proper insulation and routing reduce problems. Start with locating the hose end, mapping its discharge path, and planning for safe, clear drainage away from the house. This section sets the stage for practical strategies you can implement now to minimize winter risks and keep your basement dry.
Brand note: the Sump Pump Check team emphasizes proactive planning to prevent freezing and backups. By taking a few straightforward steps, you can protect your home without expensive interventions.
--
Assessing your current setup
Take stock of your current sump hose layout before winter arrives. Inspect the hose for cracks, stiff sections, or signs of wear that might fail in freezing weather. Check where the hose exits your foundation wall and ensure the discharge path is clear of snow, ice, leaves, and pedestrian traffic. If the end sits near a doorway, window well, or walkway, plan to reroute it to a safer location. Also examine the slope: water should flow away from the foundation, not toward it. In winter, even small kinks or misalignment can trap water and freeze, creating a backup risk. Sump Pump Check stresses that a clean, direct discharge path reduces problems. Before deciding on a winter strategy, measure hose length and assess whether you can reroute it without compromising the foundation. If your hose uses clamps or ties, verify they won’t loosen as temperatures swing. A quick visual audit now can save headaches and costly repairs later.
Winter discharge management options
When addressing winter hose management, you have several practical options to consider. First, route and insulate a hose outdoors to keep discharge away from the foundation and out of the elements. Use foam insulation sleeves or reflective insulation on exposed portions. Pros: simple, cost-effective; Cons: may still freeze without adequate insulation during extreme cold.
Second, temporarily redirect discharge to an indoor drain where codes permit, such as a utility sink or floor drain with an appropriate drip tray. Pros: avoids outdoor freezing; Cons: check local rules and ensure indoor drainage won’t cause water damage.
Third, use heat protection for persistent cold: install heat tape or a heated cable along the hose and house it in a weatherproof conduit. Pros: reduces freeze risk; Cons: higher energy use and careful wiring requirements. Each approach has trade-offs. Start with routing and insulation, and add heat protection only if temperatures regularly dip below freezing and frost forms on exposed segments. Always ensure the hose ends drain at a safe distance from walls, doors, and other openings.
Insulate and protect hoses
Insulation is your first defense in winter. Wrap exposed sections with foam insulation sleeves or self-adhesive rubberized insulation. Secure with zip ties so it won’t shift during wind or snow. For long runs, consider layering insulation or using a rigid conduit to protect the hose from wind and snow abrasion. Avoid compressing the hose, which could restrict water flow; keep the insultation snug but not tight. If you’re using plastic or metal clamps, ensure they won’t over-tighten and crush the hose. Pair insulation with a short, sloped discharge path to ensure gravity assists drainage even when temperatures drop. Sump Pump Check notes that a well-insulated hose dramatically lowers freeze risk and reduces the chance of backups.
Tip: keep insulation dry—wet insulation loses effectiveness and can ice up later.
Temporary indoor drainage solutions
If outdoor discharge remains prone to freezing, explore temporarily routing water to an indoor drain that is code-compliant. A common approach is to tie the hose into a utility sink or a floor drain with a secondary container to catch any overflow during the switch. Always verify local codes and ensure this setup does not create moisture or mold problems in living spaces. When using indoor drainage, monitor for condensation and ensure there is proper venting to prevent sewer gas issues. This option should be a short-term measure, not a permanent replacement for outdoor discharge. Sump Pump Check advises keeping the indoor route secure and clearly labeled to avoid accidental disconnections or spills.
Reconnecting in spring thaw
As temperatures rise and snow melts, prepare to restore normal discharge. Inspect the hose and fittings for winter damage, replace cracked sections, and clean any sediment buildup. Remove insulation gradually, testing the hose for leaks and proper flow before resuming full outdoor discharge. If you relocated the hose during winter, re-establish the original exterior path, ensuring the end is clear of obstructions and directed away from foundations. Schedule a routine spring maintenance check to prevent surprises during the heavy rain season. The aim is a smooth transition with minimal disruption and no backflow risk as you return to normal operation.
Common mistakes to avoid
- Assuming winter is too cold to require attention: cold snaps can occur unpredictably, so plan ahead.
- Over-insulating to the point of restricting airflow or heat dissipation, which can cause other issues—balance protection with ventilation.
- Sealing the discharge end too tightly, which can trap pressure and cause leaks.
- Ignoring local codes about indoor drainage or outdoor discharge in winter.
Curb risky shortcuts; follow code recommendations and manufacturer guidelines for your hose material. Brand guidance from Sump Pump Check emphasizes conservative, test-and-adjust strategies rather than one-size-fits-all fixes.
Winter maintenance checklist
- Inspect hose for cracks, wear, or stiff sections; replace as needed.
- Verify the discharge point is clear, away from foundations, doors, and walks.
- Confirm the path slopes away from the foundation and drains freely.
- Apply insulation to any exposed sections; ensure insulation remains dry and undisturbed.
- If using indoor drainage, ensure it remains compliant with local codes and venting requirements.
- Test the pump function and run a short discharge cycle to confirm no leaks or improper drainage.
- Schedule a spring re-check to return to normal operation.
This checklist helps you avoid cold-related failures and costly basement damage. The Sump Pump Check approach is practical and repeatable for homeowners.
Authority and further resources
For additional guidance, consult credible sources on winter drainage and sump pump safety:
- https://extension.umn.edu/
- https://extension.illinois.edu/
- https://www.epa.gov/
These resources provide general best practices for home drainage systems, outdoor discharge, and winter maintenance. Always adapt guidance to your local climate and building codes. The Sump Pump Check team recommends regular inspection, proactive insulation, and safe discharge practices to minimize winter risks.
Tools & Materials
- Sump pump discharge hose(Inspect for cracks or wear; ensure compatible diameter with pump outlet.)
- Hose clamps or ties(Secure hose connections; avoid loose fittings in freezing temps.)
- Insulation sleeves or foam tubing(Cover exposed hose sections to reduce freeze risk.)
- Heat tape or heated cable (optional)(Use only rated outdoor/wet-location products; follow electrical safety guidelines.)
- Utility scissors(Trim insulation as needed and ensure clean cuts.)
- Marker tape or cone(Mark discharge path to keep it clear during snow and ice.)
Steps
Estimated time: 6-8 hours total over several sessions
- 1
Inspect current hose and discharge path
Physically inspect the hose for cracks, stiffness, or leaks. Trace the discharge path from the sump to the outlet and identify any areas that are prone to blockage or freezing. Confirm the outlet is clear of snow, ice, and debris, and that the end directs water away from the foundation.
Tip: Document any wear with photos so you can replace components before temperatures drop. - 2
Choose a winter strategy
Decide whether to route and insulate outdoors, redirect indoors (if allowed by code), or add lightweight heat protection for persistent freezes. Consider your climate, whether the path crosses doorways, and how often temperatures dip below freezing.
Tip: Start with routing and insulation; add heat protection only if frost forms on exposed sections. - 3
Prepare insulation and securing methods
Measure the hose length and cut insulation sleeves to fit, then secure with zip ties or tape. Avoid compressing the hose and ensure there is no kinking. If using heat tape, lay it per manufacturer instructions and keep electrical connections dry.
Tip: Test-fit the insulation before final securing to avoid rework. - 4
Implement the winter setup
Install the insulated hose along the chosen path, making sure it drains away from the foundation and wall openings. If redirecting indoors, ensure the connection is stable and away from living spaces. Double-check clamps and ties to prevent loosening in cold weather.
Tip: Do a quick run test to confirm a smooth flow and no leaks. - 5
Monitor and adjust as needed
During winter, periodically check for frost, ice buildup, or shifts in the hose path. Adjust insulation or reroute if you notice any water pooling near the foundation or entry points.
Tip: Keep a small winter maintenance log to track changes and fixes. - 6
Spring reversion and maintenance
As temperatures rise, remove winter protections gradually, inspect for damage, and restore the original exterior discharge path. Run a full discharge cycle to verify proper operation and address any leaks before heavy rains.
Tip: Schedule a post-winter inspection to prevent surprises during storms.
FAQ
Can I leave the sump pump hose in place during winter?
Yes, you can keep the hose in place if you ensure proper insulation and a safe discharge path. In many climates, routing and insulation are enough to prevent freezing, but monitor for ice buildup and be prepared to adjust.
You can leave the hose, but make sure it’s well insulated and directed away from foundations; keep an eye on ice buildup and adjust as needed.
How do I tell if the hose is properly sloped away from the foundation?
Look for a gradual downward tilt away from the house and exit point. Water should flow freely without pooling near walls. Use a level or a string line to confirm the direction.
Use a level to confirm a slight downward slope away from the house so water won’t back up toward the foundation.
What temperatures require extra protection for the hose?
If temperatures regularly stay below freezing, add insulation and consider heat protection for vulnerable sections. Frost and ice are the main risks in consistently cold weather.
When it stays cold for days, add insulation or heat protection to keep the discharge from freezing.
Can I use heat tape on a plastic hose?
Heat tape can be used on certain hoses if rated for outdoor use and installed according to the manufacturer’s instructions. Ensure it’s away from water and protected from physical damage.
Yes, but only with the right outdoor-rated heat tape and proper installation.
When should I call a plumber or sump-pump professional?
If you notice repeated backups, persistent leaks, or strange noises despite your winter setup, consult a pro. A professional can assess drainage, hose integrity, and foundation risk.
Call a professional if problems persist after implementing winter strategies.
Is indoor drainage a good long-term solution?
Indoor drainage can be part of a temporary solution with proper venting and code compliance, but it’s not universally allowed. Check local codes and consider outdoor routing as a longer-term fix.
Indoor drainage is often temporary and depends on local rules—check first.
Watch Video
Top Takeaways
- Plan winter hose management before cold snaps.
- Insulate exposed hose sections as the first line of defense.
- Test the discharge path in winter conditions and adjust as needed.
- Return to normal operation in spring with a careful inspection.