What to Do with a Sump Pump in Winter: A Practical Guide
Learn practical steps to protect your sump pump during winter, including cleaning, testing, discharge checks, backup power options, and a simple maintenance schedule for cold months.

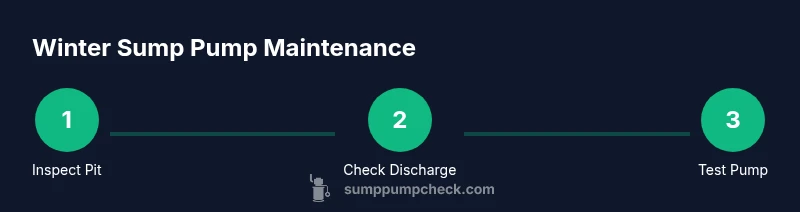
You can protect your sump pump in winter by cleaning the pit, testing operation, ensuring a clear discharge, and verifying power support. Check the float switch, inspect the outlet, and consider a battery backup for freezing areas. Track weather-related risks, such as freezing discharge lines and power outages, and plan proactive checks during cold snaps.
Why winter is different for sump pumps
Winter creates unique challenges for sump pumps. Freezing temperatures can slow or stop discharge lines, increasing the risk of backups. Power outages during winter storms may leave your pump without power, and ice or slush can clog intake screens. Understanding these realities helps homeowners decide what to do with sump pump in winter. This section explains common winter hazards and how they affect performance, emphasizing the need for proactive maintenance rather than reactive fixes. According to Sump Pump Check analysis, winter readiness reduces emergency calls and preserves basements from costly damage. A well‑prepared system keeps basements dry and protects home foundations during freezing conditions. By planning ahead, you can minimize the chance of a flood even when winter weather is harsh.
Winter prep checklist you can perform now
Before the cold hits, run through a practical checklist to reduce problems. Start by removing debris from the pit, verify the discharge route is clear, and confirm the power source is grounded. Use the following steps as a quick reference:
- Inspect the lid and seals; ensure gaskets are intact.
- Check the float switch for smooth operation.
- Inspect the discharge line for cracks or blockages and clear any ice buildup at the outlet.
- Prepare backup power options, such as a battery backup or a secondary pump if available.
- Keep towels and a bucket handy for any leakage during maintenance. Keeping notes of when you last checked helps you stay consistent. This preventative approach aligns with expert guidance from Sump Pump Check and reduces winter downtime.
How to test your sump pump and discharge path in cold weather
Testing in winter should be done carefully and methodically. Start with a visual check of the pump and its wiring, then perform a controlled test by slowly filling the pit with water until the pump activates. Observe the discharge path for any leaks, blockages, or backflow. Confirm the float switch rises freely and triggers the pump without sticking. If weather allows, run the system with a small, controlled water flow and watch for consistent operation. Always unplug the unit before inspecting or servicing components. This section helps owners understand not only what to test but why each test matters in cold conditions.
Common winter problems and practical fixes
Winter brings several recurring issues: frozen discharge lines, ice buildup around the pump intake, sediment/clog buildup, and occasional power outages. Fixes include insulating exposed discharge pipes, clearing ice at the termination point, installing a check valve to prevent backflow, and ensuring a reliable power supply. For outages, a battery backup pump can be a lifesaver. If you notice frequent cycling or beeping, address the root cause—blocked lines, failed float switches, or worn seals—before a flood potential develops. This section provides practical, hands-on strategies to keep water moving away from the home during winter weather.
Maintenance rhythm and safety reminders for winter
Adopt a simple winter maintenance rhythm to stay ahead of problems. Check the pump once a month during freezing weather, and perform a full test after major storms. Document findings so you can track changes over time. Safety reminders: always disconnect power before inspection, keep pets and children away from the pit, and ensure discharge areas are clear of snow and ice. A consistent routine reduces the chance of sudden failures and helps safeguard your basement from winter seepage.
Tools & Materials
- Plastic bucket(To catch draining water and debris)
- Rubber gloves(Protect hands from sludge and sharp edges)
- Flashlight/headlamp(For dim pits and inner housing)
- Screwdriver (Phillips #2)(To open housing or disconnect wiring if needed)
- Garden hose(Flush discharge line if accessible)
- Battery backup sump pump (optional)(Recommended for power outages or deep freezes)
- GFCI outlet tester(Verify power safety at the outlet)
- Old towels or rags(Contain minor spills during cleaning)
Steps
Estimated time: 60-90 minutes
- 1
Power down and prepare the area
Begin by unplugging the sump pump and, if safe, switch off the circuit leading to the unit. This prevents shocks while you inspect the housing, wiring, and lid. Have your bucket and towels ready to catch any residual water.
Tip: Never work on live electrical devices; double-check all power sources before touching wires. - 2
Remove debris and clean the pit
Sweep out leaves, sediment, and sludge from the sump pit. Rinse surfaces with water from the bucket, then dry with towels. A clean pit reduces the chance of debris clogging the pump during a cold spell.
Tip: Use a small brush or old towel to reach tight corners around the pump lip. - 3
Inspect and clear the discharge path
Trace the discharge line to its exit, ensuring there are no blockages or ice build-up near the outlet. If you can safely access the line, flush it with water to confirm free flow. Repair any cracks or loose fittings to prevent leaks.
Tip: Avoid forcing ice; instead, thaw sections with warm water if necessary. - 4
Test pump operation with a controlled fill
Pour water into the pit slowly to trigger the pump. Watch for consistent activation, proper pumping height, and steady water flow through the discharge. Stop the test if you notice smoke, burning smell, or unusual noises.
Tip: Keep hands at a safe distance and have a ready exit if the unit behaves erratically. - 5
Check float switch and power connections
Ensure the float switch rises and falls smoothly without sticking. Inspect cords and plugs for wear or corrosion and replace if needed. Confirm a secure ground and weatherproof connections.
Tip: Trigger the float manually if the automatic test is inconclusive to verify response. - 6
Consider backup power and winter upgrades
Assess the need for a battery backup or secondary pump in areas prone to outages. If feasible, install insulation around exposed pipes and discharge lines to minimize freezing.
Tip: Plan for a backup power solution before severe weather hits. - 7
Document results and schedule monthly checks
Record the test outcomes, any issues found, and the actions taken. Set a calendar reminder for a monthly winter check to catch problems early.
Tip: Keep a simple log—date, observations, and fixes—for quick reference next year.
FAQ
What should I do first before winter starts?
Start with a visual inspection of the pit, float switch, and discharge line. Clean the pit, clear the exit, and ensure the power outlet is safe and functional. This early prep reduces surprises when cold weather arrives.
Begin with a pit and discharge line check, then test safety features to prevent winter flooding.
Is a battery backup recommended for winter?
Yes. A battery backup provides protection during outages and reduces the risk of basement flooding when the mains fail in winter storms.
A battery backup adds an important layer of protection during power outages.
How do I know if the discharge line is frozen?
Check the exit area for visible ice buildup and perform a cautious water test to see if water flows freely away from the house.
If you see ice or water backing up near the exit, the line may be frozen and needs thawing or insulation.
Can I run my sump pump in freezing temperatures?
Yes, but ensure all connections are weatherproof, the outlet is protected, and the discharge line is free of ice to prevent damage or short cycling.
You can run it, but keep everything protected and free of ice to avoid problems.
When should I replace my sump pump for winter reliability?
If the pump frequently fails or shows reduced performance in cold weather, consider replacement rather than frequent repairs. Prioritize a unit with good cold-weather performance.
If reliability is slipping in winter, replacement is worth considering.
What safety precautions should I take while maintaining the unit?
Always unplug before inspection, avoid water contact with electrical components, wear protective gloves, and keep children and pets away from the work area.
Unplug first, wear gloves, and keep the area clear for safety.
Watch Video
Top Takeaways
- Prepare a winter-ready sump pump routine.
- Keep discharge paths clear and insulated.
- Test monthly and use a backup power option when possible.
- Document results to improve future winter readiness.