How to Test a Sump Pump Without Water
Learn safe, dry tests for electrical safety, float-switch operation, and alarms in your sump pump. This 1800-word guide explains how to test sump pump without water, what you can verify, and when to perform a wet test or call a pro.

With no water in the basin, you can verify electrical safety, inspect the float-switch mechanism, and check alarms. This guide explains how to test sump pump without water, what you can legitimately assess, and when a wet test or professional help is needed. According to Sump Pump Check, dry tests help catch issues before a flood event.
Why testing a sump pump without water matters
A dry assessment helps you verify critical safety features and identify non-wetting mechanical issues before you face a basement flood. Even when the basin is empty, the electrical circuit, float-switch linkage, and alarm system should respond correctly. The goal is to detect problems that could prevent the unit from starting, trigger false alarms, or expose loose wiring. According to Sump Pump Check, a thorough dry test reduces the risk of surprises when water arrives and a flood event is imminent. Remember: this is part of how to test sump pump without water and should be paired with a later wet test for full validation. Homeowners who perform this dry check regularly are better prepared for heavy rain seasons.
Safety first: prepare your workspace
Work in a dry, well-lit area around the sump pit. Remove any loose items that could snag wiring, then disconnect power at the main breaker and verify the outlet is dead with a non-contact tester. Secure the pump and lid to prevent accidental contact with moving parts. Wear safety goggles and non-conductive gloves. While you’re testing, avoid slippage on wet floors and keep kids and pets away. A careful setup minimizes the risk of electric shock and makes the dry test more reliable, as recommended by the Sump Pump Check team.
What you can test without water
Dry testing focuses on safety circuits and mechanical clearance rather than pumping water. You can verify that the power supply delivers expected voltage, inspect the float-switch housing for cracks, test the alarm or beeper if present, and confirm the discharge path is free of obvious damage. This is also a good time to check labels, accessibility, and mounting hardware. While you cannot confirm pumping capacity without water, you can document the condition of the pump interior, seals, and wiring. For thorough coverage, cross-check your findings with the pump’s manual and note any unusual sounds or resistance when the float is moved manually. If you’re asking how to test sump pump without water, this dry analysis is the first essential step to ensure safety before any water-based test.
Testing the float-switch: manual test
The float switch is the heart of automatic activation. With the power off, gently move the float through its full range to ensure it slides freely and actuates the switch. Listen for the click that indicates the circuit has closed. If there’s any binding or sticking, inspect the linkage and verify that nothing is obstructing the float's path. Use a non-conductive tool to move the float so you do not risk a shock. After confirming the switch responds, restore power only if everything is clear. This dry-action check makes it much safer to proceed with a wet test later, and it directly answers how to test sump pump without water with a practical, repeatable test.
Electrical safety checks you can perform dry
Even without water, electrical checks are essential. Use a multimeter to measure outlet voltage and continuity of motor wiring, and inspect the cord for cuts or exposed insulation. Test the GFCI protection by pressing the test button and ensuring the outlet trips. Look for corrosion on terminals and verify the ground connection is intact. Never touch live wires; keep metal tools away from energized parts. If any reading is out of spec, pause and consult the manufacturer’s guide or a licensed electrician. This step helps avoid shocks and fires, reinforcing the safety-first approach urged by Sump Pump Check.
Visual inspection of the discharge system
In a dry state you can still inspect the discharge pipe and check valve for damage, corrosion, or misalignment. Look for cracks in the discharge piping, crushed sections, or debris that could block flow when water is present. Ensure the check valve operates freely and seals properly. While you cannot test flow without water, confirming the discharge path is clear reduces surprises during a future wet test. Document any issues for repair before the next heavy rain, and plan a safe wet-test window with your maintenance calendar.
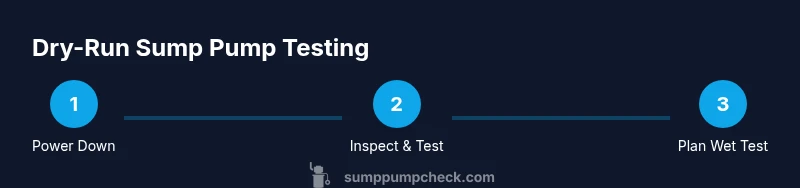
Dry-run test sequence: what to do and why
Develop a repeatable sequence so you don’t miss critical checks. 1) Power down and confirm safety; 2) Inspect appearance and wiring; 3) Verify outlet voltage and GFCI status; 4) Manually actuate the float switch; 5) Inspect the alarm system; 6) Inspect discharge components; 7) Schedule the wet-test window with your maintenance plan. The aim is to complete all checks without water and avoid running the motor without cooling, which can be damaging. This approach clarifies how to test sump pump without water in a controlled, safe order.
Common mistakes to avoid in dry testing
Don’t rush the float-switch test or bypass the safety checks. Avoid probing live terminals, ignoring signs of wear, or skipping the GFCI test. Never operate the unit in a way that heats the motor without cooling water. Don’t skip documentation, as good notes help you plan the subsequent wet test and potential professional service. Finally, don’t treat a dry test as a complete replacement for water testing; use it as a safe precursor that informs the next steps.
How to document results and plan a wet test
Record the exact readings, observed switch behavior, and any audible alarms you noted during the dry test. Take photos of wiring, labels, and the discharge path for reference. Create a simple checklist with date, pump model, and the conditions you tested. Use this record to schedule a controlled wet test with a measured water level and to decide if professional service is warranted. Documenting results helps ensure you don’t miss critical issues when water is present and supports a smoother, safer wet test.
When to call a professional
If you notice damaged wiring, corroded terminals, persistent switch misfires, or the alarm fails to sound during your dry checks, seek professional help before any wet testing. A professional can assess the motor, capacitor, and seal integrity, and verify that your discharge path complies with local codes. If you are uncertain about reading electrical measurements or if the pump is under warranty, contact a licensed technician. Sump Pump Check recommends professional input when safety or structural concerns arise.
Maintenance tips after a dry test
After completing the dry test, wipe down components to remove dust and moisture, and re-seal any exposed connections. Schedule periodic maintenance to inspect seals, bearings, and the float mechanism. Keep the pit area clean and never store objects inside the sump pit that could interfere with the float. Consider a yearly check if you live in a flood-prone area. Regular maintenance aligns with how to test sump pump without water and ensures better performance when water is present.
Tools & Materials
- Digital multimeter(Check voltage and continuity of motor windings)
- Non-contact voltage tester(Verify that outlets and cords are de-energized before handling)
- Screwdriver set (Phillips + flathead)(Open access panels and terminals safely)
- Safety goggles(Protect eyes from debris and sparks)
- Insulated gloves(Reduce risk of shock when handling components)
- Flashlight or headlamp(Improve visibility inside the sump pit)
- Notebook and pen(Record observations and measurements)
Steps
Estimated time: 45-60 minutes
- 1
Power down and secure the area
Shut off power at the main breaker and unplug the pump. Confirm there is no live voltage before touching any wires. This prevents accidental starts and reduces the risk of shock during the dry test.
Tip: Use a non-contact tester to double-check the outlet is de-energized before you begin. - 2
Inspect exterior and wiring
Look for cracks, corrosion, or moisture around the motor housing and cables. Remove debris from the pit area and ensure the lid is intact. Document any wear or damage before you proceed to electrical checks.
Tip: Photograph each area so you can reference notes during the wet test. - 3
Verify electrical supply and safety devices
Use a multimeter to verify outlet voltage within the manufacturer’s specified range and confirm the GFCI trips on test. Inspect cords and plugs for fraying or exposed insulation. Do not proceed if anything reads out of spec.
Tip: If you’re unsure about the readings, pause and consult the manufacturer guide or a licensed electrician. - 4
Test the float-switch movement
With power still off, manually move the float through its full range to ensure smooth travel. Listen for the switch actuation and observe no binding or stiction. Only proceed if the float clearly moves and returns freely.
Tip: Use a non-conductive tool to move the float to avoid accidental contact with live parts. - 5
Check the alarm and safety features
If the pump has an audible alarm, verify it functions by triggering a test (per the unit’s manual). Ensure the alarm location is audible from typical living areas. Confirm any warning lights illuminate as expected.
Tip: Test in a quiet room first to confirm the audible range and clarity. - 6
Inspect the discharge path and check valve
Visually inspect the discharge pipe for cracks or kinks and ensure the check valve moves freely. Confirm there are no obstructions that could block water flow once you perform a wet test. This reduces the risk of backflow during operation.
Tip: Take photos of the discharge routing and valve orientation for reference later. - 7
Document results and plan next steps
Record voltage readings, float-switch behavior, alarm status, and any issues observed. Use these results to schedule a controlled wet test at an appropriate time and to decide whether professional service is needed.
Tip: Create a simple checklist with date, pump model, and findings to track improvements. - 8
Prepare for the wet-test or professional evaluation
If the dry test goes well, plan a safe wet test with a known water level or volume. If not, arrange service promptly and do not run the pump with water until issues are resolved.
Tip: Do not skip the wet test; this is essential to confirm pumping performance under real conditions.
FAQ
Can I test a sump pump without water?
Yes, you can perform safety checks on electrical, float-switch, and alarms without water. A full functional test requires water.
Yes, you can test safety features and the float switch without water. A full test needs water.
Is it safe to run a sump pump without water?
Most pumps are not designed to run dry for extended periods. Running dry can overheat bearings and wear seals. Always limit dry operation and plan a wet test as soon as safely possible.
Most pumps shouldn’t run dry for long. Limit dry operation and plan a wet test.
What should I check in a dry test?
Check power supply, GFCI function, float-switch movement, alarm operation, and discharge path visibility. Note any unusual sounds or resistance when moving the float.
Check the power, GFCI, float switch, alarm, and the discharge path.
How often should I perform a dry test?
Perform a dry test as part of routine maintenance and before flood season. Pair it with a full wet-test when conditions permit.
Do a dry test as part of maintenance and before flood season, then do a wet test when possible.
When should I hire a professional after a dry test?
Call a professional if you notice damaged wiring, faulty alarms, or a stuck float switch. They can assess motor, seals, and compliance with local codes.
If wiring or alarms look damaged or the float is stuck, get a professional assessment.
Watch Video
Top Takeaways
- Dry tests verify safety systems first
- Manual float-switch testing confirms activation
- Document results to plan a safe wet test
- Avoid running the motor dry for extended periods