How to Check a Sump Pump to Ensure It's Working
A comprehensive, step-by-step guide to test and troubleshoot your sump pump, including safety checks, common issues, maintenance tips, and a practical maintenance schedule for reliable basement drainage.

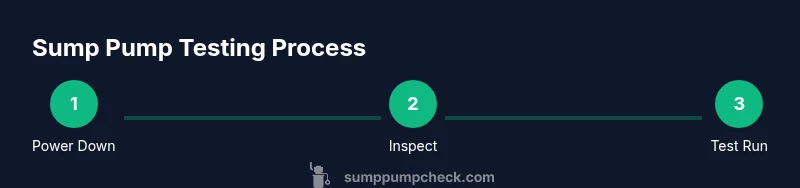
To check a sump pump and make sure it’s working, start with safety, then test power and response. Confirm the float moves freely, inspect the discharge path, and perform a controlled water test to trigger activation. This short checklist helps you identify obvious problems before a storm.
Understanding the Sump Pump System and Why Regular Checks Matter
If you’re asking how do you check sump pump to make sure working, the short answer is safety-first and a simple real-time test. Regular checks help you catch problems before they become floods, and they build confidence in your home's basement defense. A typical sump pump sits in a sump basin at the lowest point of a basement or crawl space, discharging water through a discharge line to a street, yard, or municipal drainage. There are two common configurations: submersible units, which live inside a sealed basin, and pedestal pumps, which stand above the pit. Each type has its quirks, but the core checks remain the same: inspect wiring and power, verify the float switch movement, examine the discharge path, and confirm the pump activates when water level rises. In this guide, we’ll cover practical, homeowner-friendly steps, plus warnings about safety and common mistakes. According to Sump Pump Check, routine checks can extend the life of components like the check valve and seals, and reduce the chance of nuisance beeping or failure during a storm.
What You’ll Inspect: Components and Configuration
Sump pumps are simple devices, but the surrounding plumbing adds complexity. The float switch detects rising water, the impeller powers water upward, the discharge line carries water away, and the check valve prevents backflow. The two main configurations—submersible and pedestal—each have access points and maintenance quirks. If you have a submersible unit, you’ll typically access the pump by removing the cover from the sump pit; pedestal units may require lifting the motor housing. Beyond the pump itself, inspect the power cord for cracks, the electrical outlet (ideally GFCI-protected), and the ground fault path. The drain or discharge line should be free of kinks and blockages, and the check valve should seal tightly to prevent water from falling back into the pit. A well-sealed lid or cover helps keep dirt out and prevents accidental contact with moving parts. This section helps you map your setup so you can tailor the test protocol to the exact model in your basement and the home’s drainage layout.
Safety First: Prepare Yourself and Your Space
Before you touch any electrical components or water, unplug the pump or switch off the circuit at the breaker. Wear rubber-soled shoes, use a flashlight, and keep pets and children away from the work area. If your sump has a backup pump or battery system, ensure those are de-energized until you’ve completed the primary test. Never work in a wet environment with exposed wiring. Having an absorbent mat, a bucket, and a towel helps, and a non-conductive tool like a plastic pry bar reduces the risk of accidental contact. This is also a good moment to check that you have a spare battery on hand if you rely on a backup system. Safety-first steps protect you, your property, and your equipment as you perform your checks.
Quick Pre-Test Checks You Can Do Without Running the Pump
Visually inspect the area around the sump pit: is there standing water, dampness on walls, or unusual odors? Look for signs of previous water intrusion, cracks around the pit, or corrosion on metal parts. Check the lid to ensure it’s properly seated; a loose lid can allow debris to enter and interfere with the float. Confirm the discharge path runs to a safe location and that the area around the outlet isn’t blocked by snow, ice, or vegetation. Verify the float has free movement: manually lift and lower the float or press on the float switch with a dry tool to ensure it moves smoothly without sticking. Also, test the power outlet with a small appliance to verify it’s live. This pre-check helps you decide whether to perform a full test with water and active monitoring.
Running a Live Test: Step-By-Step Narrative to Verify Operation
To test the pump under realistic conditions, slowly add water to the sump basin until the float rises and the pump engages. Observe the pump for eight to ten seconds to confirm it starts pumping water and that a steady stream exits the discharge line. Listen for the motor sound and check for any unusual vibrations, which may indicate a loose component or mounting. Watch the water level fall as the pump runs, and note how quickly the basin empties. If the pump runs but the water does not drain, inspect the discharge line for kinks or an air lock, and verify the check valve’s seal. After the test, power down the unit and let the pit refill to verify the safety shutoff and float reset. This live test confirms practical operability and helps you identify minor issues early.
Troubleshooting Common Issues and Quick Fixes
Sticking float: reseat the float or gently move it through its range to free a stuck mechanism. No power: verify that the circuit breaker is on, the GFCI outlet is not tripped, and the plug is fully inserted. Pump runs but water won’t discharge: check for an obstructed discharge line, a blocked vent, or a clogged check valve. Frequent tripping or beeping can indicate an underlying issue with the float switch, power supply, or the check valve. In some homes, a backflow issue may require re-piping or a higher discharge used. For backup pumps, regularly test the battery and charging circuits. Document symptoms and fix steps for future reference.
Maintenance Schedule and Long-Term Care
Create a quarterly quick-check routine and an annual deeper inspection. Schedule professional service every 2-3 years or when you notice persistent problems or unusual noises. Replace worn components like the float switch, check valve, and seals as recommended by the manufacturer. Keep records of tests and maintenance to spot trends and plan replacements before failures happen. A consistent schedule minimizes flood risk and extends the life of the pump.
Tools & Materials
- Flashlight (hands-free preferred)(Bright LED with extra batteries)
- Non-contact voltage tester(To verify power before touching wiring)
- Bucket(To collect water during the test)
- Gloves (rubber)(Water-safe gloves for grip and protection)
- Screwdriver set (flathead and Phillips)(For securing lid or access panels)
- Pliers(Useful for guiding hoses or wires if needed)
- Camera or smartphone(Document any issues for reference)
- Water source or hose(Optional if you want a larger test in some setups)
Steps
Estimated time: 30-45 minutes
- 1
Power down and safety check
Unplug the pump or switch off the circuit at the main breaker. Verify there is no live current using a non-contact voltage tester, and wear rubber-soled shoes. This prevents electric shock while you handle the sump pit and components.
Tip: Always double-check power with a tester before reaching into the pit. - 2
Inspect components and layout
Visually examine the float, discharge line, check valve, and power cord. Ensure the lid is secure and the pit is free of debris that could jam the float or block the line.
Tip: Take a quick photo of the setup to compare later after testing. - 3
Prepare water for testing
If your pit is low, fill the basin slowly to raise the float without splashing. Avoid overfilling; you’re aiming for a controlled rise to trigger the float.
Tip: Keep a bucket handy to control the amount of water you add. - 4
Power up and observe operation
Restore power and watch the float rise. The pump should activate within a few seconds and begin pumping water out of the basin.
Tip: Listen for a smooth motor hum and watch for any vibration that seems abnormal. - 5
Verify discharge and shutdown
Ensure water exits through the discharge line and that the pump shuts off when the water level falls below the float, resetting for the next cycle.
Tip: Lower the float manually to confirm a clean shutdown. - 6
Test backup and safety features
If you have a battery backup, simulate a brief outage to confirm the backup engages and recharges as expected. Note alarms or beeps and document any failures.
Tip: Check battery age and replace as recommended by the manufacturer.
FAQ
How often should I test my sump pump?
Perform a basic functional check every 3-6 months and after major storms. Keep a log of the tests to notice trends over time.
Test your sump pump every few months and after storms, keeping a simple log helps you spot issues early.
What does it mean if the pump runs but water doesn’t drain?
This usually indicates a discharge path or check valve problem. Inspect the line for blockages and confirm the valve seals properly.
If it runs but water won’t drain, check the discharge line and the check valve for blockages or leaks.
Can I test the sump pump with the power off?
Yes for basic float movement checks, but a full functional test requires power to verify activation and drainage.
You can check the float with power off, but the real test needs power.
What maintenance is recommended for a sump pump?
Clean the pit, inspect the float and check valve, lubricate if the manufacturer recommends, and replace worn seals as needed.
Regular cleaning, inspections, and replacements keep it reliable.
Is a backup sump pump worth it?
If you experience power outages or frequent heavy rainfall, a backup pump adds reliability and protection during storms.
A backup pump is worth it if outages or heavy rain are common in your area.
What safety precautions should I take?
Power off, wear PPE, and keep children and pets away from the testing area. Use non-conductive tools when near water.
Power off and protect everyone nearby during testing.
Watch Video
Top Takeaways
- Test safety first before touching anything electrical
- Verify float movement and discharge path during every check
- Use a controlled water test to confirm activation and drainage
- Maintain a maintenance schedule to prevent floods