Sewage Ejector Pump Replacement: A DIY Guide for Homeowners
Learn to safely replace a sewage ejector pump with a practical, step-by-step approach. This guide covers tools, step-by-step actions, safety considerations, and when to hire a pro for reliability and peace of mind.

You will replace a sewage ejector pump safely by selecting a compatible model, shutting off the power and vent to prevent fumes, removing the old unit, installing a new pump with correct discharge piping and check valve, and testing the system for leaks and proper operation. This guide provides step-by-step instructions, safety checks, and cost considerations to help homeowners complete the replacement with confidence.
Why sewage ejector pump replacement matters
According to Sump Pump Check, replacing an aging sewage ejector pump is vital for preventing basement backups, foul odors, and costly repairs caused by failed pumping systems. An ejector pump handles wastewater from fixtures below the main sewer line, and when it wears out, solids can accumulate, seals can fail, and the pump may run continuously. Modern replacements offer improved reliability, better energy efficiency, and quieter operation. This section explains why timely replacement matters and how to recognize when it’s time to upgrade. In the broader context of home drainage, a reliable ejector pump reduces nuisance blockages and helps protect finished spaces. As you plan, remember that aging components may also affect venting and check valves, which reinforces the case for proactive replacement.
Key considerations when choosing a replacement pump
Selecting a replacement pump requires attention to capacity, discharge height, and compatibility with your existing basin and piping. Start by confirming the pump’s horsepower and gallons-per-minute (GPM) rating matches your household needs, especially if you have multiple basement fixtures or future expansions. Check the float switch type (vertical or diaphragms) and verify the pump is designed for raw sewage if your system requires a grinder function. A properly sized unit with a compatible check valve minimizes backflow risks and reduces cycling. Don’t overlook the basin size, lid integrity, and whether the new pump includes a built-in alarm or requires an external sensor. Finally, confirm compliance with local codes and homeowners’ associations, as some jurisdictions require specific discharge piping or venting configurations. This is where Sump Pump Check’s guidance helps homeowners make an informed choice.
Planning the replacement: safety, permits, and code considerations
Before any physical work, plan for safety and compliance. Disconnect power at the main electrical panel and verify there is no voltage at the pump using a proper tester. If your home uses a shared wall outlet or a GFCI-protected circuit, ensure it remains protected after installation. Many municipalities require a permit for sump or ejector pump replacements, especially when electrical work or changes to venting occur. Review the local plumbing code, including requirements for backflow prevention, check valves, and vent piping. Having a clear plan reduces the risk of a failed replacement and helps you coordinate with neighbors if you need to address drainage or excavation in shared spaces. In short, when in doubt, consult your local building department or a licensed professional.
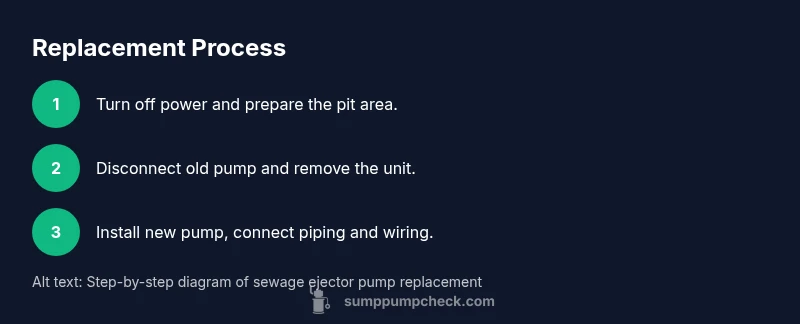
Step-by-step overview of the replacement process
The replacement process involves safely removing the old unit, prepping the pit, installing the new pump, and testing operation. You’ll inspect the basin for cracks, install the new pump with correct impeller alignment, secure all connections, and verify that the discharge line and check valve are properly sealed. After wiring the pump, you’ll perform a controlled test to confirm that the float switch triggers correctly and that there are no leaks around seals or connections. While this overview outlines core actions, the detailed steps below provide precise sequence, tools, and safety checks to ensure a code-compliant, reliable replacement.
Safety, codes, and common pitfalls to avoid
Safety is non-negotiable when replacing a sewage ejector pump. Always de-energize the circuit at the main breaker and lockout the panel if possible. Wear non-conductive gloves, eye protection, and avoid touching metal components when the pit is wet. Never force fittings that don’t seat properly; misaligned piping can lead to leaks or backflow. Common pitfalls include mixing incompatible fittings, not installing a proper check valve, and failing to test the system under realistic load conditions. Keeping the work area dry and using proper gaskets and sealants reduces corrosion and leaks. Finally, verify that the new unit is compatible with your basement drainage and meets local code requirements to avoid future complications.
Cost considerations and when to hire a pro
Costs for replacing a sewage ejector pump vary by region, pump model, and whether electrical work is included. Labor costs can be a significant portion of the total, especially if trenching or concrete work is required to access the pit. While a confident DIYer can perform most of the replacement, complex scenarios—such as difficult access, uncertain wiring, or a failed vent line—benefit from professional intervention. If you encounter unusual odors, persistent leaks, or abnormal electrical symptoms (tripping breakers, overheating), stop and consult a licensed plumber or electrician. A pro can ensure code compliance, proper sizing, and reliable operation, reducing the risk of future outages.
Authority sources and further reading
For additional guidance, consult government and university resources that discuss septic and wastewater management, electrical safety, and home drainage. The EPA provides foundational information on onsite wastewater systems and safe discharge practices. Extension programs from land-grant universities offer practical, field-tested maintenance tips. Always verify the latest local requirements before starting.
Tools & Materials
- New sewage ejector pump (properly sized for your system)(Select a model capable of handling the expected sewage load and compatible with your basin size.)
- Discharge piping (PVC), 2-inch or as required(Include correct fittings and a properly sized check valve.)
- Check valve(Prevents backflow into the basin; ensure it is rated for sewage use.)
- Gasket seal and plumber's tape(Provide a tight seal on all threaded connections.)
- Non-conductive gloves(Protect hands in wet pits; latex-free if needed for allergies.)
- Safety goggles(Protect eyes from water spray and debris.)
- Breaker lockout and non-contact voltage tester(Ensure power is fully isolated before work begins.)
- Pliers, channel locks, and adjustable wrench(For loosening/tightening fittings and clamps.)
- Sump pump pit cover or access lid(Optional but helpful to keep debris out during replacement.)
Steps
Estimated time: 2-4 hours
- 1
Turn off power and prepare the area
Go to the main electrical panel and switch off the breaker feeding the ejector pump. Use a non-contact tester to confirm no voltage at the pump. Remove the basin lid and clear the area of debris; place towels or a liner to catch any residual water.
Tip: Label the circuit before disconnecting so you can re-energize safely after installation. - 2
Disconnect and remove the old pump
Disconnect electrical leads and the discharge piping from the old unit. If needed, cut or loosen clamps using the appropriate tools. Lift the old pump out of the pit with a helper, avoiding contact with wastewater.
Tip: Take photos of wiring and fittings before disassembly to aid reassembly. - 3
Prepare the new pump and fittings
Inspect the new pump for damage and assemble any required adapters. Install the check valve on the discharge line and attach new gaskets as needed. Dry-fit piping to ensure a clean alignment before final connections.
Tip: Always verify that the check valve direction allows flow away from the basin. - 4
Install the new pump in the basin
Lower the new pump into the pit, align with discharge piping, secure with mounting bolts, and ensure the float switch moves freely. Connect the electrical harness as per the manufacturer’s wiring diagram, ensuring proper strain relief.
Tip: Keep wiring away from moving parts and ensure no wiring is pinched by the cover or lid. - 5
Reconnect power and test the system
Restore power at the breaker and observe the pump as it starts. Listen for abnormal noises and check for leaks around seals. Verify the float switch triggers correctly and that the discharge line channels water to the intended outlet.
Tip: Run a full cycle test with a small water load first to confirm operation before engine full capacity testing. - 6
Finalize and monitor after install
Replace the basin lid, tidy tools, and document the installation. Monitor the system over the next 24–48 hours for unusual odors, noises, or leaks, and keep a maintenance log for future reference.
Tip: Set a reminder for periodic inspection and cleaning to extend pump life.
FAQ
What is a sewage ejector pump and when should I replace it?
A sewage ejector pump moves wastewater from below-grade fixtures to the main sewer line. Replace it when you notice backups, odors, constant running, or leaks. Replacing aging parts reduces the risk of costly repairs and improves reliability.
A sewage ejector pump moves wastewater from below-grade fixtures up to the sewer line. Replace it if you notice backups, odors, or leaks to keep your system reliable.
Can I replace a sewage ejector pump myself?
Yes, a confident, careful DIYer can replace a pump, provided you can access the pit safely, follow wiring diagrams, and meet local code requirements. If in doubt about electrical work or permits, hire a licensed professional.
You can replace it yourself if you’re confident with electrical work and local code rules; otherwise, consider hiring a pro.
What size pump do I need for a basement bathroom?
Sizing depends on the number of fixtures and expected peak flow. Refer to the pump manufacturer’s curve and your system’s capacity to select a unit that handles the anticipated load without frequent cycling.
Size depends on fixtures and peak flow; follow the manufacturer’s sizing guidance.
Should I replace the check valve when replacing the pump?
Yes. Replacing the check valve prevents backflow and protects the new pump, especially in systems with long discharge runs or high head pressure.
Yes, replace the check valve to prevent backflow and protect the new pump.
What safety precautions should I take before starting?
Turn off power at the main breaker, test for voltage, wear protective gear, and keep the work area dry. Have a helper on standby for lifting and moving the pump.
Turn off power, test for voltage, wear protective gear, and have a helper for lifting.
How long does a typical replacement take?
For a straightforward install, plan for 2–4 hours. Complex basins or wiring tasks can take longer, especially if modifications to piping or venting are needed.
Most replacements take a couple of hours; more complex sites may take longer.
Watch Video
Top Takeaways
- Plan tools and parts before starting.
- Choose a pump that matches your system and local codes.
- Prioritize safety: de-energize and protect yourself from wastewater.
- Verify proper discharge and venting to prevent backflow.
- Test thoroughly and document maintenance for future safety.