Replace Ejector Pump: A Practical Homeowner Guide for Basements
Learn how to replace ejector pump safely and efficiently. This step-by-step homeowner guide covers tools, safety, selecting the right replacement, and post-install maintenance for reliable basement drainage.

This guide shows you how to replace an ejector pump in a basement ejector pit. You will need basic plumbing tools, a compatible ejector pump, safety gear, and a clean working area. Follow the steps to disconnect power, remove the old unit, install the new pump, reconnect plumbing, and test the system.
Assessing Your Ejector System Before Replacement
If you’re planning to replace ejector pump, start with a thorough assessment of the entire system. A failed ejector pump can lead to sewer gas entry, unpleasant odors, or basement flooding when the pit is not drained properly. According to Sump Pump Check, a careful evaluation before removing the old unit saves time, reduces risk, and helps you buy the right replacement the first time. Begin with the pit: is the lid intact, is the pit clean, and is there standing water? Inspect the current unit: is the housing corroded, the seal leaking, or the impeller damaged? Review the discharge path and check valve: is the valve set correctly (one-way flow), and is the piping free of cracks? Then look at the electrical side: is power on a dedicated circuit, are wires dry and protected from moisture, and does the float switch move freely without sticking? Finally, factor in local codes and permit requirements. Capture notes and photos to guide your purchase and installation plan: this reduces guesswork and keeps you aligned with safety standards.
Understanding Ejector Pumps and Key Components
An ejector pump, also called a sewage ejector pump, removes wastewater from fixtures that are below the main sewer line. Key components include the pump unit, a check valve on the discharge line, a vent or deodorizer to prevent sewer gases, the float switch that starts the pump, and the power connection. The pit lid, intake screen, and gaskets contribute to proper operation and odor control. When replacing, verify that the new pump has compatible horsepower (typically 1/2 HP for many homes), lift height, and a reliable check valve. Ensure the discharge pipe diameter matches existing piping to avoid flow restrictions, and consider a back-up option if your area experiences power outages or flood-prone conditions. Proper maintenance of the float switch, seals, and vent pathway will prolong the life of the new unit and reduce future call-backs.
Preparing for the Replacement: Safety, Codes, and Planning
Before touching any equipment, shut off power to the ejector pump circuit at the main panel and lockout the switch if possible. Wear protective gloves, eye protection, and work in a well-ventilated area to minimize exposure to sewage odors. Check local codes for pit access, venting requirements, and electrical grounding; many municipalities require a GFCI-protected outlet and a grounded metal enclosure. Plan the replacement in a dry period if possible to reduce water exposure. Have replacement parts ready, including the new pump, a compatible check valve, replacement gaskets, and PVC connectors. Document the pit dimensions, pipe sizes, and electrical conduit routes so you can purchase exactly what you need and avoid unnecessary trips to the hardware store.
Choosing the Right Replacement Pump and Accessories
Select a pump that matches the pit depth, piping size, and anticipated drainage load. For most residential basements, a 1/2 HP sewage ejector pump with a robust float switch provides reliable performance. Check the pump’s maximum head (lift height) to ensure it can reach the main sewer line, and verify that a suitable check valve is included to prevent backflow. Consider a corrosion-resistant impeller, stainless-steel fasteners, and a stainless-steel or plastic submersible pump housing. Accessories to consider include a new inlet screen, a backup power option, an automatic float switch timer, and a replacement riser or lid gasket. If you’re unsure about compatibility, consult a professional or reference the manufacturer’s specifications and your local code requirements.
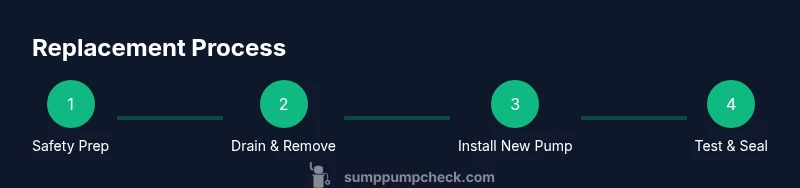
The Replacement Process: What to Expect
Carefully remove the old unit from the pit and prepare the space for the new pump. Install the new pump on the pedestal or base, ensuring it sits level and stable. Connect the discharge line to the check valve and ensure all joints are secure with appropriate PVC cement or solvent welding where required. Reconnect the venting path and ensure there are no blockages. Mount the float switch so it engages and disengages smoothly within the safe operating range. Reattach the power supply, restore power, and perform an initial test with a small water load to verify that the pump starts, pumps, and shuts off correctly. Monitor for leaks around the seals and verify that the discharge line runs properly to the main sewer or sump line.
Post-Installation Testing and Maintenance
Run a comprehensive test by introducing water gradually to confirm steady operation and auto-start behavior. Check for leaks around gaskets, fittings, and the check valve. Listen for unusual noises that may indicate misalignment or dry-running bearings. Install or confirm a functioning backup option if your system has one. Create a maintenance plan that includes annual inspection of the pit, cleaning the inlet screen, testing the float switch, and replacing corroded components before failure.
Common Issues and Troubleshooting After Replacement
If the pump fails to start, verify power, switches, and fusing, then confirm the float is not stuck. A noisy pump may indicate loose mounting, air in the line, or a misaligned impeller. If you see backflow, inspect the check valve and discharge line for blockage or improper orientation. Odors can point to venting issues or exhaust pathways; verify that the vent is clear and that the pit is sealed with a tight lid. Persistent issues after replacement often indicate a sizing mismatch or improper installation; in these cases, consult a professional.
Safety and Environmental Considerations
Dealing with sewage equipment requires prudent safety practices. Always use PPE and avoid skin contact with wastewater. Ensure that the pit area is well-ventilated and that electrical connections are GFCI-protected and moisture-protected. Environmental considerations include proper disposal of the old unit and any wastewater during testing, and following local guidelines for backflow prevention and odor control. Regular maintenance and timely replacement help protect both your home and the surrounding environment.
Maintenance Schedule and Long-Term Care
Establish a simple maintenance routine: inspect the pit monthly for standing water or odors, test the float switch quarterly, and perform a full functional test after heavy rainfall or power outages. Replace worn gaskets or seals at the first sign of leakage. Keep spare parts on hand, including a backup float switch and a replacement check valve, to minimize downtime. Regular checkups will extend the life of the ejector pump and improve reliability.
Tools & Materials
- New ejector pump (proper horsepower and head)(Ensure compatibility with pit depth and discharge piping)
- Check valve (if not included)(One-way flow to prevent backflow)
- PVC pipe sections and couplings(Match existing pipe sizes (typically 1-1/2)
- PVC primer and cement(For solvent welding joints)
- Flexible inlet hose or screen(To improve debris handling)
- Gasket set and seals(Keep leaks away)
- Electrical tester and PPE(Voltage tester, gloves, goggles)
- Waterproof sealant or mastic(Optional for extra sealing)
- Safety gear (gloves, goggles, boots)(Personal protection)
- Bucket and shop vacuum(For clean-up and water removal)
- Teflon tape for threads(Seal threaded connections)
Steps
Estimated time: 2-4 hours
- 1
Power down and secure area
Turn off the ejector pump circuit at the main panel and lock out the switch if possible. Verify there is no power by testing with a voltage tester. This prevents electrical shock and ensures a safe working environment.
Tip: Label the circuit to prevent accidental re-energizing during replacement. - 2
Drain and access the pit
If the pit contains water, use a pump or bucket to remove as much water as possible. Remove the lid or access cover to gain clear access to the pump and discharge connections. A dry work area reduces slipping hazards and makes connections easier.
Tip: Have a helper hold the cover to prevent it from slipping into the pit. - 3
Disconnect old pump
Unplug the power cord and loosen the discharge line from the check valve. If the wiring is hard-wired, disconnect the junction box and document wire colors for reassembly. Keep track of gasket locations.
Tip: Take clear photos of wiring and piping before disconnecting. - 4
Remove the old pump and clean the pit
Lift the old unit out of the pit carefully, and inspect the pit for debris or damage. Clean any sediment and wipe down the interior to prepare a clean mounting surface for the new pump.
Tip: Replace damaged pit components if present. - 5
Install the new pump and connect lines
Place the new pump on the pedestal or base, orient the outlet ports, and secure it. Connect the discharge line to the check valve, then attach the vent or deodorizer if applicable. Reattach wiring or plug-in power, ensuring dry connections and proper strain relief.
Tip: Use thread-sealing material and tighten fittings hand-tight plus a quarter-turn. - 6
Restore power and test
Power up the circuit and run a controlled test with water in the pit. Confirm the pump starts, discharges through the line, and shuts off cleanly. Check for leaks and verify no abnormal noises.
Tip: Test multiple times with increasing water to verify reliability.
FAQ
Do I need to replace the ejector pump if it still runs but leaks?
Yes. A leaking pump indicates a compromised seal or gasket, which can lead to wastewater exposure and backflow. Replacement is typically recommended rather than repair.
If it leaks, you should likely replace it to prevent odors or backflow.
How long does a typical ejector pump replacement take?
Most homeowners complete a replacement in 2 to 4 hours, depending on pit access, piping changes, and electrical work required. More complex setups may take longer.
Most replacements take a few hours, depending on access and wiring.
Can I replace the ejector pump myself, or should I hire a pro?
If you have basic plumbing and electrical skills and can shut off power safely, you can replace a standard ejector pump. Complex wiring or unfamiliar code requirements may justify hiring a licensed plumber or electrician.
You can DIY if you’re comfortable with plumbing and electrical work; otherwise, hire a pro.
What safety precautions should I take during replacement?
Wear PPE, ensure power is completely off, ventilate the space, and dispose of wastewater safely. Confirm that all electrical connections are GFCI-protected and dry before powering the system.
Wear PPE, shut off power, ventilate, and follow electrical safety rules.
What maintenance should follow after replacement?
Test the system monthly, inspect the pit for debris, clean the inlet screen, and check gaskets and the check valve annually. Replace worn parts promptly.
Test monthly, clean the inlet, check seals annually.
Will replacing the pump affect the sewer line or vent system?
Replacement should not affect the main sewer line or vent system if connections are correctly installed. Ensure venting is clear and the discharge path remains compliant with local codes.
If installed correctly, it won't affect the sewer line or vent system.
Watch Video
Top Takeaways
- Plan replacement with a clear checklist and measurements.
- Verify compatibility: horsepower, head, piping, and valve.
- Test thoroughly and maintain a schedule to prevent future failures.
- Always follow safety and local code requirements.