How Long to Replace a Sump Pump: A DIY Guide
Discover how long a sump pump replacement typically takes, the factors that influence timing, and a practical step-by-step approach for a safe, reliable install.

How long does it take to replace a sump pump? Typical residential replacements run about 1 to 4 hours, influenced by pit access, pump type, and whether you upgrade related parts. According to Sump Pump Check, most skilled DIYers plan for 2-3 hours for a straightforward swap, with extra time for backups or piping changes.
Why Replacement Time Varies
Replacement time isn’t a fixed number. It changes with pump type (submersible vs pedestal), horsepower, discharge piping complexity, access to the sump pit, and whether you replace related components such as the check valve, float switch, or battery backup. A straightforward, well-prepared replacement on a standard basement sump pit often takes about 1 to 3 hours, while adding upgrades like a back-up sump pump or rerouting discharge lines can push total time toward 4 hours. According to Sump Pump Check, most residential installs fit within a predictable window when tasks are planned in advance and the right tools are on hand. If the pit is cramped, the home has limited access, or you must work around other utilities, plan for longer. Understanding these variables helps homeowners schedule downtime and avoid rushing critical safety steps.
Key Factors That Affect Job Time
Several elements determine how long a replacement takes. Access to the pit is critical: crowded areas, clutter, or pits located under fixed objects add time. The pump type matters: pedestal pumps sit higher and may require more clearance, while compact submersible pumps can fit in tighter pits. The condition of wiring and outlet proximity also matters: if a dedicated GFCI or circuit needs upgrading, electricians may be needed and time increases. Replacing ancillary components—check valves, discharge piping, union fittings, and optional battery backups—adds materials prep and testing time. Finally, the installer’s experience and familiarity with local codes influence efficiency. A confident DIYer who tests the system incrementally reduces last-minute issues and rework.
Preparations That Save Time
Before you touch tools, create a practical plan. Confirm you have the correct pump size and model, the right discharge pipe diameter (commonly 1-1/2 inch or 1-1/4 inch), and a compatible check valve. Buy any extras in advance—battery backup, float switch, piping, and fittings. Clear the work area, turn off the power at the panel, and unplug the sump’s plug. Test the area for water presence and arrange a helper if possible. Prepare a temporary catch basin or towels to control drips, and arrange a convenient disposal plan for the old unit. Finally, review installation instructions for your specific model to avoid surprises and ensure a smooth swap.
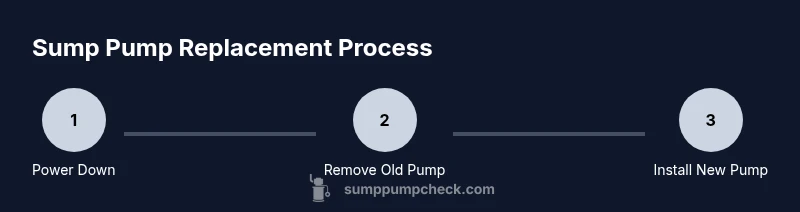
Typical Replacement Process Overview
Replacing a sump pump involves several stages: safety setup, removal of the old unit, pit cleaning, installing the new pump, plumbing connections, electrical wiring, and system testing. Start by shutting off power at the circuit breaker and confirming a no-voltage condition. Lift the old pump from the pit, inspect the pit for sediment, and clean as needed. Install the new pump on its base, attach the discharge pipe and check valve, and ensure proper alignment and slope so water flows away from the foundation. Then connect the power, plug into a GFCI outlet, and run multiple test cycles to verify float operation and leak-free joints. Following this methodical sequence minimizes surprises and ensures the new pump starts correctly when storms arrive.
What Might Slow You Down
Delays often come from stubborn clamps, corroded discharge fittings, or worn-out check valves. If your home has multiple levels or tight bends in the discharge line, routing can take longer. In cramped pits, you may need to move nearby items to gain access or temporarily remove a panel. Electrical work can extend timelines if a dedicated outlet is required or if code upgrades are needed. If you plan a battery backup, coordinate charger wiring and ensure it integrates with the primary unit. Anticipating these obstacles helps you stay on schedule.
Choosing the Right Sump Pump for Replacement
Selecting a replacement that fits your home starts with the pit size, water load, and noise tolerance. Decide between submersible and pedestal styles based on your pit dimensions and accessibility. Check the pump’s horsepower and flow rate (GPM) to ensure it handles your basement's water volume during heavy rains. If power outages are common, add a battery backup. Ensure compatibility with your existing discharge piping size, and consider a built-in alarm for early warning. Review warranty terms and local code requirements for safe operation in basements, and choose a model with a longer service life where possible.
Electrical Safety, Permits, and Cost Considerations
Electrical safety is critical when replacing a sump pump. Always shut off power at the circuit breaker before starting work, and use a GFCI outlet near the sump for moisture protection. If wiring upgrades are needed, hire a licensed electrician to avoid shock or fire hazards. Some jurisdictions require permits for plumbing or electrical work; check with your local building department before you start. The cost of replacement includes the new pump, any accessories, and labor—there are broad ranges depending on the complexity and components chosen. Plan for parts plus labor, and consider whether you’re replacing only the pump or upgrading related parts. For authoritative guidance, see OSHA, Extension services, and EPA resources:
- https://www.osha.gov
- https://extension.psu.edu
- https://www.epa.gov
Tools & Materials
- Sump pump (new or replacement unit)(Choose a model with the appropriate horsepower and flow rate for your basement load)
- Discharge pipe (1-1/2 inch or 1-1/4 inch)(Ensure length and fittings match the pit to exterior outlet)
- Check valve(Required to prevent backflow; compatible with discharge pipe size)
- Float switch (if not included with pump)(Mounted to trigger pump on rising water)
- PVC cement and primer(For secure pipe joints; allow curing time per product instructions)
- Silicone sealant or gasket(Optional sealant at seals to reduce leaks)
- Power tools (screwdriver, pliers, adjustable wrench)(Essential for mounting and connections)
- Non-contact voltage tester(Verify power is truly off before handling wiring)
- Towels, rags, bucket(Contain drips during removal and testing)
- GFCI tester (optional)(Helpful to confirm outlet protection during testing)
Steps
Estimated time: 2-4 hours
- 1
Power down and safety check
Shut off the circuit breaker feeding the sump pump and unplug the unit at the outlet if accessible. Use a non-contact tester to confirm there is no voltage present before touching any wiring. This protects you from shocks during removal and installation.
Tip: Double-check the main panel; water can backfeed if another circuit shares a neutral. - 2
Disconnect and remove the old unit
Carefully detach the discharge pipe and any clamps or fittings. Unplug the pump, then lift it from the pit using a stable stance. Inspect the pit for sediment and wipe it clean before placing the new pump.
Tip: Take a quick photo of how hoses and wires were routed to aid reassembly. - 3
Prepare the new pump and piping
Attach the check valve to the discharge pipe and dry-fit the piping to ensure proper alignment. Trim any pipe extensions as needed and cut clean, square ends for tight seals. If using a battery backup, verify wiring paths and space.
Tip: Measure twice; small misalignment will cause leaks or poor drainage. - 4
Install the new pump in the pit
Place the pump on its base and ensure it sits level. Connect the discharge pipe to the pump outlet, and secure clamps. Make sure the depth in the pit allows the float switch to move freely without catching on the pit rim.
Tip: Avoid hasty tightening; overtightening can crack fittings. - 5
Reconnect power and discharge connections
Wire the pump to a GFCI-protected outlet or direct circuit, following the manufacturer’s wiring diagram. Reinstall any safety clamps and ensure all connections are snug and dry. Reattach the discharge piping, ensuring a clean slope away from the foundation.
Tip: If you’re uncertain about wiring, pause and consult a licensed electrician. - 6
Test, inspect, and finalize
Fill the pit with water to actuate the float and confirm the pump starts reliably. Check for leaks along all joints, and listen for unusual sounds. Once satisfied, wipe the area dry and perform a final visual inspection of cords and connections.
Tip: Run multiple test cycles to validate performance under varying water levels.
FAQ
How long does a typical sump pump replacement take?
Most residential replacements take between 1 and 4 hours, depending on pit access and wiring. A well-prepared DIYer often lands in the 2-3 hour range. Allow extra time for upgrades like a battery backup.
Most sump pump replacements take 1 to 4 hours, depending on access and wiring. Plan for 2 to 3 hours for a straightforward swap.
Can I replace a sump pump myself, or should I hire a pro?
If you’re comfortable with basic plumbing and electrical work and can safely access the pit, a DIY replacement is feasible. For complex pits, unusual wiring, or updates to permits, hiring a licensed professional is safer and may save time in the long run.
You can DIY if you’re comfortable with plumbing and electrical work; otherwise, a pro is safer and could save time.
What tools do I need for a sump pump replacement?
You’ll need common hand tools (screwdrivers, pliers, adjustable wrench), a non-contact voltage tester, PVC cement, a new discharge pipe, check valve, and a replacement pump compatible with your pit size.
Have basic tools, a tester, PVC cement, a new discharge pipe, a check valve, and the right pump ready.
Should I replace the discharge pipe and check valve at the same time?
Yes. Replacing both at the same time ensures proper flow direction and reduces future leaks. It also helps prevent backflow and extends overall system reliability.
Yes—replace the discharge pipe and check valve together to prevent leaks and backflow.
What maintenance should I perform after replacement?
Test the pump with several cycles, inspect joints for leaks, and verify the float engages correctly. Keep the pit clean and check periodically for sediment buildup.
Test multiple cycles, check for leaks, and keep the pit clean after replacement.
Watch Video
Top Takeaways
- Plan for 2-4 hours in typical replacements.
- Gather all parts before starting to avoid trips to the hardware store.
- Verify electrical safety and proper discharge routing before testing.
- Consider a battery backup for power-outage resilience.