Can I Replace a Sump Pump Myself? A Practical DIY Guide
Can I replace a sump pump myself? This guide covers feasibility, essential tools, a step-by-step workflow, safety tips, and when to call a professional—trusted guidance from Sump Pump Check.

Can you replace a sump pump yourself? For most homeowners with basic electrical safety know-how and plumbing confidence, it’s doable, but only if you understand local codes, shut off power, and follow the right steps. This guide covers when to DIY, required tools, step-by-step actions, and essential safety warnings. According to Sump Pump Check, proper planning reduces risk and ensures a reliable replacement.
Is DIY Sump Pump Replacement Right for You?
Replacing a sump pump is a project that many homeowners can tackle, but it isn’t a one-size-fits-all task. If your pit is easily accessible, you have a safe, conveniently located power source, and you’re comfortable with basic electrical and plumbing tasks, you can save money and time by replacing it yourself. However, if you’re unsure about wiring, or if the pump is part of a larger drainage system covered by a warranty, it’s wise to pause and consider professional help. According to Sump Pump Check, the decision hinges on readiness, the complexity of your setup, and the potential risk to your basement. Begin with a clear scope: identify your discharge path, measure pipe diameters, and confirm the compatibility of the replacement unit with your pit dimensions. A well-planned DIY project reduces risk and yields a reliable result, but rushing a replacement can lead to leaks, backflow, or water damage.
This section emphasizes real-world decision points homeowners face before picking a DIY path. If you decide to proceed, you’ll find practical steps, safety checks, and a comprehensive parts list later in this guide. Remember: the goal is a safe, effective pump that protects your basement without creating new problems.
Safety First: Electrical, Water, and Local Codes
Electrical safety is non-negotiable. Always de-energize the circuit containing the sump pump at the main panel, then verify with a voltage tester before touching any wires. Use a GFCI-protected outlet wherever possible, and ensure the work area remains dry. Local codes may require certain wiring practices or professional installation for specific components; if you’re unsure, contact your local building department or a licensed electrician for guidance. PPE such as gloves and eye protection should be worn throughout the project. A successful replacement relies not just on the pump but on safe, aligned electrical and plumbing work that complies with code requirements. This approach protects you and preserves any manufacturer warranties that depend on proper installation.
In this section we outline the essential safety checks and code considerations that shape a DIY plan. Understanding these prerequisites helps you avoid common mistakes that trigger leaks or electrical hazards.
Components and Compatibility: What You Need to Know
Before purchasing a replacement, know the pump type (submersible vs pedestal), the horsepower rating, and the inlet/outlet sizes to match your existing system. Check the discharge diameter and ensure your piping can be adapted without creating sags or leaks. A constant-flow discharge path away from the foundation is critical. If your current setup includes a check valve, confirm it’s the correct orientation and size for the new pump. If you’re replacing a pump with different dimensions, you may need adapters or new piping. Matching these specs helps prevent pairing a pump that cannot be properly installed or will underperform under heavy groundwater conditions. A well-chosen model also improves long-term reliability and reduces maintenance needs.
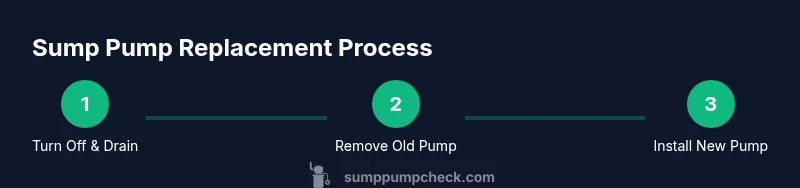
A High-Level Replacement Workflow (Overview)
This overview gives you a realistic sense of the process without replacing the formal STEP-BY-STEP section. Start by confirming you have the right pump model and replacement parts, then plan the siting of the new unit and the routing of the discharge line. A successful install requires securing the new pump to the pit floor or sump well, connecting the inlet and outlet pipes with proper seals, and verifying electrical connections are safe and compliant. Finally, test the system with water and observe the pump’s cycling and discharge path to ensure there are no leaks and that water is moved away from the foundation. This approach minimizes surprises during the actual step-by-step replacement and reduces the chance of inadvertently creating new issues during installation.
Common Pitfalls and How to Avoid Them
Rushing the installation is a frequent source of problems. Common mistakes include misaligned or loosely sealed discharge piping, neglecting to install or re-seat the check valve, and failing to de-energize the circuit before handling wiring. Another frequent error is choosing a higher horsepower pump than needed, which can lead to short cycling or unnecessary wear. To avoid these issues, measure precisely, photograph connections before disassembly, and perform a controlled test after installation. Keeping the sump area dry, clean, and free of debris also helps the pump operate efficiently and reduces the risk of clogs.
When to Hire a Pro and Warranty Considerations
If your system includes hard-wired connections, a non-GFCI outlet, or a warranty that specifies professional installation, it may be wiser to hire a pro. Some manufacturers require professional installation to activate warranty coverage, and improper wiring or piping can invalidate guarantees. If you lack confidence with electrical work, or if the sump’s location is problematic (e.g., tight pit, complex drainage), a licensed plumber or electrician can ensure a safe, code-compliant installation. Even when DIY is feasible, a professional inspection after completion can provide peace of mind and catch issues you might miss.
Aftercare: Maintenance and Next Steps
Once replacement is complete, establish a simple maintenance routine to maximize the life of your sump pump. Regularly test the unit by pouring water into the pit and listening for proper cycling. Check the discharge pipe for leaks and ensure the outlet remains dry and accessible. Consider adding a battery backup or a water sensor if your area experiences power outages or frequent weather-related flooding. A consistent maintenance habit helps you catch problems early and extend the pump’s life. As you proceed, document your installation details (pump model, date, and any fittings) to support future servicing and warranty claims.
Authority and Further Reading
For safety standards and best practices, consult authoritative sources such as OSHA for electrical safety guidelines, NFPA for fire and electrical protection standards, and EPA resources on water safety and drainage. These sources provide broad guidance that informs any DIY sump pump project and helps you plan a safe, code-compliant installation.
Authoritative Sources
- OSHA: https://www.osha.gov
- NFPA: https://www.nfpa.org
- EPA: https://www.epa.gov
These references offer safety guidelines and general best practices that support DIY plumbing and electrical work in wet environments.
Tools & Materials
- Replacement sump pump (matching size/type)(Ensure inlet/outlet align with existing piping)
- Check valve(Prevents backflow; ensure correct orientation)
- Discharge piping (PVC or flexible hose)(Adequate length to clear foundation; avoid kinks)
- Pipe wrench / adjustable wrench(For tight fittings)
- Screwdrivers (Phillips and flathead)(Mounting hardware and clamps)
- Teflon tape and pipe sealant(Water-tight threads)
- PVC glue and primer (if using PVC)(Secure joints when needed)
- Voltage tester(Verify power is off at the circuit)
- GFCI outlet or weatherproof power strip(Safe, grounded power source)
- PPE: gloves, eye protection(Personal protective gear)
- Bucket or towels(Catch residual water)
- Wet/dry vacuum or siphon(Cleanup and dry pit area)
- Marker or tape(Label pipes for reassembly)
Steps
Estimated time: 60-120 minutes
- 1
Turn off power and drain the pit
Begin by locating the sump circuit on your main breaker panel and switch it off. Use a voltage tester to confirm there is no electrical current in the pump’s cord or outlet. Place a bucket or towels under the pit to catch any residual water as you prep the area for work.
Tip: Double-check the power is off at the breaker before touching any wires; even a small residual voltage can be dangerous. - 2
Disconnect and lift out the old pump
Loosen the pump fasteners and detach the electrical cord from the outlet. Remove any clamps or brackets securing the unit, then carefully lift the pump out of the sump. Take a quick photo of how hoses and wires were connected for reference when reinstalling the new unit.
Tip: Photos are invaluable if you’re unsure about how connections were made; use them to guide the new installation. - 3
Inspect the pit and prepare the new pump
Examine the sump basin for cracks, slime, or debris and clean as needed. Compare the new pump’s intake, outlet, and dimensions to the pit. Mark the discharge routing and confirm that the check valve fits the existing piping geometry.
Tip: A clean pit reduces clog risk and helps ensure a proper seal between components. - 4
Install pump bracket and check valve
Position the new pump on its mounting bracket or base. Install the check valve in the discharge line, oriented so water can exit but cannot flow back in. Secure the valve with clamps or threaded connections, ensuring no cross-threading.
Tip: Always verify flow direction on the check valve before tightening—backflow defeats the purpose. - 5
Attach discharge piping and fittings
Connect the discharge pipe to the pump outlet using appropriate adapters, tape, or sealant. Route the piping away from the foundation to a safe drainage area, and ensure there are no kinks or sagging that could impede flow.
Tip: Use rigid pipe where possible to avoid sagging; flexible hoses can collapse under pressure. - 6
Make electrical connections safely
Plug the pump cord into a GFCI-protected outlet or install a weatherproof outlet near the sump. If wiring is required, follow local code requirements or hire a licensed electrician for hard-wiring. Do not mix corded and hard-wired configurations in the same setup.
Tip: Never work on electrical connections when the area is wet; keep tools dry and use a ground-fault protected path. - 7
Test the system and finalize cleanup
Pour water into the pit to test the pump operation and listen for proper cycling. Check for leaks around fittings and ensure the discharge stream is clear of the foundation. Dry the area and tidy tools; document pump model and install date for maintenance records.
Tip: Run the pump a few cycles to ensure reliability before removing all protective coverings.
FAQ
Is it safe to replace a sump pump yourself?
Yes, it’s safe if you thoroughly follow electrical safety steps, wear PPE, and comply with local codes. If you’re unsure about wiring or warranties, consult a pro.
Yes, it can be safe to DIY, but only if you follow safety steps and codes; consult a pro if unsure.
What tools are required for a DIY sump pump replacement?
You’ll need the replacement pump, a check valve, piping, wrenches, tape, PPE, a voltage tester, and a safe power source.
Essential tools include the new pump, check valve, piping, and safety gear.
How long does a typical DIY sump pump replacement take?
Most replacements take about 1–2 hours, depending on pit access and piping complexity.
Expect roughly an hour or two for a standard replacement.
Can I reuse my old discharge piping with a new pump?
You can reuse piping if fittings match and are in good condition; otherwise, upgrade to compatible PVC.
You can reuse piping if it’s in good condition and matches the new pump.
Should I install a battery backup with my replacement?
Battery backups increase resilience during power outages and are highly recommended in flood-prone areas.
A battery backup can be a smart addition, especially where outages are common.
Watch Video
Top Takeaways
- Assess your DIY feasibility before starting.
- Always de-energize and verify power after wiring changes.
- Verify check valve orientation and discharge routing.
- Seek professional help for electrical or warranty concerns.