How to Stop Sump Pump Gurgling: DIY Guide
Learn proven steps to stop sump pump gurgling with safe DIY fixes, maintenance tips, and when to call a pro. Troubleshoot discharge lines, vents, and valves to quiet your basement today.

By the end, you’ll know how to stop sump pump gurgling and restore quiet operation around your basement. This guide covers the most common causes, essential tools, and safe DIY steps you can perform before calling a plumber. Follow the step-by-step instructions to diagnose, fix, and prevent future gurgling.
What causes sump pump gurgling and when to worry
If you’re wondering how to stop sump pump gurgling, you’re not alone. This common basement issue often stems from air pockets, improper venting, or pressure changes in the discharge line. Common culprits include air entering the line, a clogged vent, an aging or misaligned check valve, or a partial blockage that causes the pump to work harder and create a bubbling, gurgling sound. While the sound is annoying, it can also signal backflow risks or water hammer in nearby plumbing. By diagnosing the source, you can apply a targeted fix rather than a full replacement. The Sump Pump Check team notes that early identification saves time and money, and reduces potential flood risk.
According to Sump Pump Check, start with non invasive checks and only escalate to valve and vent adjustments if initial steps don’t quiet the system.
Quick diagnostic checklist to identify the noise source
Many gurgling sounds originate in the discharge path, but some stem from the pit’s internal air handling. Start by listening at the discharge line outside the house, then check inside the sump pit for standing water levels, debris, or signs of air being trapped. A helpful rule of thumb: if the gurgle coincides with a pump cycle, air pockets or a venting issue are likely. If the sound occurs while water enters the pit, the discharge path and backflow preventer are common suspects. Sump Pump Check emphasizes a systematic approach: isolate each component, test, and observe changes to confirm the root cause.
Inspecting the discharge line and check valve for proper operation
The discharge line should run freely from the sump to a designated exterior exit without kinks or sharp bends. A clogged line, frozen sections, or a poorly sealed check valve can cause air to back up into the system, producing gurgling. Inspect clamps, joints, and the valve itself for wear or sticking. If the valve is old, dirty, or installed backward, your gurgling may persist despite other fixes. Cleaning or replacing a faulty valve can dramatically reduce noise and improve drainage efficiency. When in doubt, replace the valve with a compatible model and ensure proper orientation.
Air pockets, venting, and the role of plumbing vents
Ventilation is critical to prevent negative pressure and air pockets that cause gurgling. If your home’s vent system is blocked, undersized, or improperly connected, air can be drawn into the sump system during pump cycles. Inspect the vent path from the sump pit to the exterior, ensuring there are no blockages and that the vent line is properly pitched. In some cases, an additional air vent or air admittance valve can help, especially in basements with long drain runs. Proper venting reduces suction, minimizes air ingestion, and quiets the system.
Clogged discharge lines and gravity-based blockages
Partial blockages in the discharge line can cause the pump to push against resistance, leading to gurgling as air and water compress and release. Inspect the entire length of the line for leaves, sediment, or built up mineral deposits. Flush the line with clean water or a gentle blast from a hose to clear obstructions. If the line runs underground or through a roofline, check for frozen sections in winter and thaw as needed. Regular maintenance helps prevent recurring gurgling from debris accumulation.
Checking the pump’s intake and pit cleanliness
A clogged or restricted intake can create air bubbles and a louder pump sound. Empty the sump basin, remove visible debris, and rinse the interior walls. Ensure the sump’s float switch operates freely; a stuck float can cause intermittent pumping and erratic noises. Keep the basin clean and free of silt, mud, or fibrous materials. Regular cleaning not only reduces noise but also prolongs pump life and improves efficiency.
When to replace components rather than patch the issue
If the gurgling persists after cleaning and valve checks, you may be dealing with worn seals, a degraded check valve, or an aging pump that can’t maintain proper flow. Replacement parts are often cost-effective and reliable compared to repeated repairs. Consider upgrading to a modern pump with a better seal, a properly sized discharge line, and a maintenance-friendly design. Sump Pump Check’s guidance suggests evaluating the pump’s age, cycle frequency, and current performance to decide on replacement.
Quick DIY fixes you can safely try this weekend
- Unplug the pump and remove debris from the basin. Reconnect and test with a controlled amount of water.
- Inspect and tighten discharge line clamps; reseat the check valve in the correct orientation.
- Clear any visible vent blockages and ensure proper venting slope.
- If safe to do so, rinse the line with a hose to remove mineral buildup.
If the noise persists after these steps, plan a more thorough inspection or professional help. Safety first: never work on an energized sump pump or exposed electrical components.
Maintenance routine to prevent future gurgling
Creating a simple maintenance schedule can prevent future gurgling and extend pump life. Perform a monthly visual inspection of the pit, discharge line, and venting; a quarterly water test can verify that the pump cycles smoothly. Annually replace worn components like the check valve and seals, and flush the discharge line. A regular maintenance habit reduces the chance of backflow, back pressure, and annoying gurgling sounds.
Tools & Materials
- Basic safety gear (gloves and eye protection)(Protect hands and eyes during cleaning and parts replacement)
- Voltage tester or multimeter(For safety when handling electrical connections)
- Screwdriver set (Phillips and flat)(For removing clamps and screws)
- Adjustable wrench and pliers(Torque fittings and clamps without damage)
- Bucket and towels(Catch water and keep the area dry)
- Replacement check valve kit(Buy one compatible with your pump model)
- PVC cutter or saw(Needed if you replace discharge line sections)
- PVC primer and cement(Use for new pipe connections)
- Wet/dry vacuum(Clean sediment from the sump basin)
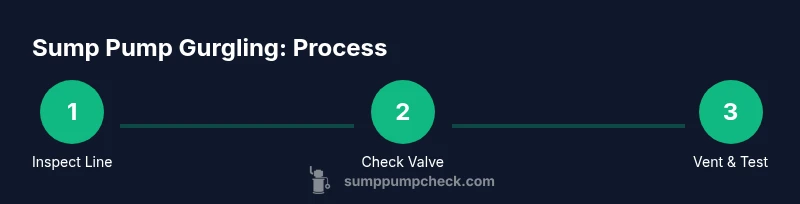
Steps
Estimated time: 60-90 minutes
- 1
Power down and prep the sump area
Unplug the sump pump and switch off any circuit breakers if present. Wear safety gear, and remove debris from the pit to create a clear workspace. This prevents accidental shocks and ensures you can inspect components safely.
Tip: Double-check that the power is fully disconnected with a tester before touching electrical parts. - 2
Inspect the discharge line for blockages
Trace the line from the sump to the exterior outlet. Look for kinks, clogs, or frost in winter. Clear debris, flush with water, and recheck for smooth flow.
Tip: Use a garden hose with mild pressure to dislodge buildup; avoid forcing items that could damage the line. - 3
Check the valve orientation and clean or replace
Inspect the check valve for wear, sticking, or improper seating. Clean the valve seat, remove buildup, and reinstall in the correct orientation. Replace if the valve shows signs of damage or leakage.
Tip: Mark the valve orientation before removal so you can reinstall it correctly. - 4
Evaluate venting and air pockets
Inspect any vent lines for blockages and ensure they are properly pitched toward the outside. If no vent is present or if venting is poor, consider adding an air admittance valve or upgrading venting as needed.
Tip: Vent modifications may require professional approval depending on local codes. - 5
Test with controlled water and observe
Pour water into the sump to simulate a full cycle and listen for changes in sound. Note whether gurgling stops after valve/line adjustments. Re-check for backflow signs or irregular cycling.
Tip: Document the sound changes to track improvements over time. - 6
Decide on next steps
If gurgling persists after these steps, consider replacing components or the entire pump. Schedule a professional assessment if you’re unsure about electrical safety or plumbing modifications.
Tip: Plan for a preventive maintenance window and have replacement parts ready.
FAQ
What causes sump pump gurgling?
Gurgling is usually due to air in the discharge line, venting problems, a faulty check valve, or a partial line blockage. Diagnosing the exact cause requires testing each component in sequence.
Gurgling often comes from air, venting, a bad valve, or a partial blockage in the discharge line.
Is sump pump gurgling dangerous?
Gurgling isn't always dangerous, but it can signal backflow risk or drainage problems that could lead to leaks or flooding if left unchecked.
Not always dangerous, but it can indicate backflow or drainage issues you should fix.
Can I fix gurgling without professional help?
Many causes can be addressed with basic tools and careful steps, such as clearing blockages, cleaning the valve, and improving venting.
Yes, many fixes are doable yourself with the right precautions.
When should I replace the sump pump because of gurgling?
If the issue persists after fixes or if the pump is old and failing, replacement may be more reliable and cost-effective than repeated repairs.
If it keeps gurgling after fixes or the pump is aging, replacement may be best.
How can I test that the gurgling is resolved?
Run a controlled water test and observe the discharge and sound. Check for backflow signs and ensure the pump cycles smoothly.
Test by pouring water and listening; watch for smooth flow and no backflow.
Should I install an enhanced vent or air admittance valve?
Improved venting or an air admittance valve can reduce air pockets, but installation should follow local codes and may require a pro.
Vent changes can help; consult a pro for proper installation.
Watch Video
Top Takeaways
- Identify root cause before fixes.
- Check discharge line and valve first.
- Ventilation matters for gurgling control.
- DIY fixes are possible safely with proper steps.
- Call a pro if unresolved after fixes.