How to Stop a Sump Pump from Overflowing: DIY Guide
Learn practical steps to stop your sump pump from overflowing. Diagnose causes, fix float switches, improve discharge, and schedule maintenance with trusted guidance from Sump Pump Check.

With this guide, you’ll learn practical steps to stop a sump pump from overflowing and protect your basement. You’ll inspect the pit and discharge path, verify the float switch, clean debris, and implement backup options for heavy rainfall. The process emphasizes safe maintenance, proper drainage, and reliable alerts to prevent future backflow.
Understanding Overflow: How Water Moves Through Your System
Water entering a sump pit is managed by a sump pump that transfers collected water to a discharge line. Overflow happens when inflow exceeds the pump’s capacity or when the discharge path is blocked. For homeowners, understanding how the system behaves is the first step in preventing a flood. According to Sump Pump Check, heavy rainfall, power outages, and a faulty float switch are common triggers. This block will explain the core components—the pump, the float switch, the discharge line, and the pit—and how they interact during a surge. Recognize that a well-sized pump is not a magic fix if the drainage route cannot move water away quickly enough. In addition, maintaining the pit and components reduces the risk of overflow in the next storm.
Key terms to know:
- Pump capacity (gallons per hour or GPH) and horsepower
- Float switch operation and adjustment
- Discharge line diameter, slope, and termination point
- Check valve to prevent backflow
A proactive maintenance mindset saves you from costly floods. This is not just about stopping water now, but about preparing your system for the next heavy rain event. The Sump Pump Check team emphasizes planning for high-water scenarios and keeping critical parts accessible for quick fixes when conditions change.
Common Causes of Overflow
Overflow is usually the result of one or more failures or misconfigurations in the system. By recognizing the typical culprits, you can prioritize fixes that deliver real results.
- A pump that is too small for the volume of water entering the pit during storms
- A blocked or restricted discharge line caused by debris, ice, or partial collapse
- A malfunctioning or incorrectly adjusted float switch that fails to trigger the pump promptly
- A failing or clogged sump pit screen that reduces water flow into the pump
- A faulty or missing check valve that allows backflow toward the pit
- Power interruptions or an exhausted backup power source during peak rainfall
- Improperly buried or routed discharge that returns water to the home or yard
Understanding these causes helps you target the right fixes rather than guessing. Sump Pump Check recommends a systematic inspection routine to confirm each component is functioning as intended and to catch small issues before they escalate into an overflow event.
Practical Fixes That Stop Overflow
Implementing targeted fixes can dramatically reduce the chance of overflow during heavy rain. Start with the simplest, most impactful changes and then move to more advanced solutions as needed.
- Verify the pump size and ensure the unit matches your home's typical water inflow. If the system runs constantly during rain, you may need a larger pump or a second unit.
- Inspect the discharge line for blockages. Clear obstructions, ensure proper slope, and confirm the line ends away from foundations and vents. A blocked line often causes backpressure that triggers overflow.
- Check the float switch for smooth operation. If it sticks or travels slowly, replace it or adjust the float arm so the switch activates at the correct water level.
- Clean the sump pit and screen regularly. Debris and sediment reduce water intake and can stall the pump when you need it most.
- Install or service a check valve on the discharge line. This prevents backflow that pushes water back into the pit.
- Consider a battery-backed sump pump for power outages. A backup unit keeps water removal running when the primary pump loses power.
- Add a high-water alarm to alert you before overflow occurs. Early notification helps you act quickly and prevent basement damage.
For best results, combine fixes with a clear maintenance plan and routine testing. A well-tuned system performs better under pressure than a single, large component that never gets checked.
Preventive Maintenance for Long-Term Reliability
Prevention beats emergency fixes. A planned maintenance routine keeps your sump system ready for the next storm and extends its lifespan. Regular checks help detect wear and shifting baselines before problems appear.
- Schedule monthly visual inspections of the pit, pump, electrical connections, and discharge line. Look for corrosion, leaks, or loose fittings.
- Test the pump and float switch weekly by simulating water rise. This ensures the switch triggers correctly and the pump runs without stalling.
- Inspect the discharge path annually. Clear debris, verify the slope, and confirm that the end point is free from obstructions or backflow risks.
- Maintain the backup system. Test a battery-backed unit and replace batteries per manufacturer guidance. Keep a spare battery on hand if possible.
- Keep a maintenance log. Record dates, issues found, repairs made, and parts replaced so you have a history to guide future decisions.
- Review local rainfall patterns and your basement’s vulnerability. If you see rising risk, plan additional defenses like a secondary pump or an elevated discharge route.
A proactive approach minimizes the odds of overflow and reduces the stress of dealing with flood risk when rain arrives.
Authority Sources and Best Practices
This section provides external references to support the guidance above and to help you verify steps with reputable sources. Use these as a baseline for your own maintenance plan.
- U.S. Environmental Protection Agency (EPA) — Home Water Management and Drainage Basics: https://www.epa.gov/
- University Extension services on sump pumps and basement drainage: https://extension.illinois.edu/ and https://extension.umn.edu/
- FEMA guidance on home flood preparedness and basement protection: https://www.fema.gov/
Rely on credible sources to validate your maintenance approach and to stay informed about best practices for preventing basement water intrusions. Sump Pump Check recommends cross-referencing your setup with trusted, official guidelines to ensure your methods align with broader safety and efficiency standards.
Maintenance Schedule and Smart Upgrades
A steady cadence of checks ensures your system remains capable when storms arrive. Consider upgrading components only after confirming that the current configuration consistently underperforms. A staged approach reduces downtime and budget impact while improving reliability.
- Phase 1: Confirm current pump capacity, discharge path, and backup readiness. Address any obvious deficiencies.
- Phase 2: Implement gradual upgrades, such as a larger pump or better check valve, if the system still overflows during heavy rain.
- Phase 3: Add monitoring options like a high-water alarm or smart sensor that can alert you remotely.
A thoughtful upgrade plan, paired with ongoing maintenance, minimizes overflow risk and protects your home.
Quick Troubleshooting Checklist
If you notice signs of overflow, use this quick checklist to isolate the issue fast without jumping to conclusions.
- Check for standing water in the pit and unusual pump noises
- Inspect the discharge line for kinks, blockages, and proper slope
- Test the float switch by simulating water rise; observe activation
- Confirm the backup power source is charged and connected
- Verify the check valve is present and functioning
- Review recent rainfall versus system response and adjust accordingly
Conclusion and Next Steps
Preventing sump pump overflow is a combination of diagnosis, targeted fixes, and ongoing maintenance. By understanding the system, identifying common failure points, applying practical fixes, and committing to a routine of checks and upgrades, you can protect your basement from water damage during storms. The Sump Pump Check team recommends starting with a thorough inspection, addressing discharge path issues, and then implementing monitoring and backup options to build resilience against heavy rainfall.
FAQ: Quick Answers to Common Questions
In this section we address common questions homeowners have about sump pump overflow, from causes to upgrades and maintenance. If a question isn’t listed here, refer to the detailed steps above or consult a professional for a more thorough assessment.
Tools & Materials
- Sump pump user manual(Keep for reference on model-specific maintenance and part replacements)
- Rubber gloves(Protection when handling debris and sharp edges)
- Screwdrivers (Phillips & flat-head)(For opening access panels and adjusting components)
- Pliers(Grip and remove small clamps or debris)
- Flashlight(Inspect deep pits and discharge entry points)
- Bucket or wet/dry vacuum(Remove water, debris, and sediment)
- Garden hose(For testing discharge line flow and flushing the pit)
- Replacement float switch (optional)(Use if the current switch sticks or fails to trigger)
- Check valve (replacement if needed)(Prevents backflow into the pit)
- Battery tester (for backup battery)(Assess readiness of backup power source)
- New backup battery (optional)(Keep charged for emergencies)
Steps
Estimated time: 1-2 hours
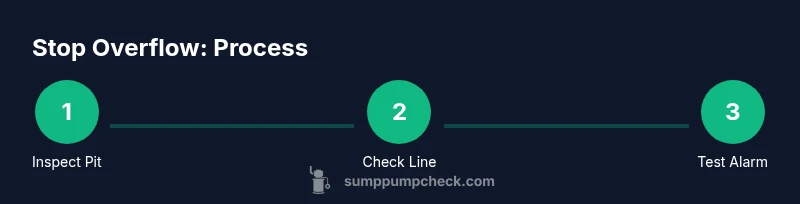
- 1
Inspect the pit for debris
Power off the system and remove access covers. Look for sediment, algae, or foreign objects that could reduce intake. Clear debris carefully without disturbing electrical components.
Tip: Wear gloves and use a flashlight to see into corners; avoid tipping the pump while working. - 2
Check the discharge line for blockages
Trace the line from the pit to the exterior termination. Clear any obstructions, and ensure the line slopes away from the foundation. Test water flow by briefly running the pump.
Tip: If you hear gurgling, there may be a partial blockage or air trap that needs attention. - 3
Test the float switch
Gently lift the float to mimic rising water and confirm the pump starts. If it doesn’t engage, inspect the float arm for sticking or misalignment and adjust or replace as needed.
Tip: Be cautious not to force the float; small disturbances can misalign the switch. - 4
Clean the sump pit and screen
Remove sediment from the bottom and clean the inlet screen to restore free water flow to the impeller. A clogged pit reduces pumping efficiency.
Tip: Avoid using harsh chemicals in the pit; stick to water and a mild soap if needed. - 5
Check the discharge path and end point
Ensure the discharge ends away from your foundation, sidewalks, and air intakes. Confirm that there are no irrigation outlets or other water sources feeding back toward the pit.
Tip: If the discharge exits near a downhill slope, consider rerouting to a safer area. - 6
Inspect or replace the check valve
Look for signs of wear or leaks in the check valve. A faulty valve allows backflow that can cause repeating surges into the pit.
Tip: Test by stopping the water upstream and watching for backflow in the pit. - 7
Test power and backup options
Verify the main pump plugs into a GFCI outlet and test the battery-powered backup pump if you have one. Replace any weak batteries.
Tip: Keep backup power sources charged and ready; test monthly during dry periods. - 8
Install or test an alarm
Add a high-water alarm to alert you early. If you already have one, test the sensor and notification path (phone, siren, or home automation).
Tip: Place the alarm where it is heard throughout the home, not just near the sump pit.
FAQ
What causes sump pump overflow?
Overflow is usually caused by a mismatch between water inflow and pump capacity, a blocked discharge line, a faulty float switch, or backflow through a faulty check valve. Regular maintenance helps prevent these issues.
Overflow happens when the pump can’t keep up, or the discharge path is blocked. Regular checks help prevent it.
How can I prevent overflow during heavy rain?
Ensure the discharge line is clear, consider a larger pump or a second pump for heavy rain, install a check valve, and set up an alarm to alert you early.
Keep the discharge clear, use backups, and set an alarm so you know early if water rises.
Is a backup sump pump worth it?
Yes, a battery-backed backup pump provides water removal during power outages, which are common during storms and can cause overflow if the main unit stops.
A backup pump helps keep water out when the power goes out.
How often should I test my sump pump?
Test the pump weekly or monthly, including the float switch, alarm, and backup system, to ensure everything operates when needed.
Test it regularly so you’re ready when it matters.
What maintenance tasks should be in my log?
Record pump tests, battery checks, discharge inspections, and any part replacements. A history helps plan upgrades and alerts you to recurring issues.
Keep a log of tests and repairs so you can track performance.
Can I DIY replace a sump pump component?
Many components are user-serviceable, such as float switches and check valves, but some repairs require a licensed electrician or plumber. Follow safety guidelines and consult the manual.
Some parts you can replace yourself, others need a professional.
Watch Video
Top Takeaways
- Inspect and maintain the pit, discharge line, and float switch regularly
- Upgrade and test backups to handle power outages
- Install an alarm to get early warnings of rising water
- Keep a maintenance log for ongoing prevention