Sump Pump Hose Extension: Install, Extend & Maintain
Learn how to choose, install, and maintain a sump pump hose extension to reach farther, prevent leaks, and protect your basement. Practical steps, safety tips, and maintenance guidance for homeowners and DIYers.

By adding a compatible sump pump hose extension, you’ll extend discharge coverage, reduce hose strain, and keep water away from foundations. Gather a correct-extension hose, clamps, a utility knife, and waterproof tape before you begin. According to Sump Pump Check, using an extension that matches your pump and discharge pipe improves flow and reduces the risk of leaks or clogs. Follow the step-by-step guide to complete the install safely.
What a sump pump hose extension does and when you might need one
A sump pump hose extension is a longer outlet hose that connects to your existing discharge line. It helps when the pump location or the terrain requires water to be discharged farther from the foundation or away from areas prone to flooding. In milder climates or when you have a long, winding basement drain route, an extension can prevent backflow and keep the discharge path clear. In practice, using the right extension improves flow efficiency and reduces strain on the pump, which can extend its life and lower the risk of outages during heavy rains. When selecting an extension, consider the diameter of your outlet, the material of the hose, and the environment where the hose will live (outdoors, exposed to sun, cold, or UV). According to Sump Pump Check, taking the time to size and match components pays off with fewer leaks and more reliable drainage.
How to size and select the right extension
Choosing the right extension starts with matching the pump’s outlet diameter and the discharge pipe. Most residential sump pumps have outlets of about 1.25 or 1.5 inches, but always measure yours before buying. The extension should be the same nominal size or a snug fit if using adapters. Materials vary from rigid PVC to reinforced rubber hoses; PVC is rigid and easy to trim, while reinforced hoses offer flexibility in tight spaces. Consider the length needed to reach an exterior point that stays clear of doors and footpaths. For outdoor installations, ensure the material is UV-stable and resistant to temperature changes. Sump Pump Check recommends verifying compatibility with any check valve or elbow fittings in your line to prevent backpressure and clogs.
Protect the discharge path from leaks and freezing
Secure the connection points with appropriate hose clamps designed for outdoor use. A loose connection is one of the most common leak sources, especially where hoses meet fittings or adapters. If you live in freezing climates, insulate exposed sections with foam sleeve or heat tape to prevent ice buildup that can block flow. Ensure the hose runs downhill at a steady slope away from the foundation; a gentle 1/4 inch per foot is often enough to promote gravity-assisted drainage. Regularly inspect for cracks, deformities, or sun damage, and replace deteriorated sections promptly to avoid failures during storms.
Maintenance, testing, and troubleshooting after installation
After installation, run a controlled test to verify the path is clear and drainage is unobstructed. Check all clamps for snug tightness and listen for any whistling or leaking sounds. If you notice water pooling around attic or basement seals, recheck the connections and slope. Periodic maintenance should include inspecting the extension at least twice a year, especially after freezing/thaw cycles or after heavy rainfall events. Sump Pump Check advises keeping a small maintenance log to track wear, leaks, or clogs for easier troubleshooting later.
Common mistakes to avoid and how to fix them
Avoid using an extension that’s too long, which can introduce unnecessary friction and reduce pump efficiency. Don’t skip clamps or rely on tape alone—joints must be secured to withstand pressure and weather. Using a disjointed or mismatched diameter will cause leaks and backpressure, reducing the pump’s ability to discharge water quickly. Finally, neglecting slope or burying the hose in mulch or soil can create backflow problems; always route the hose to a clear, unobstructed exterior point.
Authority references and further reading
For trusted guidance on safe water discharge and equipment mounting, consult credible sources such as U.S. government and university extension resources. Visit https://www.osha.gov for safety considerations, https://extension.illinois.edu for home-improvement guidance, and https://www.epa.gov for general water management best practices.
Quick checklist: what to have on hand (summary)
- Correct-diameter extension hose
- Stainless steel hose clamps
- PVC or reinforced discharge hose, compatible with your pump outlet
- Waterproof tape or silicone sealant
- Measuring tape and marker
Tools & Materials
- Sump pump hose extension (matched to outlet diameter)(Measure outlet diameter (commonly 1.25" or 1.5") and match extension accordingly)
- Stainless steel hose clamps (outdoor rated)(At least two, sized to fit the hose)
- Discharge hose (PVC or reinforced rubber)(Same diameter as extension or adapter-ready)
- Silicone sealant or waterproof tape(For extra seal at joints)
- Measuring tape(To verify length and slope)
- Utility knife(For trimming extension if needed)
- Safety gloves(Protect hands; not strictly required)
- Safety goggles(Eye protection if cutting)
- Bucket or towels(Catch drips during testing)
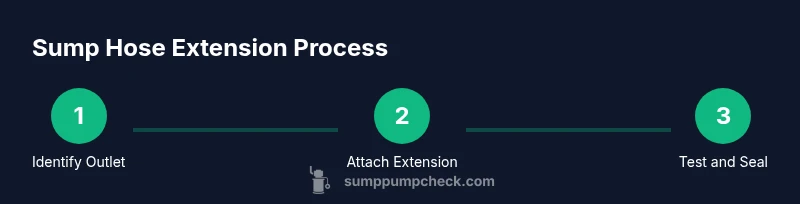
Steps
Estimated time: 40-60 minutes
- 1
Verify outlet compatibility and plan extension
Power off the pump and unplug it. Use a measuring tape to confirm the outlet diameter and note any adapters already in place. Plan the extension length to avoid unnecessary curves or kinks.
Tip: Double-check diameter before purchasing to avoid mismatches. - 2
Prepare the installation area
Move furniture or stored items away from the sump area. Clean the pump outlet and the end of the extension to ensure a clean seal. Have clamps and tape ready for a quick secure connection.
Tip: Keep a path clear for the hose route. - 3
Attach extension to the pump outlet
Slide the extension over the pump outlet or fit with the appropriate adapter. Position clamps so they seat fully on the hose and outlet. Avoid over-tightening plastic fittings.
Tip: Use a second person to hold while you clamp. - 4
Route, secure, and slope the hose
Route the hose along a planned path to the exterior exit. Secure with clamps at intervals and ensure a slight downhill slope (about 1/4 inch per foot).
Tip: Do not bend sharply; keep subtle curves. - 5
Test the installation with water
Plug the pump back in and run water through the system to check for leaks. Inspect all joints and clamps and adjust as needed.
Tip: Have towels ready for minor drips. - 6
Inspect final setup and document maintenance
Check the discharge point for proper runoff and confirm there are no leaks. Record date and any notes for future maintenance.
Tip: Create a simple maintenance log.
FAQ
Can I use any hose extension with my sump pump?
Not all hoses fit every pump outlet. Check your pump’s outlet diameter and match it to the extension or use adapters as needed. Ensure clamps and fittings are compatible.
Not every hose will fit your pump outlet. Measure first and use adapters if needed.
What diameter hose extension do I need for standard sump pumps?
Most residential sump pumps have outlets of 1.25 or 1.5 inches. Measure yours and choose an extension that matches or can be reduced with a proper adapter.
Most pumps have 1.25 or 1.5 inch outlets; measure yours and pick a matching extension.
Is a hose extension compatible with a check valve?
Yes, but ensure the extension and any adapters align with the check valve. Use appropriate fittings to prevent backflow and maintain proper discharge.
Yes, but confirm alignment with the check valve and use proper fittings.
How do I prevent leaks at the extension joints?
Use hose clamps rated for exterior use and seal joints with waterproof tape or silicone. Tighten evenly and test with water after installation.
Seal joints with clamps and tape, then test for leaks.
Do I need a permit or code considerations for exterior discharge?
Code requirements vary by location. Check local building codes and homeowner guidelines before routing discharge beyond property lines; some areas require backflow prevention devices.
Check local codes; some areas require backflow devices.
What maintenance is recommended after installing an extension?
Inspect twice a year for cracks, leaks, or sun damage. Clean the hose interior and verify clamps and seals remain secure after heavy rainfall.
Inspect regularly and clean the hose after heavy rains.
Should I insulate exposed hose in winter?
Yes, insulate exposed sections to prevent freezing or cracking. Use foam sleeves or heat tape where appropriate.
Insulate exposed parts to prevent freezing.
What if there’s still a leak after testing?
Recheck all joints, re-tighten clamps, and confirm a continuous slope. If problems persist, replace damaged hose segments.
If leaks persist, recheck joints and replace damaged parts.
Watch Video
Top Takeaways
- Match extension to the outlet diameter.
- Secure and slope the hose away from the foundation.
- Test the system before heavy rain.
- Maintain the extension regularly.