Connecting a Sump Pump: A Practical Step-by-Step Guide
Learn how to connect a sump pump correctly, including discharge piping, check valves, and safety considerations. This step-by-step guide helps homeowners install a reliable, code-compliant system.

Learn how to complete a safe, code-compliant sump pump connection that reliably moves water away from your foundation. According to Sump Pump Check, a properly planned discharge path reduces backflow risk and flood potential. This quick guide helps you plan the layout, select the right discharge route, and test for leaks.
Why a Proper Sump Pump Connection Matters
A reliable sump pump connection is the backbone of basement drainage. It ensures storm water and groundwater are moved away from your home's foundation, reducing the risk of flooding, mold, and structural damage. A correct connection also helps your sump pump operate at its rated performance, minimize wear, and avoid leaks. In many jurisdictions, discharge piping must route water away from the foundation and meet local codes; failing to comply can lead to fines or rework. When homeowners understand the role of each component—pump outlet, discharge pipe, check valve, backflow prevention, and electrical connections—the system becomes easier to diagnose and maintain. The goal is a simple, continuous path from the sump basin to a legal exterior outlet or approved drainage area, with no low spots or siphoning risks. Remember, a well-planned connection reduces service calls and protects your basement during heavy rains.
Planning Your Connection: Layout and Codes
Before you touch a single pipe, sketch the route from the sump pit to the discharge point. Consider the grade of the ground, nearby electrical outlets, and accessible access for maintenance. Check local codes for discharge requirements, backflow prevention, and acceptable outlet locations. Plan to avoid routing water toward sidewalks, vehicle paths, or indoor drains. Ensure you have a dedicated circuit and a GFCI-protected outlet for the pump, since proper electrical safety is essential for any sump pump connection. If you rent or live in a homeowners association area, confirm rules about exterior piping and drainage areas. By documenting the plan, you’ll reduce back-and-forth during installation and minimize rework.
Choosing the Right Discharge Route
Discharge pipes can vent outside through walls or foundations or exit above grade to an exterior area. The key is to direct water away from the foundation and to a place that can absorb it without pooling. PVC pipes offer durable, long-lasting pathways; flexible hoses can simplify tight spaces but may require clamps and careful routing to prevent leaks. Frost and freezing considerations matter in cold climates: insulate long pipes, bury sections below frost line, or install a short run to a protected exterior wall. If you live in an area with heavy rainfall, consider routing to a storm drain only if local codes permit it; otherwise, connect to a dedicated drainage area that accepts sump discharge. The right route minimizes backflow risk and simplifies future maintenance.
Required Materials and Components
To build a dependable sump pump connection, gather the following items before you start:
- Sump pump discharge pipe (PVC, 1-1/2" or 1-1/4" depending on your pump outlet) – required
- Check valve for the discharge line – required
- Adapter fittings (elbows, couplings) – required
- PVC cement and primer – required
- Silicone sealant or waterproof caulk – required
- Teflon tape for threaded connections – required
- Clamps or straps for securing piping – required
- Gloves and safety glasses – required
- GFCI outlet and a dedicated circuit – required Optional: Flexible discharge hose for tight spaces and quick adjustments. Plan for future pump replacement with accessible fittings.
Safety First: Electrical and Grounding
Electrical safety cannot be an afterthought in sump pump connections. Always use a GFCI-protected outlet and a dedicated circuit to reduce shock risk. Keep electrical connections dry by mounting the outlet away from potential water splashes and using weatherproof enclosures. When working near power, unplug the pump before handling any wires or fittings. Confirm the pump’s plug is in good condition and that the circuit breaker is appropriately sized for the pump’s amperage. If you’re unsure about wiring, consult a licensed electrician.
Connecting the Drain Line: PVC vs Flexible Tubing
PVC piping provides robust, leak-resistant joints when cut and sealed correctly. Use solvent cement, primer, and proper glue joints; dry-fit first to ensure angles align. Flexible tubing can help in tight spaces or around obstacles, but it requires sturdy clamps and careful support to prevent sagging or leaks. When selecting pipe diameter, match the pump outlet size and the chosen route. For subterranean runs, bury PVC below the frost line or inside a protected wall cavity; for above-ground runs, secure the pipe with straps to avoid movement during heavy rain.
Installing a Check Valve and Backflow Prevention
A check valve prevents water from flowing back into the sump pit when the pump turns off, improving efficiency and reducing odor and stagnation risks. Install the valve in the correct orientation so water flows away from the pump. After installing, test by gently lifting the discharge end to see if the valve holds or leaks. If leaks occur, check for proper seating, replace worn O-rings, or use silicone sealant on threaded joints. Keep the valve accessible for maintenance and future replacement.
Sealing, Anchoring, and Anti-Freeze Considerations
Seal all joints with silicone or PVC cement as appropriate, and anchor pipes with clamps or straps to prevent movement during gusts of wind or heavy rain. For exterior runs in cold climates, wrap exposed sections or insulate to minimize freeze-thaw damage. Use frost-proof outdoor outlets and maintain a small slope away from the foundation to prevent water pooling near walls. Inspect seals and anchors annually and after major storms.
Testing Your System: Verify Flow and Leaks
Once assembled, run the sump pump briefly to confirm that the discharge line carries water cleanly without leaks. Check every joint for seepage and watch the entire run for any sagging sections that could cause pooling. Ensure the discharge path terminates at a suitable exterior area and does not push water toward walkways or foundations. If you notice backflow, re-check valve orientation and joint seals. Also verify that the pump turns off cleanly when the water level drops.
Maintenance and Troubleshooting Basics
A proactive maintenance routine helps prevent unexpected failures. Inspect the discharge line monthly for cracks or blockages and clear any debris from the sump pit. Test the check valve quarterly and replace worn O-rings or seals. Keep the area around the pump dry and free of clutter to access the shut-off switch and power supply easily. Schedule an annual professional inspection if you’re unsure about electrical or plumbing connections.
Tools & Materials
- Sump pump discharge pipe (PVC, 1-1/2" or 1-1/4" matching outlet)(Match pump outlet size)
- Check valve for discharge line(Install in correct orientation away from sump)
- Adapter fittings (elbows, couplings)(Match pipe size and route)
- PVC cement and primer(Follow safety guidelines)
- Silicone sealant or waterproof caulk(Seal joints to prevent leaks)
- Teflon tape for threaded connections(Ensure tight, leak-free threads)
- Clamps or straps for securing piping(Prevent movement and sagging)
- Gloves and safety glasses(Personal protective equipment)
- GFCI outlet and dedicated circuit(Electrical safety for pump)
- Optional: Flexible discharge hose(Useful in tight spaces)
Steps
Estimated time: 90-120 minutes
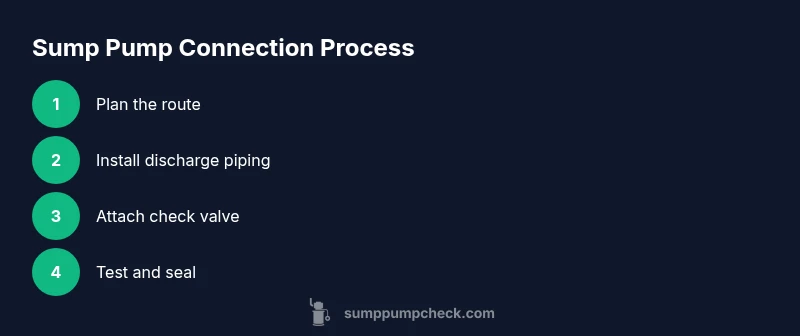
- 1
Assess the site and plan the path
Survey the basement layout and identify a clear route from the sump pit to the exterior discharge point. Note potential obstacles, power outlets, and accessible space for maintenance. A well-drawn plan reduces guesswork during installation.
Tip: Sketch the route on paper or a smartphone diagram to avoid backtracking. - 2
Shut off power and prepare safety measures
Power down the sump pump circuit and unplug the unit before handling any wiring or fittings. Wear protective gear and keep a flashlight handy if you work in dim areas. Confirm the area is dry to prevent accidental shocks.
Tip: Never work on live electrical components near water. - 3
Measure outlet and select pipe size
Measure the pump outlet diameter and select piping that matches or fits adapters cleanly. Decide between PVC for durability or flexible tubing for tight spaces, ensuring proper support and slope for drainage.
Tip: Choose a pipe size that allows at least a 1/4 inch per foot slope. - 4
Install discharge pipe route and secure supports
Dry-fit the piping along the planned route, then make permanent connections using PVC cement or clamps as appropriate. Secure pipes with straps every 3–4 feet to prevent movement during heavy rain or ground movement.
Tip: Always dry-fit first to confirm angles before gluing. - 5
Attach the check valve and ensure correct orientation
Position the valve so water flows away from the sump, then tighten joints securely. Use Teflon tape on threaded connections and sealant where needed. Check the valve movement manually to ensure it seals properly.
Tip: Test the valve by lifting the discharge end to simulate pump off conditions. - 6
Seal joints and anchor the pipes
Apply silicone or PVC cement to create watertight joints and anchor with straps. Inspect every joint for gaps and tighten as needed. Ensure the route remains sloped away from the foundation to prevent pooling.
Tip: Avoid over-tightening which can crack fittings. - 7
Connect to sump pump outlet and perform a test
Attach the discharge line to the pump outlet, ensuring a snug fit with the correct adapter. Restore power, run the pump briefly, and observe for leaks and backflow. Keep a close eye on the exterior discharge area to verify proper drainage.
Tip: Have a bucket handy to catch any initial leaks during testing.
FAQ
What is the purpose of a discharge check valve in a sump pump connection?
A discharge check valve prevents water from flowing back into the sump pit when the pump turns off, improving efficiency and reducing odor and stagnation risks. It also helps protect the system from backpressure during shutoff.
A check valve stops water from flowing back into the sump when the pump stops, keeping the system clean and efficient.
Can I discharge sump water into a storm drain?
Discharging into a storm drain is often restricted by local codes. Always check regulations for your area and use an approved drainage area that safely handles sump discharge.
Check local codes before routing sump discharge to any storm drain.
Do I need a professional to install a sump pump connection?
Basic setups can be DIY with proper safety, tools, and patience. Electrical connections and drainage code compliance may require a licensed plumber or electrician for complex configurations.
If you’re unsure about wiring or building codes, consider hiring a professional.
What electrical requirements should I follow?
Use a GFCI-protected outlet on a dedicated circuit. Keep the pump and outlet dry, and ensure cords and connections are rated for outdoor use if applicable.
Use a GFCI outlet on a dedicated circuit and keep everything dry.
How often should I inspect the discharge line?
Inspect monthly for leaks or cracks, and test the check valve quarterly. Address damage promptly to avoid failure during heavy rain.
Check the line monthly and test the valve every few months.
What are common signs of a faulty sump pump connection?
Look for leaking joints, unusual noises, backflow, or water pooling around the discharge exit. These can indicate loose fittings, clogged lines, or a failed valve.
Leaks, backflow, or pooling are red flags you should address soon.
Watch Video
Top Takeaways
- Plan the route before cutting any pipe.
- Use a check valve to prevent backflow and odors.
- Keep the discharge path away from foundations and walkways.
- Test the system thoroughly and maintain electrical safety.