Submersible Sump Pump Installation: A Complete Guide
A practical, step-by-step guide to installing a submersible sump pump, covering site prep, sizing, discharge planning, and testing. Includes safety tips, common mistakes, and maintenance guidance.

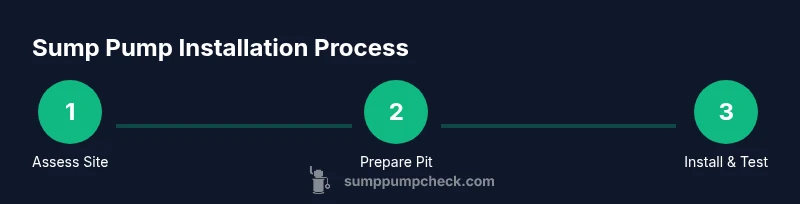
According to Sump Pump Check, a proper submersible sump pump installation safeguards basements by efficiently discharging groundwater away from the foundation. In this guide, you will learn how to assess site conditions, select a pump size, prepare the pit, position the unit, hook up the discharge, and test the system. Follow these steps to ensure reliable performance and long-term peace of mind.
What is a submersible sump pump and why it matters
A submersible sump pump is designed to operate while fully submerged in a sump pit. This configuration helps reduce noise and vibration, which is especially important for finished basements. By moving groundwater away from the foundation and toward a drainage path, submersible units minimize flood risk and protect home interiors. The Sump Pump Check team notes that choosing the right model for your space—considering pit size, expected water flow, and automatic or manual controls—will save time and prevent unnecessary wear on the pump.
Assessing site conditions and pump sizing
Before you buy or install a pump, evaluate the basement or crawlspace area: pit size, typical water inflow, and the height of water that triggers pumping. Larger basins with higher inflow require pumps with greater flow rates, while smaller pits can use compact models. Sump Pump Check analysis indicates that many homes benefit from a pump in the 1/3 to 1/2 horsepower range, paired with a responsive float switch for automatic operation. Match the pump’s capacity to the expected load, but avoid oversizing, which can waste energy and shorten pump life.
Choosing a pump and components
Select a submersible sump pump with a reliable motor, durable bearings, and a float switch (vertical or tether) that fits your pit geometry. Plan for a discharge system that includes a check valve to prevent backflow, a properly sized discharge pipe (PVC or reinforced hose), and a secure power connection with GFCI protection where required. Optional components include a battery backup, an external float auxiliary, and a stand or base to reduce noise transfer to the surrounding floor. Always verify compatibility with local code and the pump manufacturer’s warranty.
Pit preparation and basin considerations
A clean, properly sized pit ensures efficient pumping and reduces debris accumulation that can clog the impeller. Remove any loose material, ensure the pit walls are smooth, and install a lid or grate to prevent debris and pests from entering. If the pit is in a finished area, consider a splash guard and sound-dampening measures. Sump Pump Check recommends confirming the pit’s dimensions against the selected pump to avoid overfilling or excessive vibration when the motor starts.
Discharge planning and piping
Plan a discharge route that directs water away from the home’s foundation and toward an appropriate drainage area. Use a durable discharge pipe with a secure connection, and install a check valve to stop backflow. Ensure the discharge line maintains a gentle slope and avoids tight elbows that can trap air or clog. In many jurisdictions, discharge lines must terminate above grade or into an approved drainage system; consult local codes and the pump manufacturer’s guidelines.
Safe installation steps: wiring, grounding, and venting
Electrical work should prioritize safety: turn off the circuit at the panel, verify the absence of power, and use a GFCI outlet or breaker in damp locations. Route the power cord through a strain relief to prevent pulled connections. Grounding and proper enclosure protection reduce shock risk. If you’re unsure about wiring, hire a licensed electrician. The goal is a safe, code-compliant connection that won’t trip breakers during heavy rain events.
Testing, priming, and maintenance routines
After wiring, fill the pit with water and observe the pump’s operation as it activates. Ensure the float mechanism trips reliably and the discharge line releases water promptly. Periodic testing—at least quarterly—helps catch issues before a failure. Routine maintenance includes cleaning the impeller inlet, inspecting seals, and verifying that the check valve remains leak-free. A simple annual inspection can extend the life of the pump and reduce nuisance beeping or overheating.
Common mistakes and how to avoid them
Avoid mis-sizing the pump, skipping the check valve, or running without a secure lid. Misrouting the discharge line can cause water to pool near the foundation or re-enter the pit. Do not bury electrical connections or run wiring in damp conditions without proper protection. Following best practices from Sump Pump Check helps prevent short-cycles, jams, and premature motor wear.
Maintenance schedules and long-term care
Create a maintenance calendar: quarterly quick checks and an annual deeper inspection. Note the pump’s running hours, inspect for unusual noises, and replace worn parts as needed. Keeping spare gaskets and a small service kit on hand reduces downtime after a storm. With good maintenance, a submersible sump pump can provide many years of reliable service.
Tools & Materials
- Submersible sump pump (1/3 to 1/2 HP typical)(Choose based on expected water load and pit size)
- Discharge piping (PVC or reinforced hose)(Size to fit pump outlet and desired run)
- Check valve(Prevents backflow into the pit)
- PVC primer and cement(For PVC pipe connections)
- Sump pit cover/grate(Keeps debris out and protects children/pets)
- Float switch (integrated or external)(Ensure compatibility with pit geometry)
- Electrical cord strain relief kit(Prevents cord fatigue and loosening)
- Voltage tester(Verify power is off before handling)
- Teflon tape(Seal threaded pipe joints)
- Adjustable wrench and pliers(Tighten fittings securely)
- Safety gloves(Protection during pit work)
- Scoop or bucket(Remove water and debris as you work)
Steps
Estimated time: 2-4 hours
- 1
Shut off power to the sump pump circuit
Locate the circuit breaker and switch it off. Use a voltage tester to confirm no power is present before touching any wiring.
Tip: If you can’t locate the breaker, hire a licensed electrician. - 2
Clear and prepare the sump pit area
Remove standing water and debris. Clean the pit walls to reduce impeller clogs and ensure a stable base for the pump.
Tip: Take photos before disassembly to aid reassembly. - 3
Position the pump in the pit
Lower the unit so the float can freely move without contacting pit walls. Check that the outlet aligns with the planned discharge path.
Tip: Ensure the inlet remains unobstructed by sediment. - 4
Attach discharge piping and install the check valve
Connect the discharge pipe to the pump outlet, install the check valve, and secure joints with sealant where required.
Tip: Keep the discharge line slightly sloped away from the foundation. - 5
Install the float switch and secure the cable
If using a separate float, mount it according to the manufacturer’s guidance and route the cable to avoid snagging on debris.
Tip: Verify the float trips at the desired water level. - 6
Make electrical connections with GFCI protection
Run the power cable through a strain relief, connect to a GFCI outlet or breaker, and secure the junction box or housing per code.
Tip: Avoid running cords through water or damp surfaces. - 7
Test the system and adjust float height
Pour water into the pit until the pump activates; confirm proper discharge and air-free water flow. Adjust float height if necessary for reliable cycling.
Tip: Do a full test cycle in dry weather to verify operation. - 8
Finalize installation and maintenance plan
Install pit cover, tidy wiring, and set a maintenance schedule. Document model numbers and warranty details for future service.
Tip: Keep a spare gasket and tool kit handy for quick refits.
FAQ
What size sump pump do I need for a typical basement?
Most basements benefit from a 1/3 to 1/2 HP pump, chosen based on pit size and water inflow. If the space has heavy groundwater, you may need a larger unit. Always refer to the manufacturer’s sizing charts and local codes.
Most homes use a 1/3 to 1/2 horsepower pump, sized to your pit and water rate. Check the manufacturer’s charts and local codes.
Do I need a discharge line outside the home?
Yes. The discharge should direct water away from the foundation and into an approved drainage area. Do not release water into crawl spaces or indoor drains unless permitted by local codes.
Yes. Direct the discharge away from the foundation to an approved outdoor drain unless your local code says otherwise.
Can I install a sump pump myself or should I hire an electrician?
DIY installation is possible for homeowners with basic plumbing and mechanical skills. Electrical work, however, should follow code and often requires a licensed electrician or professional installer to ensure safety and compliance.
You can install it yourself if you’re comfortable, but electrical work is best handled by a licensed electrician.
What maintenance does a submersible sump pump require?
Regular checks include testing the unit, cleaning the impeller, inspecting seals, and testing the backup system if you have one. Schedule an annual professional inspection if you’re unsure.
Test it regularly, clean the impeller, check seals, and inspect the backup if you have one.
Is a battery backup necessary for reliability?
A battery backup is highly recommended to keep the system running during power outages, which are common in storms. It provides a second line of defense when the primary pump can’t operate.
A battery backup is highly recommended to cover power outages during storms.
Watch Video
Top Takeaways
- Size the pump to fit the pit and expected inflow.
- Use a check valve and proper discharge routing to prevent backflow.
- Test the system regularly and maintain it to avoid failures.
- Prioritize electrical safety and code compliance throughout the install.