Submersible Sump Pump Replacement: A Practical Homeowner Guide
A practical, step-by-step guide for homeowners to perform a safe submersible sump pump replacement, covering sizing, tools, installation, maintenance, and troubleshooting to protect basements from flooding.

Replacing a submersible sump pump is a practical move to protect your basement from flooding. This guide covers essential steps, safety checks, and proper sizing to ensure you install a reliable unit. By following the process, homeowners can perform a code-compliant replacement that fits their discharge and power needs.
Why replace a submersible sump pump
Replacing a submersible sump pump is a strategic choice for homeowners facing recurring clogs, reduced pumping efficiency, noisy operation, or frequent outages. A failing unit jeopardizes your basement during heavy rain or rapid snowmelt. When evaluating a replacement, compare horsepower, efficiency, head height, and discharge diameter to match your sump pit and piping. According to Sump Pump Check, aging units near the end of their service life require careful assessment to prevent unexpected failures. Planning ahead helps you avoid emergency servicing, reduced protection, and potential water damage. For best results, select a model with robust seals, corrosion resistance, and a motor designed for continuous duty in damp environments. Consider future needs, such as absences of a gravity drain or a new check-valve integration, to ensure long-term reliability.
Safety and code considerations
Safety comes first when performing a submersible sump pump replacement. Always disconnect power at the circuit breaker before starting work, and never rely on a switched outlet. Use a GFCI-protected outlet if available, and verify that wiring, conduit, and strain relief meet local electrical codes. Ensure the sump pit is clean and dry before installation and wear non-slip footwear and gloves. Keep a bucket and towels handy for spills. If you’re unsure about electrical work, consult a licensed electrician. Following proper safety steps prevents shocks, short circuits, and fire risks, and helps you achieve a compliant installation.
Planning the replacement: sizing, discharge, and power
Sizing a submersible sump pump replacement starts with your sump pit size, the expected water volume, and the discharge path. Determine needed head height (the vertical distance water must be pumped) and choose a pump with adequate horsepower and an efficient motor. Verify your discharge line diameter and ensure the new pump’s outlet matches existing piping or plan a compatible adapter. Consider a check valve to stop backflow and a float switch compatible with dry-run protection. Draft a simple layout showing where the outlet will vent, how the hose will route to the exterior, and where any flood-proofing devices or alarms will be located. This planning reduces guesswork and saves time during installation.
Tools, materials, and setup
Before you begin, assemble the essential tools and materials. A new submersible sump pump, appropriate discharge hose or piping, a compatible check valve, PVC cutter, pliers, screwdrivers, wire nuts, electrical tape, gloves, a bucket, rags, and a flashlight are typically needed. Keep a level to confirm pump orientation and a marker for alignment. Having everything ready minimizes mid-project trips to the hardware store and keeps the workflow smooth. If you’re replacing an older unit, photograph the wiring and plumbing connections for reference. This helps you replicate correct wiring and pipe routing on the new pump.
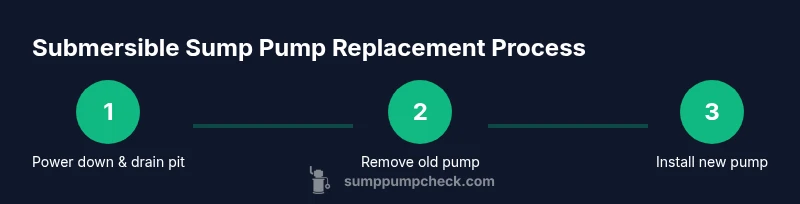
Step-by-step overview: the replacement workflow
This overview outlines the core stages of the replacement process without duplicating the step-by-step instructions below. Begin by turning off power, draining the pit, and removing the old unit. Inspect the pit condition and piping, then prepare the new pump with a proper discharge setup and check valve. Install the new unit securely, connect electrical supply according to code, and perform a thorough test run to verify proper operation and leak-free connections. Finally, secure the lid, clean the workspace, and document the maintenance plan for future reference. See figure references in the accompanying diagrams for guidance.
Step-by-step: 8 concrete actions you can take
- Power down and drain the pit. 2) Disconnect and remove the old pump. 3) Inspect the pit and inspect the discharge piping for damage. 4) Prep the new pump, install the check valve, and attach the discharge line. 5) Lower the new pump into the pit and secure it. 6) Restore power and perform a test run with water. 7) Check for leaks and verify proper cycling. 8) Reinstall the lid and schedule regular maintenance.
Sizing and compatibility checks during replacement
Match the new pump to your pit size, expected water volume, and discharge routing. Ensure the outlet matches or adapts to your existing piping, and verify that the float switch operates freely without obstruction. Confirm that the electrical supply is suitable for continuous duty operation and that the outlet is protected by a GFCI. If your home has a battery backup system, consider integrating it with the new unit for enhanced resilience.
Dry-run testing and initial operation
After installation, run a simulated test by filling the pit with water to trigger the pump. Observe the cycle and listen for abnormal noises; address any vibrations or rubbing that indicates misalignment. Check the discharge line for leaks and confirm water is exiting away from the foundation. A proper test confirms the unit is ready for ongoing service and helps identify issues before a real flood event.
Maintenance plan and warranty considerations
Document the pump model, installation date, and maintenance schedule. A recommended maintenance routine includes periodic cleaning of the pit, inspecting seals, checking the check valve, and testing the float assembly every few months. Register the pump for the warranty and store receipts and manuals with other home maintenance records. A proactive maintenance plan reduces the risk of unexpected failures and extends the life of your replacement pump.
Troubleshooting after replacement
If you notice frequent cycling, strange vibrations, or slow pumping after replacement, re-check electrical connections and the discharge path for blockages. Inspect the float switch for proper travel and ensure no debris interferes with operation. If leaks persist, reseal joints and replace worn gaskets. When in doubt, consult a professional to diagnose persistent issues.
Environmental considerations for disposal of old pump
Dispose of the old pump according to local regulations. Many communities require recycling of electrical devices or proper disposal of metal components. Photograph the old unit for reference if you plan to compare performance with the new model later. Proper disposal helps minimize environmental impact and ensures you’re complying with local waste guidelines.
Tools & Materials
- New submersible sump pump(Choose a model with appropriate horsepower and flow rate for your pit size and rainfall patterns.)
- Discharge hose or PVC piping(Match the outlet size to your existing piping or have adapters ready.)
- Check valve(Prevents backflow and protects the pump from repeated cycling.)
- PVC cutter(Clean, square cuts improve seal integrity.)
- Pliers(For gripping and crimping hose/clamps.)
- Screwdrivers(Flathead and Phillips to secure components.)
- Wire nuts and electrical tape(Secure electrical connections per code.)
- Gloves and rags(Protect hands and keep the pit clean.)
- Bucket or container(Used to catch spills during swapping.)
- Sump pump check valve(Essential to prevent backflow into the pit.)
- Marker and flashlight(Mark alignment and illuminate the pit.)
Steps
Estimated time: Total time: 90-120 minutes
- 1
Power down and drain the pit
Shut off the circuit breaker feeding the sump pump and verify no power is present. Use a flashlight to inspect the interior and a small container to capture any remaining water. Draining the pit reduces splash and makes the removal safer.
Tip: Double-check the breaker label and use a lockout method if available to prevent accidental re-energizing. - 2
Disconnect and remove the old pump
Unplug the pump from the outlet or disconnect the hard-wired connection, depending on your setup. Detach the discharge line from the pump and carefully lift the unit out of the pit. Inspect the pit walls and the pump intake area for debris.
Tip: Take a photo of wiring before removal to guide the new connections. - 3
Inspect the pit and discharge piping
Look for cracks, corrosion, or damage to the pit walls and piping. Clear any debris blocking the intake or discharge path. If the discharge line is damaged, plan a repair or replacement during the install.
Tip: Replace damaged piping to prevent leaks and ensure smooth operation. - 4
Prepare the new pump and install the check valve
Attach the check valve to the discharge line as close to the pump outlet as possible. Ensure the valve is oriented correctly to prevent backflow. Install the discharge line from the valve to your exterior area following the lowest path with no kinks.
Tip: Use Teflon tape or primers as appropriate for a secure seal. - 5
Lower and secure the new pump
Lower the new pump into the pit, ensuring the float switch can move freely. Secure any mounting hardware and verify the pump sits level and stable. Align the discharge line to avoid contact with the pit wall.
Tip: Ensure the pump is fully submerged as designed and that cords have slack to prevent pinching. - 6
Connect electrical supply and perform a test run
Reconnect the power supply or wiring per local code, then run a test by pouring water into the pit. Observe the pump’s activation, cycling, and discharge flow. Listen for odd noises and check for leaks along joints.
Tip: If the pump won’t start, re-check the electrical connections and breaker status. - 7
Check operation and leaks
Let the pump cycle several times to confirm consistent operation. Inspect all joints, seals, and the connection to the exterior discharge for leaks. Ensure there is a proper slope away from the foundation for drainage.
Tip: Address any leaks immediately to prevent water damage. - 8
Finalize and plan maintenance
Replace the pit lid or cover and store manuals and receipts with your home records. Schedule a maintenance check every 6–12 months and after major storms. Keep a spare check valve or gasket on hand for quick responses.
Tip: Document the replacement date and set calendar reminders for ongoing upkeep.
FAQ
What is the typical lifespan of a submersible sump pump, and when should I replace it?
Most submersible sump pumps last 6-10 years with regular maintenance. Replace if you notice frequent cycling, reduced flow, loud noises, or repeated outages even after maintenance.
Most pumps last several years; replace if cycles or noise become frequent despite cleaning and maintenance.
Do I need a professional to replace a submersible sump pump, or can I do it myself?
Many homeowners can replace a sump pump with basic electrical safety knowledge and the right tools. Complex electrical wiring or new plumbing configurations may require a licensed professional.
A capable DIYer can do it, but call a pro if wiring or code compliance is in doubt.
How do I know what size pump I need for my basement?
Size depends on pit volume, rainfall, and desired cycle rate. Compare the pump’s flow rate (gallons per hour) with your typical water inflow and ensure the head height matches your installation.
Match the pump’s capacity to your basement’s needs and the height water must be pumped.
Can I reuse the existing discharge pipe with a new pump?
If the existing discharge piping is in good condition and compatible with the new pump, you can reuse it with appropriate adapters. Inspect for cracks and replace if needed.
You may reuse pipes if they’re in good shape; check compatibility first.
Should I add a battery backup to a sump pump replacement?
A battery backup provides protection during power outages, especially in heavy storms. It’s a worthwhile addition for critical sump pump systems.
Yes, a backup helps you stay protected during outages.
Watch Video
Top Takeaways
- Plan ahead with sizing and discharge routing.
- Install a check valve to prevent backflow and extend pump life.
- Test thoroughly before sealing the pit and schedule regular maintenance.
- Keep backup options for power outages to protect your basement.