How to Use a Submersible Sump Pump: A Homeowner’s Guide
Learn how to use a submersible sump pump safely and effectively. This step-by-step guide covers selection, installation, operation, maintenance, and troubleshooting to protect your basement from flooding.

This guide shows you how to use a submersible sump pump safely and effectively, from selecting the right model to installation, operation, and maintenance. You’ll learn essential safety steps, wiring basics, discharge setup, and how to test the pump to protect your basement from flooding. By the end, you’ll know when to add a backup and how to prevent common failures.
What a Submersible Sump Pump Is and Why It Matters
A submersible sump pump lives under the water line in a specially built pit. Unlike pedestal pumps, submersibles are designed to be fully submerged, which reduces noise and vibration while improving efficiency. For homeowners, understanding how to use a submersible sump pump begins with recognizing its core components: the pump housing, the float or electronic switch, the discharge outlet, and the power connection. In practical terms, this equipment protects basements from groundwater and stormwater intrusion by expelling water away from the foundation through a discharge pipe. When you ask how to use a submersible sump pump, you’re really learning how to pair the right pump capacity with a correct installation, a robust discharge path, and reliable safety measures.
To get the most from your unit, choose models with a reputable float switch, an appropriate horsepower rating for your space, and built-in protection features like a thermal overload indicator. Sump pumps are part of a broader basement-water management approach that includes proper drainage, sump-pit sizing, and reliable power backup where needed. The Sump Pump Check team emphasizes not just buying a pump, but installing and maintaining it as part of a proactive flood-prevention plan.
Safety First: Electrical and Water Safety Essentials
Before any interaction with a sump pump, safety must come first. Water and electricity create potentially dangerous conditions, so always unplug the power when handling wiring or the pump itself. Install a GFCI-protected outlet that is outdoors-rated or in a damp area, and keep power cords elevated and dry. Never run an extension cord as a primary power source for a sump pump; use a dedicated, properly rated outlet. Inspect the pump’s cord and plug for cracks or wear, and ensure the grounding system is intact. If you smell burning insulation or notice scorch marks on outlets, stop and call a qualified electrician. Following these safety steps reduces the risk of electric shock and fire while you perform maintenance or inspections.
For additional safety context, you can consult authoritative sources on electrical safety and moisture hazards from government and university resources. The goal is to treat the sump pump as a critical safety device rather than a quick fix.
Planning Before You Install: Pit, Cover, and Discharge
A successful install starts with planning. Confirm the sump pit dimensions are compatible with your pump and that the cover seals well to keep debris out. The discharge piping should route water away from the foundation and, if possible, downhill to a storm drain or outdoor landscape. A properly sized check valve helps prevent backflow and re-entry of water into the pit. When planning, consider future maintenance access, the space in the basement, and whether a battery backup is warranted for power outages. Sump pump planning also involves choosing a suitable location for the pump that is accessible for testing and service. Good planning reduces installation time and minimizes post-install issues.
As part of your planning, note that many homeowners pair their primary sump pump with a backup pump or water-powered backup system. This approach is especially helpful in regions prone to long outages or heavy rainfall.
How to Choose the Right Submersible Sump Pump
Selection hinges on estimated water flow, pit height, and the head you must lift water to reach the discharge point. A higher head or longer discharge run reduces the effective flow, so choose a pump with a slightly higher capacity than your rough calculations. Look for a model with a sealed motor, corrosion-resistant materials, and a reliable float switch or electronic auto-start feature. Consider noise, energy efficiency, and the pump’s ability to start under a load. For many homes, a pump with a balanced blend of efficiency and durability provides the best long-term value. Always verify that the chosen unit fits your pit diameter and that the discharge fittings are compatible with your piping.
The brand context from Sump Pump Check emphasizes selecting a pump based on real-home conditions and future-proofing with access for maintenance.
Step-by-Step Installation Overview
This section provides a high-level overview of the installation process without repeating the full step-by-step instructions. Start with a clean, dry pit, install the pump with the inlet screen oriented correctly, and ensure the float switch has full, unrestricted movement. Attach the discharge line to the pump outlet, ensure the check valve is properly installed, and route the line to a suitable exterior outlet or drainage point. Once installed, connect the pump to a properly rated power source and test the system with water to confirm water removal and correct activation with rising water levels. Finally, document maintenance schedules and safety checks to simplify future servicing.
Maintaining a bow-to-stern understanding of your system reduces the risk of a flood during a heavy rain event.
Wiring and Electrical Considerations
Electrical safety is essential for sump pump operation. Use a dedicated, GFCI-protected circuit or a weatherproof outlet in proximity to the pump. Route cords in a way that minimizes tripping hazards and avoids contact with standing water. If your pump requires a cord, ensure it is rated for wet locations and that the plug is accessible for quick disconnection. Many jurisdictions require a ground fault protection device because sump pump failures can pose shock risks. If the installation involves hard-wired connections, have a licensed electrician perform the work. Regularly inspect the wiring for wear or corrosion and replace damaged components promptly.
Your local codes may specify additional requirements, so consult local electrical guidelines as part of the planning.
Connecting Discharge Lines and Check Valves
Discharge piping should be sized to the pump outlet and compatible with your home drainage plan. A check valve installed in the discharge line prevents backflow into the pit, which helps the pump stay primed and operates more efficiently. Use rigid PVC or flexible hose designed for exterior use, and secure all joints with appropriate fittings and sealants. Direct the discharge away from the foundation and toward a downward slope to minimize the risk of re-entry due to wind reversal or pooling. Ensure the route avoids entanglement with basement windows or doors and that animal damage is unlikely.
Always verify that any exterior discharge point complies with local codes and drainage regulations.
Testing, Priming, and the Initial Run
After installation, perform a careful test. Add water to the pit until the float switch engages, then observe the pump as it empties the pit. Check for leaks at joints and the discharge connection. If the pump fails to start or makes unusual noises, power down and inspect the impeller and inlet screen for obstructions. Allow the pump to return to rest and repeat the test to confirm consistent operation. For the initial run, monitor the discharge rate and ensure the water is directed away from the home’s foundation. Keep a log of test dates and results for ongoing maintenance.
A well-timed test helps confirm readiness before heavy rainfall or spring melt season.
Maintenance: Routine Checks and Long-Term Care
Regular maintenance preserves performance and extends life. Inspect the inlet screen for debris and remove any buildup that could restrict flow. Clean the impeller and housing to prevent clogging, and verify the float switch or electronic sensor moves freely without sticking. Check the discharge line for leaks or cracks and ensure the check valve remains secure. Keep batteries on backup systems charged if you have a battery backup pump. Scheduling a seasonal check helps you catch problems before they cause flooding, and keeping a simple maintenance log makes future servicing easier.
The maintenance routine is your best defense against sudden failures during storms.
Troubleshooting Common Problems and Quick Fixes
If the pump won’t start, verify power, check the circuit breaker, and inspect the float switch for obstruction. A clogged inlet will reduce flow; clean the intake screen and remove debris. If the pump runs but water level remains high, check for leaks in the discharge line, valve misalignment, or air locks in long piping runs. If the pump trips the breaker, reassess load on the circuit and the outlet’s weatherproofing. For persistent issues, consider professional inspection or a replacement if the unit shows signs of wear after years of use. Keeping spares of basic components can speed fixes and minimize downtime.
Not all problems require replacement; many issues are addressable with proper maintenance.
Backup Power and Redundancy Considerations
Outages during storms are a common trigger for basement flooding. A back-up sump pump powered by a battery or a generator ensures water removal continues during power failures. Battery backup units are designed to kick in automatically when the primary pump loses power, while generators require manual or automatic startup and fuel management. Evaluate your home’s risk level, the climate, and typical outage durations to decide whether a backup system is worth the investment. Regularly test both primary and backup pumps so you can trust them when the weather turns bad.
When to Call a Pro and Replacement Guidelines
If you notice persistent flooding after a thorough maintenance check, or if electrical work is required beyond basic wiring, consult a professional. A licensed plumber or electrician can verify code compliance, check for structural issues, and recommend a replacement if your unit has exceeded its expected life. Signs you may need replacement include persistent clogs, excessive vibration, loud grinding noises, or repeated circuit trips. In general, plan for a replacement when the pump frequently fails to start or cannot move water efficiently during testing. A professional evaluation can save time and prevent costly damage.
Putting It All Together: A Quick Recap of How to Use a Submersible Sump Pump
To summarize, you should select a pump with appropriate capacity, install it in a well-planned sump pit, hook up a safe discharge route with a check valve, and ensure proper electrical safety. Regular maintenance, proactive testing, and backup power options significantly reduce flood risk. By leaning on reputable guidance from sources like Sump Pump Check and trusted safety resources, you’ll be better prepared for wet seasons. The aim is consistent performance and long-term protection for your home.
Authoritative Resources and Further Reading
For deeper understanding and official guidelines, consider these sources: 1) OSHA safety information for electrical installations and damp environments (https://www.osha.gov). 2) U.S. Environmental Protection Agency guidance on moisture control and water management in basements (https://www.epa.gov). 3) General safety and home maintenance references from major public institutions (https://www.cdc.gov).
Tools & Materials
- Submersible sump pump(Select based on pit size and expected water flow)
- Sump pit or basin(Pre-formed or custom-fit to your space)
- Discharge piping (PVC or flexible hose)(Diameter compatible with pump outlet)
- Check valve(Prevents backflow into the pit)
- Float switch or electronic control(Integrated in many pumps)
- GFCI-protected outlet(Required for safety in damp areas)
- Weatherproof outdoor-rated extension cord (if needed)(Use only if a dedicated outlet is not nearby)
- Sealant or silicone(Seal joints and keep water out of gaps)
- Silicone caulk or plumber’s putty(For sealing around piping and pit edge)
- Basic hand tools (screwdrivers, pliers, adjustable wrench)(For assembly and disassembly)
- Bucket, sponge, and rags(Cleanup during installation)
- Gloves and eye protection(Protect during handling and drilling)
- Backup power option (battery backup pump or generator)(Consider for outages in flood-prone areas)
Steps
Estimated time: 2-3 hours (plus follow-up tests)
- 1
Assess pumping needs
Calculate the expected water inflow and head pressure to determine pump size. Consider basement size, rainfall history, and future expansion plans. This helps ensure the pump will meet demand without overloading.
Tip: Match pump capacity to real conditions; underpowered pumps fail during storms. - 2
Prepare the pit and area
Clear debris, dirt, and protrusions from the pit. Ensure the pit is dry and the floor around it is clean to prevent contamination and interference with the float switch.
Tip: Use a utility knife to remove obstructions around the pit edge if needed. - 3
Install the pump in the pit
Lower the pump into the pit with the discharge port facing the planned outlet. Route the power cord and ensure it has clearance to avoid rubbing on sharp edges.
Tip: Keep the cord elevated and away from potential flood paths. - 4
Attach discharge and check valve
Connect the discharge pipe to the pump outlet and install the check valve in the correct orientation to prevent backflow. Secure with clamps and sealant where required.
Tip: Ensure the valve is above the waterline to function properly. - 5
Wiring and safety connections
Plug into a GFCI-protected, properly grounded outlet or have a licensed electrician perform hard-wired connections. Confirm all connections are dry and tight.
Tip: Never bypass safety devices or skip the GFCI requirement. - 6
Test the system with water
Pour water into the pit until the float triggers and the pump runs smoothly. Observe discharge flow and listen for unusual noises.
Tip: Run the test multiple times from low water to peak height to verify consistency. - 7
Backup power readiness
If you rely on a backup, connect or position a battery backup pump or ensure generator access. Verify automatic startup if designed for it.
Tip: Test backup power quarterly to ensure reliability. - 8
Seal and finalize installation
Seal any gaps around the pit, secure cords, and install a tight-fitting lid. Confirm there is no water intrusion around the pump mounting area.
Tip: Label the system so future homeowners know the setup. - 9
Document maintenance plan
Create a simple log of test dates, maintenance performed, and any replacement parts. Schedule periodic checks—at least seasonally.
Tip: A log helps track wear and plan replacements. - 10
Schedule regular checks and tests
Set reminders to clean the pit, inspect the outlet, check valve condition, and re-test the pump during heavy rain seasons or spring thaw.
Tip: Active maintenance minimizes unexpected failures.
FAQ
What is a submersible sump pump and how does it work?
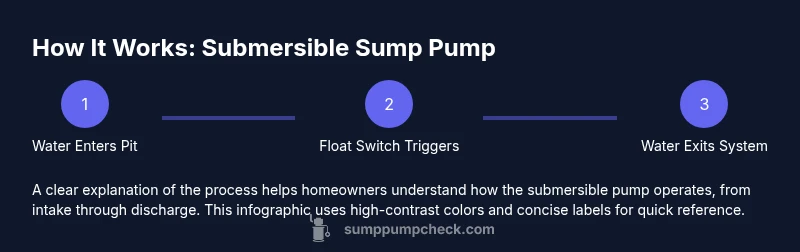
A submersible sump pump is designed to operate while submerged in a sump pit. Water entering the pit raises a float or triggers a sensor, which starts the motor and pushes water out through a discharge line. This type reduces noise and vibration and is common in residential basements.
A submersible sump pump sits in the pit and turns on automatically when water rises, pushing it out through a pipe to keep your basement dry.
Do I need a battery backup for my sump pump?
Battery backups are recommended in flood-prone areas or where power outages are common during storms. They provide continued operation when the main power fails. Choose a backup that is compatible with your pump and system and test it regularly.
Yes, a battery backup helps you stay protected during storms when power goes out.
How do I install a submersible sump pump safely?
Safe installation includes a grounded, GFCI-protected outlet, proper discharge routing away from the home, secure valve and piping connections, and avoiding water-contact with electrical components. If you’re unsure, hire a licensed professional.
Install with safety in mind: use a GFCI outlet and route water away from the house. If unsure, call a pro.
What maintenance does a sump pump require?
Routine maintenance includes inspecting and cleaning the inlet screen, testing the float/sensor, verifying the discharge path, and checking electrical connections. Regular checks prevent clogs and prolong pump life.
Clean the intake, test the float, and verify the discharge path during routine maintenance.
How can I tell if my sump pump is failing?
Indicators include unusual noises, frequent tripping of the circuit breaker, failure to start, or water remaining in the pit after a test. If you notice these signs, inspect connections, clean the intake, and consider professional service.
Unusual noises or frequent trips suggest failure; test and inspect before calling a pro.
When should I replace my sump pump?
Replacement is warranted when repairs become frequent, performance declines, or the unit reaches end-of-life as indicated by persistent issues despite maintenance. A professional evaluation can confirm the right timing.
Replace when repairs pile up or performance drops despite maintenance.
Watch Video
Top Takeaways
- Choose a pump with adequate capacity for your space
- Plan a clean, code-compliant discharge path with a check valve
- Prioritize electrical safety with GFCI-protected outlets
- Regularly test and maintain the system to prevent floods
- Consider a backup power option for outages