Sewer Sump Pump Installation: A DIY Guide for Homeowners
Learn how to plan, install, and maintain a sewer sump pump safely. This step-by-step guide covers permits, components, wiring, venting, and troubleshooting for basements.

Sewer sump pump installation helps protect basements from sewage backups by moving wastewater to the main sewer line. This guide covers planning, code considerations, essential components, and a practical step-by-step approach to installation, operation, and maintenance.
What sewer sump pump installation aims to do and why it matters
Sewer sump pump installation, often called a sewage ejector pump setup, provides a dedicated basin for wastewater from basement fixtures to be pumped up to the home’s sewer or septic system. It’s a common solution in homes with bathrooms or laundry rooms below grade where gravity drainage isn’t possible. According to Sump Pump Check, understanding local codes and choosing the right kit is essential to avoid unsafe backflow or illegal discharge. By planning ahead, homeowners reduce the risk of overflows during heavy rain or overloaded municipal systems, keeping living spaces dry and sanitary.
When you should consider a sewer ejector pump
Not every basement needs a sewage ejector system, but several situations warrant one. If your lower level hosts a bathroom, sink, laundry, or utility room without direct connection to the main waste line, a sewer sump pump installation is worth evaluating. It’s also prudent when existing pumps clog frequently or fail during wet seasons. Before proceeding, verify whether permits are required in your jurisdiction and whether your plumbing layout supports a dedicated discharge path that meets local backflow and venting rules.
Key components and how they work
A sewer sump pump system typically includes a basin (or pit), an automatic sewage ejector pump, a discharge pipe, a check valve, a float switch, and an alarm option. The basin sits securely in the lowest point of the basement floor and connects to a wastewater line leading to the municipal sewer or septic system. The pump activates when wastewater enters the basin and reaches a level that lifts the float switch. The check valve prevents backflow, while the alarm warns of pump failure or power outage. Proper venting helps prevent sewer gases and pressure buildup. By understanding these parts, you’ll know what to inspect during maintenance and what to replace if needed.
Planning your installation: permits, codes, and layout
Planning is the backbone of a safe install. Start by consulting local codes, obtaining any required permits, and scheduling inspections as needed. Create a simple layout showing where the pit will sit, the discharge route, and where electrical connections will occur. A dedicated circuit with GFCI protection is commonly recommended to reduce shock hazards. Make sure the discharge path ends outside the building and never ties into a drainage line intended for rainwater. This planning helps prevent code violations and potential health risks.
Choosing the right system: pumping capacity, float switch, and basin size
Sewer ejector pumps come in different sizes and capacities. For most residential basements, a pump with adequate horsepower and a reliable float switch provides consistent performance. Select a basin large enough to hold wastewater without frequent overflows and ensure the inlet is compatible with your fixtures. Consider whether you want a battery backup or alarm system to guard against power loss. The right combination reduces maintenance needs and extends system life, especially in areas with inconsistent power or high wastewater volumes.
Safety and code considerations you can't ignore
Electrical safety is critical when installing any pump. Always shut off power at the service panel before starting work, and use a dedicated, grounded circuit with GFCI protection where required. Use proper pipe fittings, cement, and sealants rated for wastewater to avoid leaks. Follow venting requirements to prevent sewer gas buildup and ensure cleanouts are accessible for future service. Finally, confirm that all components meet local regulations and that inspections are completed when required.
Sizing, layout, and drain considerations for best results
Thorough sizing ensures the pump, basin, and discharge piping are matched to your home’s needs. Measure basement depths, check the distance to the main sewer line, and plan for a discharge route that avoids obstacles and preserves landscaping. Use durable PVC or ABS piping with correctly rated fittings and a secure, corrosion-resistant discharge end. A solid layout minimizes clogs, reduces maintenance, and makes future upgrades easier.
Maintenance, troubleshooting, and long-term care
Regular maintenance keeps sewer sump pump systems reliable. Periodically inspect the pump for corrosion, listen for unusual noises, test the float switch, and check the alarm if installed. Clean the basin to prevent sediment buildup, inspect the discharge line for obstructions, and ensure the check valve seals properly. If the pump runs frequently or fails to start, consult a licensed plumber. Routine checks prolong the life of the device and protect your basement from wastewater problems.
Common mistakes and how to avoid them
Avoid skipping permits or neglecting a dedicated electrical circuit. Don’t route the discharge into a stormwater system or a floor drain that isn’t designed for wastewater. Ensure the basin is properly sealed and the cover is installed to prevent odor and pests. Finally, don’t ignore maintenance; small issues become costly repairs if left unattended.
Tools & Materials
- Sewage ejector pump kit(Include pump, float switch, and mounting hardware)
- Sewer ejector basin (pit)(Rugged basin sized for fixtures served)
- Discharge piping (PVC/ABS)(Appropriate diameter for pump outlet)
- Check valve(One-way flow to prevent backflow)
- Vent pipe and fittings(Required by some codes for gas venting)
- Electrical: dedicated circuit, GFCI breaker(120V circuit, proper gauge wire)
- Conduit and electrical box(For safe, code-compliant wiring)
- PVC cement and primer(Seal and secure joints)
- Caulk, putty, or sealant(Waterproof seal at basin and piping)
- Shovel or trenching tool(For pit preparation, if needed)
- Safety gear: goggles, gloves(Protect yourself during installation)
- Back-up power option(Battery backup or generator if desired)
- Alarm or notification device(Alerts for pump failure)
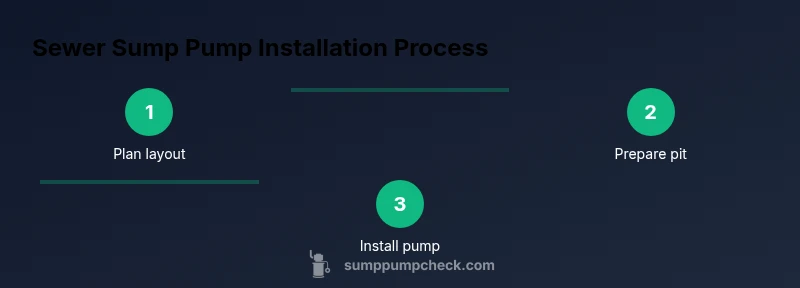
Steps
Estimated time: 4-6 hours
- 1
Plan pit location and fixture layout
Identify the lowest practical point in the basement and map all fixtures that drain into the ejector system. Confirm there is enough room for the pit, pump, and maintenance access.
Tip: Mark alignment points on the floor and maintain clear access to the panel. - 2
Shut off power and water supply
Turn off the circuit feeding the area and seal off nearby valves to prevent accidental flows. Verify power is off at the main panel before touching wiring.
Tip: Use a non-contact voltage tester to double-check. - 3
Cut or drill as needed and prepare pit
Create the pit space to fit the basin. Ensure walls are clean and the bottom is level to prevent uneven weight distribution.
Tip: Use a concrete saw or core drill if required; wear dust protection. - 4
Install the basin and check for level
Secure the basin in the pit and confirm it sits level. A tilted basin can cause improper pump operation and leaks.
Tip: Use shims and a level; seal the edges with gasket material. - 5
Install discharge piping and check valve
Connect the discharge outlet to the pipe, install the check valve in the correct orientation, and secure all joints with primer and cement.
Tip: Keep the discharge route above grade and away from doors. - 6
Install the pump and float switch
Mount the sewage ejector pump on the basin, route wiring to the control box, and wire the float switch to trigger on wastewater entry.
Tip: Ensure the float travels freely without obstruction. - 7
Run electrical connections and install a GFCI outlet
Finish wiring with a grounded, dedicated circuit; install a GFCI outlet per code and mount an accessible disconnect.
Tip: Follow local code for conductor gauge and routing. - 8
Test the system and adjust settings
Pour water into the basin to simulate wastewater and observe pump operation. Adjust float and cut-off levels as needed.
Tip: Listen for the pump starting and stopping smoothly. - 9
Install alarm and backup power considerations
If using an alarm, connect it to the control panel. Assess options for battery backup to prevent failure during outages.
Tip: Place alarm where it’s audible in living spaces. - 10
Final inspection and cover installation
Seal the pit and install the cover securely. Schedule any required inspections and document the installation.
Tip: Keep a maintenance log and test annually.
FAQ
What is a sewer sump pump and how does it differ from a standard sump pump?
A sewer sump pump, often called a sewage ejector pump, handles wastewater from basement fixtures and moves it to the main sewer or septic line. A standard sump pump primarily removes groundwater or stormwater. Sewage ejectors must be built with a sealed basin, appropriate venting, and meet local backflow and electrical codes.
A sewer sump pump handles wastewater from basements and must meet plumbing and electrical codes. A standard sump pump mainly handles groundwater.
Do I need a permit for installation?
Many jurisdictions require permits for sewage ejector pump installations and electrical work. Check your local building department and obtain any necessary approvals before starting. Permits help ensure safety and code compliance.
Yes, permits are often required. Check with your local building department before you start.
Can I install a sewer ejector pump myself?
Do-it-yourself installation is possible for simple layouts with basic plumbing and electrical skills. Complex basins, long discharge runs, or tight spaces may require a licensed plumber and electrician. Always prioritize safety and local code compliance.
DIY is possible for straightforward setups, but professional help is wise for complex jobs.
What maintenance does a sewer ejector pump require?
Regular maintenance includes testing the pump, inspecting the basin, cleaning sediment, checking the discharge line for blockages, and ensuring the float switch operates freely. Replace worn components as needed to prevent backups.
Test the pump regularly, clean the basin, and inspect lines and switches for smooth operation.
What should I consider for backflow prevention?
A properly installed check valve and venting system prevent backflow and sewer gas. Some codes require additional backflow prevention devices, especially in flood-prone areas. Review local regulations.
Use a check valve and proper venting to prevent backflow; follow your local codes.
What are signs of a failing sewer ejector system?
Unusual odors, frequent clogs, water backups, or the pump running continuously can indicate problems. Address issues promptly to avoid basement damage and costly repairs.
Watch for odors, backups, or a pump that never stops. Fix early.
Watch Video
Top Takeaways
- Plan permits and layout before breaking ground
- Choose the right basin, pump, and discharge path
- Prioritize safety: shut off power, use GFCI, and secure seals
- Test and maintain regularly for reliability
- Consult professionals for complex installs