Install a New Sump Pump: Step-by-Step Guide for Homeowners
Learn to install a new sump pump safely with a complete, practical process. This guide covers planning, electrical safety, pit setup, discharge routing, testing, and ongoing maintenance to protect your basement from flooding.

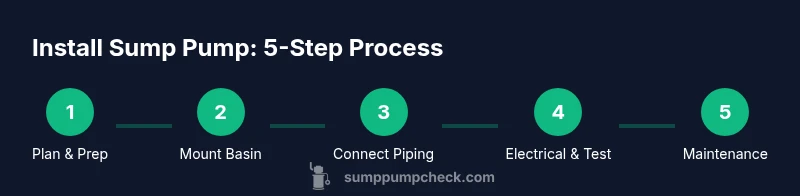
You can install a new sump pump by planning placement, selecting a suitable pump, wiring to a dedicated outlet with GFCI, routing the discharge correctly, and testing for leaks and cycle performance. This guide walks homeowners through safety precautions, required tools, and a practical, step-by-step process to protect basements from flooding.
Assessing your drainage needs and selecting a sump pump
According to Sump Pump Check, choosing the right pump begins with understanding your basement's drainage needs, discharge options, and maintenance expectations. Start by evaluating pit size, typical water flow during storms, and whether the location allows for a vertical discharge or requires a longer run to an exterior drain. Sump pumps come in pedestal and submersible styles; submersible models are generally quieter and fit better in limited pits, while pedestal units can be easier to service. Sump Pump Check Analysis, 2026, emphasizes selecting an appropriately sized pump rather than over- or under-sizing. Consider future needs such as a potential drainage expansion or a switch to a battery backup during power outages. Gather your measurements: pit diameter, available space above the pit, and clearance for maintenance. With the right pump choice, you’ll establish a solid foundation for a dependable sump system.
This early planning sets the tone for a reliable installation and helps you avoid common mistakes that lead to nuisance leaks or pump failures.
A note on reliability: when you select a pump with proven durability and a reputable manufacturer, you reduce the likelihood of premature failure. The Sump Pump Check team recommends focusing on quality components and proper sizing as the basis for long-term performance.
Planning the installation layout and permits
Plan where the sump basin will sit to optimize drainage and minimize nuisance piping. Locate a dry, accessible area on the basement floor with a level surface and minimal risk of incidental flooding. Mark the pump location, ensure there is a clear path for the discharge line to an exterior point and check that the desired route complies with local building codes. If your home has frost risks or long discharge runs, plan a gravity-fed or screened exit with a backflow path. Keep electrical outlets in mind: a dedicated GFCI-protected 120V circuit often provides the safest setup. If you need a permit or inspection, contact your local building department ahead of time and schedule accordingly. By mapping the path now, you’ll avoid rework and ensure the discharge line remains above grade, free from obstruction.
Clear planning saves time and reduces the risk of leaks after the installation. It also helps you coordinate with any required inspections early in the process.
Electrical safety and codes you must follow
Electrical safety is critical when installing a sump pump. Always shut off power at the main panel before opening the sump pit. Use a dedicated 120V circuit with a Ground Fault Circuit Interrupter (GFCI) outlet; this reduces the risk of shocks from water exposure. Route the power cable away from the discharge line and keep the cord elevated to prevent contact with standing water. Use a strain relief connector to protect the cord entry and seal any gaps in the pit with a waterproof sealant. Follow local codes for wiring and check that the pump’s plug and outlet can withstand humid basement conditions. If you’re not confident with electrical work, hire a licensed electrician. Protect yourself with eye protection and gloves when handling sharp edges or damp surfaces.
Electrical safety isn’t optional. A properly wired setup reduces shock risk and protects your investment over time.
Choosing the right basin, pump, and check valve
Select a basin compatible with the pump and your floor plan. A correctly sized basin supports efficient water collection and reduces pulp noise. Match the pump to the basin and consider the head height required to push water to the exterior. Install a check valve on the discharge line to prevent backflow when the pump shuts off, and position it as close to the pump as possible to minimize water hammer. Use a flexible coupling or rubber connector to reduce vibration. Choose materials suited to your climate and ensure the union fittings are tight but not over-tightened. This choice influences long-term reliability, maintenance, and noise levels.
A well-matched basin and valve arrangement makes maintenance easier and reduces the chance of backflow or leaks.
Pro tip: double-check the fit before securing parts to avoid forced modifications later in the project.
Mounting the sump pump and securing the basin
Place the basin in the prepared pit, ensuring it sits level and flush with the floor. Fasten the pump to the mounting base or brace per the model’s instructions to prevent float oscillation. If you’re using a pedestal pump, align the motor with the cover slot and secure the base. Install the basin lid and check for any gaps around the rim, sealing with silicone as needed. Confirm that there is enough space around the pump for future maintenance and that power and discharge lines won’t be pinched.
Correct mounting reduces vibration, noise, and wear on the float switch. A secure setup also makes future inspections quicker and safer.
Routing the discharge line and venting
Plan the discharge route to avoid low points where water can back up. Use a rigid PVC pipe with proper slope (a quarter inch per foot is typical) to move water away from the foundation. Install a check valve near the pump to prevent backflow and consider a back-flow preventer if required by your code. Seal joints with PVC cement and primer and use elbow fittings to maintain a smooth path. If you need to pass through walls or floors, drill holes with care and seal penetrations to prevent radon entry or moisture intrusion.
A clean discharge path promotes consistent pumping and reduces the chance of leaks at joints. Keep the line away from plantings or metal objects that could corrode over time.
Wiring, float switch, and alarms
Connect the float switch to control the pump’s on/off cycle. Ensure the wiring is routed safely and kept away from moving parts; use flexible conduit if needed. Install a water alarm or a battery-operated backup alarm to alert you of pump failure. If your pump has an integrally wired switch, follow the manufacturer’s instructions precisely and test the switch several times during setup. Use heat-resistant cable ties to organize cables and avoid entanglements.
Proper wiring and alarms give you early warnings, which is crucial during storms when you’re least able to monitor the system closely.
Testing the system: initial startup, priming, and checks
With power off, complete the physical setup, fill the basin with water to test the activation of the float switch, and confirm the pump engages smoothly. Once the pump runs, observe the discharge line for leaks and ensure the water is flowing away from the foundation. Listen for unusual noises and verify that the check valve prevents backflow. If the unit runs but fails to pump out water efficiently, recheck the impeller, inlet screen, and discharge path. After a successful test, run the system for 24 hours to observe cycling frequency and confirm steady operation.
Testing ensures you catch misalignments and leaks before heavy rainfall arrives. A thorough test also helps you calibrate the float and alarm settings.
Maintenance plan and long-term care
Create a maintenance routine that includes monthly visual inspections, quarterly testing, and annual service. Clean the inlet screen, remove debris, and check the discharge line for blockages. Test the backup system if you have one, and replace worn parts before they fail. Keep replacement parts on hand and store a spare pump battery if you have a battery backup. Document service dates and any observed issues to support warranty claims.
A simple maintenance schedule extends pump life and reduces the chance of unexpected failures during storms. Regular checks also help you spot wear early.
Common mistakes to avoid and troubleshooting quick wins
Avoid undersizing the pump, which leads to frequent cycling and basement flooding. Do not route the discharge inside a vented crawl space or into a storm drain improperly. Avoid skipping electrical safety steps such as not using a dedicated GFCI outlet. Quick fixes include clearing debris from the inlet screen, resealing any gaps around the pit, and re-checking the discharge path for obstructions. If you still have water ingress after installation, consult a professional to evaluate pit depth, valve placement, and drainage slope. The Sump Pump Check team emphasizes adherence to safety steps and proper sizing to ensure long-term success.
Tools & Materials
- Sump pump (new)(Choose a model matching your basin and expected flow; consider a backup option.)
- Sump basin/pit kit(Ensure it fits your floor area and provides stable mounting.)
- Discharge pipe (PVC, 1-1.5 inches)(Slope away from foundation; plan exterior exit.)
- Check valve(Prevents backflow; install as close to pump as possible.)
- PVC cement and primer(Seal joints for a watertight discharge path.)
- GFCI-protected 120V outlet(Dedicated circuit; ensure outlet is in a dry area.)
- Pipe wrench and hacksaw or PVC cutter(For fittings and cutting pipe to length.)
- Silicone sealant(Seal gaps around basin rim and penetrations.)
- Measuring tape(Verify pit dimensions and discharge routing.)
- Safety gear (gloves, goggles)(Protect yourself during cutting and handling damp components.)
- Flexible conduit and cable ties(Organize wiring and protect from moisture.)
- Basement ladder or helper(Assist with installation in tight spaces.)
Steps
Estimated time: 2-4 hours
- 1
Plan and prep the work area
Identify the installation location, measure pit dimensions, and verify access to electrical outlets and exterior discharge. Clear the area of debris and power down the circuit you’ll use. Prepare the tools and materials so you can work without interruption.
Tip: Double-check the chosen discharge exit for drainage away from the foundation. - 2
Install the sump basin
Place the basin in the pit and ensure it sits level. Secure it according to the manufacturer’s instructions, so the float won’t jam or stick. If needed, pour a small amount of concrete or use mounting brackets to stabilize.
Tip: A stable basin prevents tilt that could affect pump operation. - 3
Mount the pump and route initial hoses
Insert the pump into the basin and attach the discharge pipe to the pump. Use a flexible coupling to absorb vibration and reduce stress on fittings.
Tip: Check that the impeller can rotate freely and isn’t obstructed. - 4
Install check valve and piping
Attach the check valve to the discharge line as close to the pump as possible. Run the pipe to the exterior exit with proper slope and seal all joints.
Tip: Keep the discharge line above grade to prevent pooling. - 5
Set up electrical wiring
Route the power cord safely, install strain relief, and connect to the GFCI outlet. Ensure the outlet remains dry and accessible for testing and maintenance.
Tip: Do not run electrical cords through water or damp areas. - 6
Install float switch and alarms
If your model uses a separate float switch, connect it according to the manual. Add a water alarm or backup alarm to alert you to pump failure.
Tip: Test alarms during the test run to verify audible alerts. - 7
Test startup and performance
Power up the system, trigger the float switch, and observe flow through the discharge. Check for leaks, unusual noises, and ensure water moves away from the foundation.
Tip: Run for at least 10 minutes to observe cycling patterns. - 8
Seal, finalize, and document
Seal all penetrations, replace the lid, and store maintenance notes. Record dates of testing and any issues for warranty and future service.
Tip: Keep a spare parts kit handy for quick replacements.
FAQ
What is the first step in installing a new sump pump?
Start by shutting off power and planning the pump location. Select a pump type and confirm the pit size and discharge route before buying parts.
Begin by turning off power and planning the pump location, then choose a pump that fits your pit and exit path.
Do I need a battery backup for my sump pump?
A battery backup helps keep the pump running during power outages, which is a common cause of basement flooding.
Yes, a battery backup is a smart addition for power outages.
What is the purpose of a check valve?
A check valve prevents water from flowing back into the sump pit after the pump stops, reducing cycling and noise.
The check valve stops backflow so the pump doesn’t have to re-pump the same water.
Can a non-professional install a sump pump?
Yes, a capable DIYer can install a sump pump with careful attention to safety, electrical wiring, and local codes.
It’s doable for a confident DIYer if you follow safety steps and local rules.
What maintenance does a sump pump need?
Regular visual checks, cleaning the inlet, testing the float switch, and inspecting the discharge line are key parts of maintenance.
Keep it clean, test it, and check the discharge path regularly.
When should I replace my sump pump?
Replace a sump pump if it’s frequently failing, making strange noises, or if the backup system is no longer reliable.
If it keeps failing or is noisy, it’s time to replace it.
Watch Video
Top Takeaways
- Plan the layout and discharge path before cutting any pipes
- Choose the right pump size and style for your pit
- Ensure electrical safety with a GFCI outlet and dedicated circuit
- Install a check valve to prevent backflow and minimize water hammer
- Test thoroughly and maintain on a regular schedule