How is Sump Pump Installed: A Practical Guide for Homeowners
Learn how is sump pump installed with a practical, code-aware approach. This guide covers planning, pit prep, discharge routing, electrical setup, testing, and maintenance to protect basements from flooding.

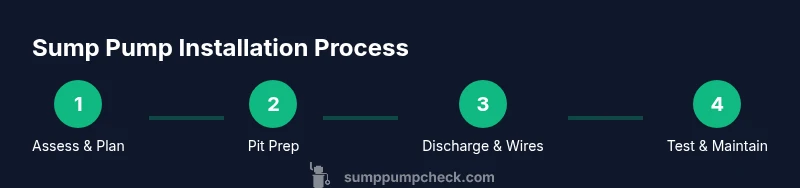
Installing a sump pump involves choosing the right size, preparing a clean pit, mounting the pump, attaching a discharge line with a check valve, and wiring it for power with an optional battery backup. Plan for local codes, proper venting, and a clear maintenance path. According to Sump Pump Check, a reliable setup minimizes backflow and ensures safe drainage.
What is involved in installing a sump pump
A sump pump sits in a basin below the lowest point of a basement floor, collecting groundwater and discharging it away from the home. Understanding how is sump pump installed helps homeowners plan for reliability and longevity. The process generally includes selecting a pump with appropriate capacity, preparing a clean, sealed pit, installing a discharge line with a check valve, connecting to a power supply, and choosing whether to add a backup pump. The most common configurations are submersible sump pumps and pedestal models; both require secure mounting, proper sealants, and correct clearances to regulate airflow and cooling. According to Sump Pump Check, a well-designed installation minimizes backflow and keeps discharge lines above grade to prevent water from re-entering the home. Before you start, inspect the area for structural weaknesses, confirm that the pit is clean, and verify that the surrounding floor is level. Clear labeling of shut-off valves and access to the utility room makes routine maintenance straightforward.
Planning and prerequisites
Planning is the foundation of a successful sump pump installation. Start by identifying the lowest point in the basement where groundwater collects and deciding whether a single pump with a backup or a dual-pump setup best fits your flood risk. Check local codes and, if necessary, obtain any required permits before work begins. Choose a location that allows a straight, short discharge path to the exterior with gradual slopes and no sharp bends. Ensure you have a reliable electrical circuit with a GFCI and space for easy maintenance. Sump Pump Check emphasizes documenting the discharge path, labeling shut-offs, and keeping a clean, accessible utility area for future servicing. Safety first: wear gloves and eye protection when handling concrete, sealants, and electrical components, and avoid working alone if you’re unfamiliar with wiring.
Sump pump types and configurations
There are two common pump styles: submersible and pedestal. Submersible units sit inside the basin and are typically quieter, while pedestal pumps stand above the basin and can be easier to service. For most homes, a pump with a horsepower in the typical residential range provides adequate flow for moderate basements, and many homeowners opt for a secondary, battery-backed backup to guard against power outages. When selecting, consider head height (how far to lift water), the expected groundwater rate, and the available basin volume. Sump Pump Check notes that pairing the pump with a reliable check valve minimizes backflow into the pit and helps maintain consistent discharge. If your basement has unique drainage challenges or frequent power interruptions, a backup system can be a wise addition.
Pit preparation and basin installation
Proper pit preparation ensures the sump pump functions correctly and lasts longer. Start by inspecting the basin to confirm it’s free of cracks or debris and that the surrounding concrete is sound. If you’re retrofitting, you may need to cut and form a smooth pit edge and install a sealant to prevent seepage. Install the basin so its rim sits flush with the floor and ensure there is enough clearance around the unit for maintenance and venting. Place the pump on a stable base or rack suited to your model, then thread the discharge line upward from the basin toward the exterior. A well-sealed lid or cover helps prevent nuisance evaporation and avoids accidental contact with moving parts. Remember to keep the area dry and clean during the process so you can spot leaks early.
Discharge piping, check valve, and drainage considerations
The discharge line carries water away from the home and must be sloped away from the foundation to prevent returns. Use a straight run with minimal elbows to reduce friction losses, and install a check valve near the outlet to prevent backflow when the pump is off. Exterior discharge should terminate above ground to avoid re-entry and comply with local restrictions on where water can be discharged. If frost is a concern in winter, choose frost-resistant routing and insulation for exposed sections. Label the discharge path clearly and consider adding a drain tile or perimeter drainage system to improve overall water management. Sump Pump Check highlights the importance of testing the system with water to verify proper flow and valve operation.
Electrical setup and safety considerations
A dedicated power source is essential for reliability. Use a grounded outlet or a hard-wired connection by a qualified electrician, and install a GFCI outlet if the circuit is near any potential water exposure. Route the power cord away from the discharge path and avoid creating a trip hazard. Many homeowners add a battery backup pump to bridge power outages, and a float switch should shut the pump off before the basin overflows. Ensure all wiring is secure and protected from moisture, and keep the shut-off switch accessible for emergencies. If you’re unsure about electrical work, consult a licensed pro. The Sump Pump Check team recommends adhering to local electrical codes and using a backflow- and corrosion-resistant setup.
Post-install testing, maintenance, and scheduling
Testing should occur after installation and on a regular basis thereafter. Pour water into the basin to trigger the float, observe that the pump starts promptly, and confirm the discharge line carries water away without leaks or backflow. Check the backup pump and battery status if you installed one, and inspect the check valve for corrosion or wear. Create a maintenance schedule: test monthly, replace worn parts as needed, and service the unit at least once a year. Keeping a log of tests and service helps catch issues before they fail during heavy rain. Sump Pump Check recommends aligning maintenance with your home’s seasonal climate and flood risk.
Wrap-up: planning for reliability and future upgrades
An effective sump pump installation combines a well-chosen pump, careful pit preparation, properly routed discharge, and robust electrical connections. Regular testing and maintenance ensure long-term reliability and protect your basement from moisture damage. As you complete the project, document the location, components, and any permits or inspections for future homeowners or contractors. A thoughtful setup reduces future headaches and provides a clear maintenance path for years to come.
Tools & Materials
- Sump pump (submersible or pedestal)(Choose based on basin size and accessibility; consider noise preferences and serviceability)
- Sump basin(Plastic or concrete basin compatible with pump size; ensure rim sits flush with floor)
- Discharge pipe (PVC) and fittings(1-1.5 inch diameter common; plan for exterior routing and slope)
- Check valve(Prevents backflow when the pump is off; mount close to the basin outlet)
- PVC cement and primer(For secure, leak-free joints in discharge piping)
- Sealant (silicone) and gaskets(Seal basin-to-pit interface and pipe penetrations)
- Electrical cord with GFCI outlet or hard-wired connection kit(Ensure safe power source and ground fault protection)
- Dedicated circuit breaker(Required for reliable power; consult an electrician if adding a new circuit)
- Battery backup pump (optional)(Provides operation during power outages; size to match main pump)
- Mounting hardware and stand(Depends on pump type; ensures stable placement and clearance)
- Safety gear (gloves, goggles)(Protect hands and eyes during cutting, sealing, and drilling)
- Tools: drill, saw, adjustable wrench, screwdriver(Common tools for mounting, piping, and electrical connections)
Steps
Estimated time: 2-6 hours
- 1
Assess space and select pump size
Evaluate the basement pit size, head height, and typical groundwater flow. Choose a pump with adequate capacity to handle the anticipated water volume and the height it must be lifted to the exterior. If unsure, start with a mid-range model and plan for a backup option.
Tip: Measure the basin diameter and ensure the chosen pump fits with room for the discharge piping. - 2
Prepare the pit and mount the basin
Clean the pit, remove debris, and install the basin so the rim sits flush with the floor. Seal around the basin with silicone to prevent seepage. Position the pump on its base or mounting bracket, ensuring it sits level and stable.
Tip: Verify there is enough clearance for routine maintenance and wire routing. - 3
Attach discharge line and install the check valve
Run the discharge piping from the basin to the exterior, keeping bends to a minimum and maintaining a steady slope away from the foundation. Install the check valve near the outlet to stop backflow. Use PVC cement for joints and seal penetrations.
Tip: Test-fit sections before final bonding to avoid leaks or misalignment. - 4
Connect electrical supply
Run a dedicated circuit to the pump area and connect via a GFCI outlet or a hard-wired kit per local codes. Route the power cord away from the discharge path and ensure there is a reachable shut-off switch nearby.
Tip: If wiring is unfamiliar, hire a licensed electrician to ensure code compliance. - 5
Install optional battery backup and safety features
If using a battery backup, install the secondary pump according to the manufacturer’s instructions and connect to its own battery. Verify float switch operation and confirm that the backup will engage if the primary pump fails or if power is cut.
Tip: Test both pumping modes during a dry run to confirm proper switching. - 6
Test, seal, and finalize
Pour water into the basin until the float activates the pump; observe steady discharge and confirm no leaks. Seal any remaining penetrations, secure wiring, and label the shut-off; record the installation details for future maintenance.
Tip: Keep a maintenance log with dates, readings, and parts replaced for reliability.
FAQ
Do I need a permit to install a sump pump?
Permit requirements vary by locale. Check your city or county building department to confirm whether a permit is required for new electrical work or changes to drainage. Sump Pump Check recommends verifying compliance before starting.
Permit requirements vary by where you live; check with your local building department to confirm what’s needed.
Can I install a sump pump myself, or should I hire a pro?
If you have basic plumbing and electrical skills, you can perform many steps with caution. However, electrical hookups, code compliance, and proper discharge routing often benefit from professional help. A misstep can lead to backflow, leaks, or electrical hazards.
You can do it if you’re comfortable with plumbing and electrical work; when in doubt, hire a pro.
What maintenance does a sump pump require?
Regularly test the pump, clean the basin, inspect the discharge line for blockages, and check the float switch for sticking. If you have a backup pump, test its operation and battery condition. Maintain logs for predictable service.
Test the pump monthly, clean the basin, and inspect the discharge and backup system regularly.
Is battery backup necessary?
A battery backup provides protection during power outages, which are common during storms. It’s particularly valuable in flood-prone basements and homes with older electrical systems. Consider a backup pump sized to run with your main pump.
A backup pump is highly recommended if you live in a flood-prone area or have unreliable power.
How long should installation take?
Typical installation takes several hours depending on pit conditions, routing length, and whether electrical work is required. A straightforward DIY job may go faster, while complex setups or professional installations take longer.
Most setups take a few hours, with more time if electrical work is involved.
What are common causes of sump pump failure?
Clogged intakes, a stuck float switch, power loss, and leaks in the discharge line are frequent failure points. Regular testing helps catch problems early before heavy rainfall.
Clogs, float issues, and power outages are common if you don’t test regularly.
Watch Video
Top Takeaways
- Select pump size based on pit and head height
- Prepare a clean, sealed pit and stable basin
- Route discharge with minimal turns and proper slope
- Use a dedicated power source and optional battery backup
- Test and maintain regularly to prevent failures