Sump Pump Discharge in Winter: A Practical Guide
Learn how to safely manage sump pump discharge during cold months with practical routing, insulation, and maintenance tips to prevent freezing and basement flooding.

Discharging a sump pump safely during winter prevents frozen lines, ice buildup, and basement flooding. This quick guide covers winter-specific routing, insulation, and maintenance, plus safety and code considerations. You’ll learn practical steps to keep your system reliable all season while minimizing risk to your home and neighbors.
Why winter discharge matters
Winter conditions create unique risks for sump pump discharge lines. Freezing temperatures, snow cover, and ice dams can cause the discharge pipe to freeze or back up, leading to basement flooding or water damage. According to Sump Pump Check, winter-specific design and maintenance significantly reduce these risks and keep the system performing when the ground and pipes are stressed. Start by mapping your current discharge route, identifying vulnerable sections, and ensuring the outlet exterior point is clear of snow and ice. In this section, we'll explain why careful planning matters for reliable operation all season long, and how adherence to practical steps aligns with home safety and property protection.
Common winter discharge challenges
Winter presents several hurdles for sump pump discharge: lines freezing and blocking flow, backflow risk when the line is buried under snow, and ice dams forming at the exterior outlet. Snow cover can clog vents or outlets, while cold ground can slow drainage. Debris and wildlife can also interfere with flow when outdoor access is exposed. The Sump Pump Check team emphasizes that recognizing these challenges early helps you design a resilient winter discharge plan and reduces emergency repairs. Plan for outdoor exposure, accessibility, and routine inspections during cold snaps.
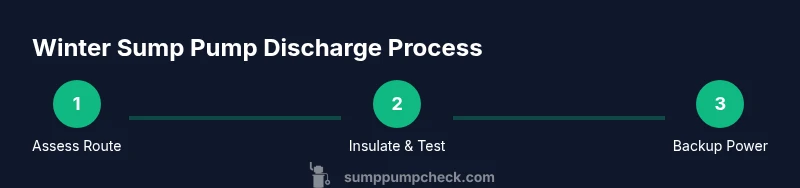
Assessing your existing discharge setup
Begin by locating where your discharge leaves the home and how it travels away from the foundation. Check for any low spots where water could pool near walls, and verify that the pipe maintains a gentle slope toward the exterior. Ensure the outlet point is free of snow, ice, and obstructions, and confirm there is no venting or drainage that could cause backpressure. Document measurements and consider whether the current route complies with local safety guidelines. A clear assessment helps you decide if upgrades or rerouting are necessary for winter reliability.
Choosing between above-ground vs. below-ground discharge routes
Above-ground discharge routes are easier to inspect and maintain in winter, but they can be exposed to ice and street spray. Below-ground routes stay hidden and are less vulnerable to snow, yet they may freeze if buried too shallowly or if grading is poor. When choosing, prioritize a route that keeps water away from the foundation, sidewalks, and driveways, while allowing for inspection and maintenance. Local codes often influence permissible discharge locations, so check with your city or county for guidance.
Frost protection for discharge lines
To prevent freezing, insulate exposed sections of pipe with foam sleeves or wrap, and consider running the line through a heated or semi-sheltered conduit when possible. Heat tracing cables can be installed on longer or more exposed segments, but they must be rated for outdoor use and properly controlled. Seal entry points where pipes pass through the building envelope to reduce drafts. Regularly check insulation for moisture and wear, especially after freeze-thaw cycles.
Drain routing and drainage hardware
A reliable discharge setup includes a proper check valve to prevent backflow and a backflow preventer where required by local codes. Use clamps and supports to minimize movement in freezing conditions, and install a splash block or ground diffuser at the exterior to divert water away from the foundation. If you have a long run, consider adding a clear inspection port to monitor flow and detect blockages early. Proper hardware reduces backflow risk and simplifies winter maintenance.
Backup power and overflow planning
Power outages are more common in winter, so a battery-backed sump pump or a small generator can prevent flooding during outages. Select a high-quality, weatherproof outdoor outlet and ensure the pump switch and float are accessible. Plan for overflow scenarios by routing discharge to a safe area with minimal risk to occupants or landscaping, and keep a portable pump available as a contingency. Document your backup plan and test it in mild winter conditions.
Maintenance schedule for winter conditions
Winter maintenance should be proactive: test the pump monthly, clear the discharge path of snow and ice, and verify electrical connections remain weatherproof. Inspect insulation and heat tape for signs of wear, and replace damaged components promptly. Keep a log of inspections, tests, and any adjustments to the discharge route. Regular checks reduce the chance of sudden failures during deep freezes and storms.
Installation considerations for codes and safety
Follow local codes regarding where and how discharge water may exit your property. Many areas require discharge water to be directed away from the foundation, entrances, and neighboring properties, and demand certain backflow prevention measures. Ensure outdoor electrical components are GFCI-protected and weatherproof. When in doubt, consult a licensed plumber or building inspector. Compliance protects you and your neighbors while reducing risk of fines or remediation work.
Common mistakes and how to fix them
Common winter mistakes include failing to insulate outdoor pipes, discharging too close to foundations or sidewalks, and neglecting to maintain a clear outlet. Another error is underestimating the impact of freezing ambient temperatures on buried runs. To fix these issues, shield all exposed piping, relocate or protect outlets, and schedule regular checks. The goal is consistent discharge performance without creating ice hazards or code violations.
Quick-start winter discharge checklist
- Map your current discharge route and note potential problem areas.
- Verify the exterior discharge point is clear of snow and ice.
- Insulate exposed pipes and consider heat tape for high-risk areas.
- Install or verify a backflow preventer and check valve.
- Ensure a weatherproof, GFCI-protected outlet is available.
- Test the pump in cold conditions and confirm water flows away from the home.
- Implement a backup power solution and locate a contingency plan.
- Document monthly maintenance and review after heavy freezes.
Seasonal transition: from winter to spring
As temperatures rise, inspect for thaw-related damage, such as softened ground or shifting pipes, and adjust discharge routing if necessary. Remove excessive insulation if it traps moisture or causes mold growth, and verify that the drainage is still directed away from the foundation. Prepare to switch back to a lighter maintenance schedule, but keep a weather eye on late-season freezes. End-of-season checks help prevent spring-time surprises and support long-term durability.
Tools & Materials
- Insulated discharge pipe (PVC or rigid plastic)(Choose smooth interior to minimize buildup; extend to exterior without sharp bends)
- Pipe insulation sleeves or foam wrap(Cover exposed sections; seal ends to prevent moisture ingress)
- Heat tape / electrical heat cable for outdoor use(Use only with thermostat control and weatherproof connections)
- Thermal tape controller or switch(Keeps power usage reasonable; place outlet in a weatherproof box)
- Check valve / backflow preventer(Prevents wastewater from re-entering the pump line during power outages or pressure changes)
- Pipe supports/clamps(Stabilizes long runs to prevent movement in freezing conditions)
- Splash block or ground diffuser(Directs flow away from foundation and entryways)
- GFCI-protected weatherproof outdoor outlet(Safety-critical for outdoor electrical connections)
- Weatherproof conduit or conduit sealant(Protects the line where it passes through walls or external enclosures)
- Drainage marker or stake(Marks route for maintenance and to deter landscaping changes)
Steps
Estimated time: 2-4 hours
- 1
Identify discharge location
Locate where the sump pump currently discharges and confirm the path away from the foundation. Note any potential ice-prone areas and plan alternate routing if needed.
Tip: If you’re unsure, take photos of the route to reference during upgrades. - 2
Inspect route slope and obstructions
Check that the pipe slopes downward toward the exterior and is free of kinks or debris. Remove any snow or ice that could back up water into the system.
Tip: A gentle slope helps gravity do the work and reduces standing water. - 3
Shut off power to the pump
Before touching any wiring, switch off the sump pump at the breaker or unplug the unit. This prevents shocks and accidental starts during maintenance.
Tip: Test the shutdown after wiring work to confirm it’s reliable. - 4
Install or verify backflow prevention
Install a check valve if one is not present, ensuring the discharge cannot backflow into the pump. Secure all connections with clamps and sealant as required.
Tip: Avoid tight bends near the valve, which can trap sediment. - 5
Route line to exterior and maintain clearance
Re-route as needed so water exits away from the foundation, keeping the line free from driveways and walkways for safety.
Tip: Keep the line elevated over ground where possible to prevent pooling near the wall. - 6
Insulate exposed sections
Wrap exposed pipe with foam insulation and seal ends to prevent moisture ingress. Inspect after frosts for any signs of moisture inside the insulation.
Tip: Check for gaps and reseal promptly if you notice condensation. - 7
Consider heat tracing for high-risk runs
If temps regularly drop below freezing, add heat tape rated for outdoor use and wire under thermostat control to prevent freezing.
Tip: Only use heat tape in accordance with the manufacturer’s instructions. - 8
Install exterior diffuser/splash block
Place a diffuser or splash block at the exit to control splash and direct water away from sidewalks and foundations.
Tip: Clear the outlet area of snow daily during heavy winter conditions. - 9
Ensure a weatherproof electrical connection
Use a weatherproof outlet cover and verify that all plugs and cords are rated for outdoor use. Keep connections elevated to avoid snow contact.
Tip: Test the outlet with a moisture-resistant tester after a storm. - 10
Test pump and discharge flow
Fill the sump basin to trigger the float and observe water exiting the exterior path. Look for smooth flow and no leaks at joints.
Tip: Run a full cycle under cold conditions to simulate winter use. - 11
Establish a backup power plan
Plan for outages with a battery-backed pump or a small generator. Ensure you can start the alternative power source quickly if snow or ice hampers the primary pump.
Tip: Keep the backup battery or generator in an accessible location with fuel and tools nearby. - 12
Document and schedule ongoing maintenance
Record all changes and set reminders for monthly winter checks, especially after storms. Keep a simple log for quick reference.
Tip: Review the log before the next winter season to make proactive upgrades.
FAQ
How far should a sump pump discharge extend from the foundation?
Discharge water should be directed away from the foundation and entry points to minimize splash back and foundation dampness. Plan a route that avoids sidewalks, driveways, and near neighbors. Confirm with local codes if there are any distance requirements.
Direct discharge away from the house and entryways to prevent water damage; check local codes for any distance requirements.
Is it legal to discharge onto the lawn during winter?
Local rules vary; some areas allow lawn discharge while others require a hard surface or drainage into a approved drainage system. Always verify with your city or county and consider gentler drainage to avoid snowmelt pooling on walkways.
Check local rules first; lawn discharge may be restricted in some areas.
How do I know if my discharge line is frozen?
Look for a lack of water flow, visible ice around the outlet, and unusual sounds or gurgling in the line. If you notice these, pause use and inspect the line and surrounding area for ice build-up.
If water stops flowing or you hear ice, inspect the line for freezing and clear it safely.
Can I discharge snow melt through the sump line?
Discharging snow melt through a sump line can overload the system or create ice hazards if not routed properly. Prefer a dedicated drainage path that prevents refreezing and complies with local drainage rules.
Snow melt discharge should be routed carefully to avoid refreezing and code issues.
How often should I test my sump pump in winter?
Test the pump periodically during winter, especially after storms. Verify that the pump starts, the water flows, and the discharge exits without obstruction.
Test the pump after storms to ensure it works when most needed.
Do I need a backflow preventer on winter discharge?
A backflow preventer can protect against wastewater re-entering the pump during pressure changes or outages. Check local codes and install if required.
Backflow prevention protects against wastewater getting back into the pump.
Watch Video
Top Takeaways
- Map and assess your current discharge route.
- Insulate exposed lines and consider heat trace for freezing zones.
- Use backflow prevention and proper outlet safety to prevent backups.
- Prepare a winter backup power plan and test it regularly.
- Follow local codes and document maintenance for ongoing reliability.