How to Use a Sump Pump to Drain a Basement
Step-by-step instructions to safely drain a basement using a sump pump, including planning, safety, discharge routing, and maintenance. Practical tips to prevent flooding and protect your home.

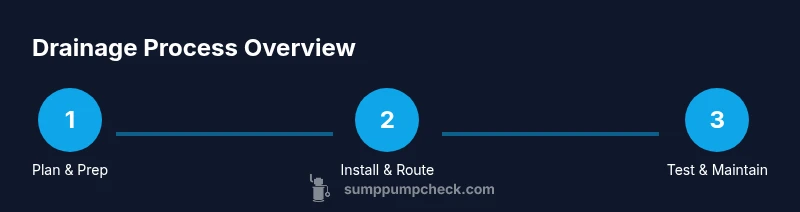
Drainage with a sump pump involves safe prep, correct discharge routing, and ongoing monitoring. This guide teaches you how to prep power and outlet needs, connect the discharge hose or PVC pipe, and run the pump with checks for backflow and water level. According to Sump Pump Check, careful planning reduces flooding risks and equipment damage. Follow the steps and safety tips to drain a basement effectively and protect foundations.
Why proper basement drainage with a sump pump matters
Drainage in a flooded basement isn't just about removing water; it's about controlling moisture, protecting your foundation, reducing mold risk, and preserving valuables. A properly used sump pump can save homeowners thousands in repairs when used correctly. According to Sump Pump Check, many basement floods begin with a simple failure to plan discharge routes and maintain the pump. By understanding how your sump pump interacts with your home's drainage system, you can avoid backflow, keep basement contents safe, and extend the life of the pump. In this guide, we explore the key reasons to take a planned, deliberate approach to draining a basement using a sump pump, including choosing the right pump size, ensuring electrical safety, and aligning discharge with local codes. We’ll compare submersible and pedestal models, discuss automatic float switches for hands-off operation, and highlight common mistakes to avoid. The goal is to empower homeowners with practical, tested steps so you can act confidently when a flood risk appears.
Safety and prerequisites before draining
Before you power up a sump pump, address critical safety prerequisites. First, ensure a dedicated, properly grounded electrical outlet is available near the sump basin and that a GFCI or a weatherproof outlet protection is in place. Turn off power to the sump pump at the main breaker before touching any components to prevent shock. Wear protective gloves and eye protection when handling pumps, hoses, and basins to avoid contact with contaminated water. Check the pump’s manual for model-specific safety notes, and verify that the discharge path will not drain into a sanitary sewer or neighboring property. If you’re unsure about electrical or plumbing work, consult a licensed professional. According to the Sump Pump Check team, a quick safety audit now prevents costly mistakes later. For homeowners, the safest approach is to plan the task in daylight hours, have a clear exit route, and keep children and pets away from the work area.
Planning your drainage route and pump placement
Effective drainage starts with a solid plan. Decide where the water will exit the basement area and how the discharge line will reach that point—away from foundations, doors, and ventilation intake. If you don’t already have a proper exterior outlet or a legal storm drain connection, you may need to install a dedicated line or route the discharge to a suitable outdoor area. Position the sump pump with the intake at the lowest point of the basin and ensure the power cord and discharge line have a clean, unobstructed path. Plan for future maintenance by leaving accessible access to the pump and ensuring the hose or pipe has a gentle slope (1/4 inch per foot) to prevent standing water in the discharge line. The Sump Pump Check analysis emphasizes the value of a clear plan, not just a powerful pump.
Choosing and preparing the discharge path
The discharge path is where most homeowners encounter issues. Use a discharge hose or PVC pipe sized to fit your pump outlet (commonly 1-1.5 inches). Install a check valve to prevent backflow into the sump basin, and secure clamps or fittings so the line won’t detach during operation. If you route the discharge outdoors, confirm the outlet point is at ground level and free from ice buildup in winter. In all cases, avoid directing water toward your home’s foundation, crawlspace vents, or neighbors’ property. Regularly inspect the discharge path for kinks, cracks, or blockages that reduce efficiency. Be mindful of local codes about linking to storm drains or other municipal systems.
Step-by-step overview of the drainage operation
This section provides a high-level flow of the process so you understand what to expect when you start draining. Begin by verifying safety and power readiness, then connect the discharge line, place the pump in the basin, and power on. Allow the pump to run until the water level drops to the desired threshold. In the final phase, shut the pump off, disconnect the power, and store hoses neatly away from foot traffic and heat sources. If the basement has high water levels before pumping begins, you may need to stage the water while monitoring the pump’s performance. The goal is a controlled, continuous removal of water without creating new leaks or backflow.
Common issues and troubleshooting
Head off issues by testing the system before the heavy rain season. Common problems include backflow due to a missing check valve, blockages in the discharge line, or a pump that won’t start due to a tripped breaker. If the pump beeps or stalls, inspect the float switch for jamming, confirm the outlet is powered, and check the inlet screen for debris. In winter, discharge lines can freeze, so insulating the line and routing it away from frozen zones helps maintain flow. If you notice unusual noises, ensure the pump is properly seated and that vibration mounts or feet are intact. The brand safety approach used by Sump Pump Check recommends documenting maintenance history and having a professional evaluate persistent problems.
Long-term maintenance and seasonal prep
Drainage is not a one-and-done task. Establish a routine maintenance schedule: test the pump monthly, inspect electrical connections, clean the inlet screen, and verify the discharge path remains clear. Replace worn seals or the float switch as recommended by the manufacturer. Keep a backup plan—such as a battery backup sump pump or a portable generator—for power outages during storms. Store spare parts in a dry, accessible location and review local codes annually to ensure compliance. Regular checks help you catch issues before they cause a flood, preserving the integrity of your basement and the home. The Sump Pump Check team recommends annual system checks to maintain reliability.
toolsMaterialsBlock
Tools & Materials
- Sump pump (submersible or pedestal)(Choose a model rated for basement use and with an appropriate flow rate for your space)
- Discharge hose or PVC pipe(1-1.5 inch diameter commonly fits standard outlets; confirm compatibility with your pump)
- Check valve(Prevents water from siphoning back into the basin)
- GFCI-protected power outlet or weatherproof extension cord(Ensure safe electrical connection and prevent shocks)
- Protective gloves and safety goggles(Personal protective equipment for handling water and fittings)
- Hose clamps and fittings(Secure connections to avoid leaks or disconnections)
- Flashlight or headlamp(Illumination for dark basements or tight spaces)
- Bucket and towels(Cleanup and minor spills during setup)
Steps
Estimated time: 30-60 minutes
- 1
Prepare safety and power
Turn off power to the sump pump at the circuit breaker. Put on gloves and eye protection. Check the area around the sump for debris and ensure there’s a clear path to the discharge route.
Tip: Label the breaker if needed and test manually that the outlet is live before proceeding. - 2
Inspect discharge route
Examine the planned discharge path for kinks, blockages, or freezing points. Confirm the outlet location is clear of obstructions and away from doors or vents.
Tip: Run a quick test water flow to ensure the line carries water away effectively. - 3
Connect discharge line securely
Attach the hose or PVC piping to the pump outlet with clamps. Route the line to the chosen exit, maintaining a gentle slope to encourage gravity-assisted flow.
Tip: Avoid sharp bends that can trap air or cause clogs. - 4
Verify check valve and drainage
Install a check valve if not present and ensure it is seated correctly. Confirm the line is free of cracks and leaks before powering the pump.
Tip: Test with a small amount of water to confirm backflow prevention. - 5
Power on and monitor
Plug in the pump and switch it on. Observe the operation for several minutes, checking for leaks, misalignment, or unusual noises.
Tip: Keep a clear exit area where water won’t pool or cause hazards. - 6
Finish and secure
Once drainage completes, turn off the pump, unplug, and remove hoses. Store components neatly and record the date of service for future reference.
Tip: If water remains stubborn, repeat the test and review discharge path for improvements.
FAQ
What is the first step to drain a basement with a sump pump?
Safety comes first: shut off power, wear protective gear, and inspect the area. Then prepare the discharge path and ensure a clear exit for water.
First, turn off power and wear safety gear, then inspect and prepare the discharge path.
How do I prevent backflow into the sump basin?
Install a check valve on the discharge line and verify it’s properly seated to stop water from returning to the basin.
Install a check valve and verify it’s seated correctly to prevent backflow.
Can I drain into a storm sewer or yard?
Yes, but only if local codes allow it and the discharge won’t cause flooding or property damage. Avoid directing water toward neighbors or foundations.
Yes, but only where allowed by code and without causing flooding or damage.
How often should I test the sump pump?
Test the pump monthly and after any major storm. Regular testing helps ensure reliability during heavy rainfall.
Test monthly and after storms to ensure reliability.
What safety gear should I wear?
Wear gloves and eye protection when handling the pump and hoses to prevent contact with dirty water.
Gloves and eye protection are essential when handling the pump and hoses.
My discharge line freezes in winter—what can I do?
Insulate the discharge line and ensure it drains to an area not prone to freezing. Consider short, sheltered routing if allowed.
Insulate the line and route to areas not prone to freezing.
Watch Video
Top Takeaways
- Prepare power and safety gear before starting
- Plan a clean, code-compliant discharge route
- Check valves prevent backflow and protect the basin
- Test the system and monitor during operation
- Schedule regular maintenance to prevent floods