How to Sump Pump Drainage: A Practical Home Guide
Learn how to design, install, and maintain sump pump drainage to protect your basement from flooding. This step-by-step guide covers planning, components, routing, testing, and upkeep for reliable water removal.

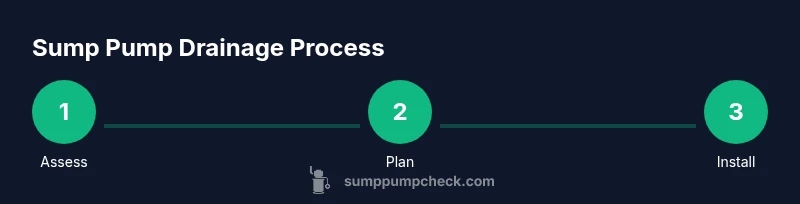
This guide shows you how to plan, select components, install, and test a sump pump drainage system so your basement stays dry during heavy rain. You’ll learn to assess site needs, route discharge correctly, and establish a maintenance routine that prevents clogs and backflow. Follow these steps to improve reliability and safety.
How to Sump Pump Drainage: Why It Matters
Understanding how to sump pump drainage is essential for homeowners who want a dry, healthy basement. A well-designed drainage path protects your foundation, reduces humidity, and minimizes mold risk in wet seasons. According to Sump Pump Check, proper drainage is essential to protect basements from water intrusion and reduce emergency repairs. A well-planned system also helps comply with local regulations and HOA rules about outdoor discharge. In practice, a reliable setup hinges on sizing the pump correctly, routing the discharge away from the foundation, and keeping all components clean and accessible. When you know the goals—keep water out, protect the structure, and maintain air quality—you can make smarter, safer choices about every component you install. This section introduces the big-picture reasons for drainage design and the outcomes you can expect with a thoughtful layout.
Assess Your Baseline: Drainage Needs and Site Evaluation
Before selecting parts, evaluate your site. Look at how much water your basement typically sees during heavy rain, the slope around the foundation, soil permeability, and any existing drainage features. Map the route from the sump pit to a discharge point, whether that’s a yard drain, a storm sewer, or a designated exterior outlet. Check local codes and HOA rules about where you can discharge water; some jurisdictions prohibit discharging onto a neighbor’s property or into storm sewers without permits. Take measurements: pit depth, floor height, and the vertical and horizontal distance to the discharge location. This assessment helps you choose the right pump size, piping, and backup options. Finally, verify electrical readiness: a GFCI-protected outlet near the sump pump is essential for safety and code compliance.
Choosing the Right Components: Pump, Check Valve, Piping, and Backups
The core components of a reliable sump pump drainage system include the pump itself, a discharge pipe, a check valve, and an appropriate power source. Select a pump with enough horsepower to move water quickly from the pit to the discharge location, based on expected inflow. A check valve prevents backflow, which can lead to re-flooding the pit. Pipe diameter commonly spans 1-1/4 to 1-1/2 inches for residential setups, with thicker walls preferred for longer runs. Use PVC for durability and take advantage of glue-and-socket fittings for a leak-free join. Consider a backup power option, such as a battery backup pump, to protect you during power outages. Don’t forget a corrosion-resistant outlet, a proper seal around the pit, and an audible alarm or indicator for maintenance.
Plan the Drainage Route: From Pit to Discharge
Plan the route with several goals in mind: gravity-assisted flow when possible, minimal bends to reduce friction loss, and a disconnection from living areas to avoid water near living spaces. Route piping away from the foundation with a slight downward slope (generally at least 1/8 inch per foot) toward the exterior discharge. If you’re tying into an existing drainage system, verify that it’s allowed by local codes and your HOA. Maintain access for future cleaning and inspection, and secure pipes to framing to prevent movement during operation. Label the discharge line to avoid accidental removal and ensure the path remains clear of insulation, soil, or debris that can cause clogs.
Install or Upgrade Your System: Planning and Preparation
Start with a safety-first mindset: turn off power at the breaker and confirm the sump pit cover is secure. Install or replace the discharge piping and connect the check valve in the correct orientation (valve toward the house, so water cannot backflow into the pit). Attach the pump and make sure it sits level in the pit. Install a GFCI-protected outlet, and consider adding a battery-backed pump or a water-powered backup for outages. Seal all joints with PVC cement, and use appropriate clamps for any flexible sections. Finally, position a drip tray or grate at the discharge point to prevent soil erosion and to keep the exit visible and accessible during maintenance.
Testing, Maintenance, and Seasonal Considerations
With the system installed, test it before the next rainy period. Pour water into the pit until the pump activates, listen for proper cycling, and verify the discharge path remains clear. Schedule routine maintenance: clean the sump basket, check the check valve for leaks, and inspect the float switch operation monthly. In colder climates, protect exposed piping from freezing by insulating sections and keeping the discharge point clear of ice. After heavy storms, recheck all connections for signs of wear or leaks. A regular maintenance routine reduces the likelihood of sudden failures when you need the system most.
Common Pitfalls, Troubleshooting, and Resources
A few common mistakes can undermine drainage performance. Avoid skipping the check valve, which invites backflow and re-flooding. Don’t discharge too close to the foundation or into areas that can re-enter your home, like window wells. Regularly clear debris from the sump and discharge path and never route water into sanitary sewer lines. If you notice persistent leaks, a noisy pump, or frequent cycling, consult a professional or refer to the authoritative sources listed below for best practices. For DIY enthusiasts, keeping a maintenance log helps track wear and plan timely upgrades. As you proceed, rely on vetted sources and user-safe practices to protect your home and family.
Tools & Materials
- Sump pump (submersible or pedestal)(Choose based on basement size and flow requirements)
- Discharge piping (PVC, 1-1/2 inch typical)(Ensure fittings match pump outlet and route toward exterior)
- Check valve(Prevents backflow into the sump pit)
- PVC cement and primer(For secure, durable pipe joints)
- Fittings and adapters(Couplings, elbows, and tees as needed)
- GFCI-protected outlet and weatherproof cord(Electrical safety near water is mandatory)
- Sealant/putty(Seal around the sump basin and pipe penetrations)
- Shovel, level, tape measure(For site prep and precise routing)
- Backup power option (battery-backed pump)(Consider for power outages)
Steps
Estimated time: 4-6 hours
- 1
Power down and safety check
Turn off the sump pump circuit at the main breaker and verify the area around the pit is dry. Remove the lid and inspect for any visible damage or obstruction in the pit. This step prevents electrical hazards during installation.
Tip: Always test the breaker with a non-contact tester before touching wiring. - 2
Measure and plan piping
Measure outlet height, determine suitable pipe diameter, and sketch the route to the exterior. Confirm that the planned discharge point complies with local rules. Accurate planning reduces leaks and rework.
Tip: Plan for minimal bends to reduce friction and improve flow. - 3
Install or prep pump and check valve
If upgrading, install the new pump and mount it securely in the pit. Attach the check valve in the correct orientation to prevent backflow. Ensure the unit sits level.
Tip: Double-check the valve direction: water should flow away from the house, not back toward the pit. - 4
Attach discharge piping and fittings
Connect the PVC piping from the pump outlet to the discharge line using solvent cement or appropriate fittings. Ensure all joints are clean and dry before bonding. Seal any penetrations to prevent leaks.
Tip: Test-fit all sections before gluing to avoid misalignment. - 5
Install backup power option
If using a battery backup pump, install the battery and ensure charging circuitry is wired correctly. Place the backup unit on a stable base and test its operation.
Tip: Label backup power switches for quick access during storms. - 6
Route to exterior or approved drain
Run the discharge line to the outside or to an approved storm drain. Maintain at least a gentle slope and avoid routing water into living areas or onto neighboring properties.
Tip: Keep the discharge path free from ice and snow in winter. - 7
Seal joints and perform initial test
Apply sealant on all joints, secure clamps, and perform a test by filling the pit with water until the pump activates. Observe for leaks and verify discharge flow.
Tip: Document test results for future reference. - 8
Document maintenance plan
Create a maintenance schedule: monthly visual checks, quarterly testing, and annual professional inspection if needed. Record dates and outcomes.
Tip: Set calendar reminders to stay consistent.
FAQ
Do I need a backup sump pump?
A backup pump is highly recommended for areas with frequent power outages or severe storms. It provides redundancy and reduces flood risk when the primary pump fails or loses power.
A backup pump is recommended for reliability during outages.
Can I discharge water into a nearby drainage ditch or street?
Discharging to a ditch or street depends on local regulations. Check with your municipality to avoid penalties and environmental harm. Use approved outlets when possible.
Check local rules before discharging to streets or natural areas.
What size should my discharge pipe be?
Most homes use 1-1/2 inch PVC for residential discharge, but confirm with pump specifications and local codes. Larger homes with higher inflow may need a bigger diameter.
Choose pipe size based on pump output and codes.
How often should I test the sump pump drainage system?
Test the system monthly by dumping water into the pit and verifying cycle operation, then perform a formal inspection quarterly.
Test monthly and inspect quarterly.
Is professional installation necessary?
DIY installation is possible with careful planning and safety, but consult a pro if you’re unsure about wiring, venting, or code compliance.
You can do it yourself if you follow safety rules, otherwise hire a pro.
What maintenance tasks improve longevity?
Clean the sump and strainer, test the float switch, inspect seals, and replace worn components before failure.
Clean and inspect regularly to extend pump life.
Watch Video
Top Takeaways
- Assess site to tailor component choices
- Install a proper check valve and correct discharge routing
- Test and maintain regularly for reliability
- Plan for power outages with a backup option
- Follow code guidance to avoid penalties and hazards