Bury Sump Pump Discharge Pipe: A Step-by-Step Guide
Learn how to bury a sump pump discharge pipe safely and legally, with planning, proper materials, and step-by-step instructions. Avoid frost damage and code pitfalls with this DIY guide.

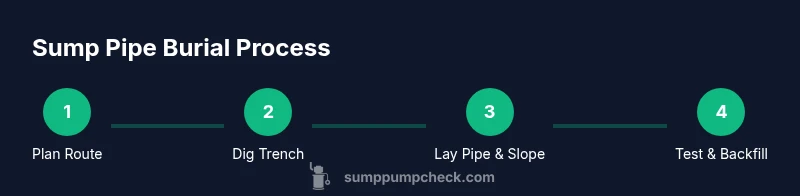
Goal: burying a sump pump discharge pipe safely and legally. Key actions: plan the route, dig a trench below grade, lay Schedule 40 PVC with a steady slope away from the house, and install a check valve and cleanout as needed. Seal joints, backfill carefully, and test the system before finishing. Check local codes and frost-line considerations.
Why bury sump pump discharge pipe matters
Properly burying the discharge line is not just about aesthetics; it helps prevent tripping hazards, avoids freezing, and keeps your foundation safe from standing water. According to Sump Pump Check, burying the discharge pipe reduces frost-related issues and helps water drain away from the home. When you bury the line, you create a low-profile path from the sump pit to an exterior outlet, minimizing exposure to weather and lawn damage. The main reasons to bury are frost protection in cold climates, preventing damage from lawn equipment, and maintaining drainage aesthetics. However, local codes may require exterior outlets, check valves, or cleanouts. Before starting, identify where the pipe will exit the house, and plan the route to a location that can carry water away from the foundation without pooling.
Planning the burial route
A thoughtful plan saves time and reduces the chance of hitting utilities or creating drainage problems. Map a direct route from the sump pit to an exterior outlet or daylighting point, avoiding low spots where water could pool. Check for nearby buried cables, gas lines, irrigation lines, and other infrastructure. If you don’t have a clear exterior exit, consider routing toward a lawn edge or drainage area that won’t flood landscaping. A simple route diagram is worth the effort and helps you communicate with helpers or contractors. Remember to allow space for future maintenance and possible cleanouts.
Codes, safety, and permits
Local building departments regulate underground discharge work, so start by checking requirements for burial work in your area. Some jurisdictions require permits for trenching or piping work, while others treat it as an unpermitted, minor project. Regardless of permit needs, install a check valve to prevent backflow and a cleanout for easy access. Frost depth, soil type, and slope influence how you trench and where you exit. Always wear protective gear and use utility locating services if you are uncertain about subsurface hazards.
Choosing the right pipe and fittings
Select Schedule 40 PVC for the main discharge line to balance durability and ease of work. Use appropriate diameter based on your sump pump’s outlet and expected flow; most residential systems use 1.5" to 2" pipe. Fit elbows, tees, and a cleanout to create a maintainable route with a reliable seal. A check valve is essential to prevent backflow, and a cleanout makes future maintenance easier. At every joint, use a compatible adhesive system and ensure all joints are clean and dry before bonding.
Digging the trench and soil considerations
Dig the trench to a depth that keeps the pipe below the frost line when possible and provides a stable bed. Construct the trench with a shallow bed of gravel or sand to promote good drainage and protect the pipe from sharp rocks. Maintain a steady downward slope (typical guidance is a small, consistent grade away from the foundation) to avoid standing water in the line. If the soil is clay or heavy, dig a wider trench to ease laying the pipe and reduce stress on joints. After testing, backfill in layers and compact gently to minimize settlement.
Installing the burial pipe and joints
Place the pipe along the trench bed, connect sections with cemented joints, and ensure proper alignment for a continuous slope toward the exit. Install a check valve near the sump pump outlet to prevent backflow. Secure the pipe with stakes or soil anchors where needed to prevent shifting, especially in busy areas of the yard. Close any gaps between pipe and trench wall with soil to keep roots and pests from disturbing the line.
Exiting above ground and protecting the outlet
End the buried pipe at a lawn edge or dedicated exterior outlet where runoff can disperse away from the foundation. If you must surface-exit, use a protected enclosure or a pop-up emitter so rain and lawn equipment won’t damage the outlet. Consider a small filter or screen at the exit to catch debris. In cold climates, plan for potential freezing at the outlet by selecting materials and configurations that minimize exposure to low temperatures.
Testing, backfilling, and final checks
Before backfilling, run the sump pump to verify water flow through the new line, ensuring there are no leaks and that the slope is adequate. If water pools in the trench, adjust the slope or reposition sections. After confirming proper function, backfill in layers, compact gently, and restore any disturbed landscaping. Finally, re-check the exit point during a heavy rain event to confirm that the discharge flows away from the foundation and into an appropriate area. The Sump Pump Check team recommends documenting the route and maintenance plan for future reference.
Tools & Materials
- Shovel or trenching shovel(for digging the trench to depth and width needed)
- Tape measure(to verify trench length and fall (slope))
- PVC Schedule 40 pipe (1.5" or 2")(primary discharge pipe)
- PVC cement and primer(for secure, watertight joints)
- PVC elbows, tees, and cleanout(to route and access the line)
- Check valve(prevents backflow into the sump pit)
- Gravel or sand for bedding(to stabilize and cushion the pipe)
- Backfill soil and sod(restore landscaping after trenching)
- Utility locator service or flags/paint(to identify buried lines before digging)
- Safety gear (gloves, goggles, sturdy boots)(protect during digging and handling pipe)
- Drainage outlet extension or pop-up emitter(optional surface exit for dispersion of water)
Steps
Estimated time: 4-6 hours
- 1
Plan and locate utilities
Before digging, map the route and locate buried utilities. Confirm the sump pit exit point and ensure the route won’t cross electrical lines, gas lines, or irrigation systems. Create a simple schematic to guide trenching and pipe placement.
Tip: Always call local utility locating services if you’re unsure. - 2
Dig trench with bedding
Dig a straight trench from the sump to the exit point, wide enough for the pipe plus bedding material. Establish a stable base with a gravel or sand bed, ensuring the pipe will sit level and slope away from the house. Keep the trench free of sharp stones that could damage the pipe.
Tip: Avoid narrow trenches that can kink pipes or trap debris. - 3
Lay pipe and set slope
Place segments along the trench, connecting with cemented joints. Maintain a consistent downward slope away from the foundation to promote gravity-driven flow. Secure the pipe so it won’t shift during backfill.
Tip: A gentle, continuous slope beats erratic drops that trap water. - 4
Install valve and inspect connections
Install a check valve near the sump outlet and verify all joints are watertight. Re-check alignment after securing to prevent accidental leaks. Keep the area free of debris until the system is tested.
Tip: Leak testing is easier before backfilling. - 5
Test the system
Run the sump pump and observe water movement through the buried line. Look for leaks, air pockets, or backflow, and confirm water exits at the desired location. Address any issues before proceeding.
Tip: Test under typical rainfall or simulated pumping if possible. - 6
Backfill and restore landscape
Backfill in layers, compacting gently to minimize settling. Restore soil, grass, or mulch and ensure the exit area remains accessible for future maintenance. Review the route to confirm no new hazards or tripping points.
Tip: Leave access for future cleanouts and inspections.
FAQ
Do I need a permit to bury a sump pump discharge pipe?
Permit requirements vary by municipality. Some areas don’t require a permit for residential burial work, while others do for trenching or piping projects. Always check with your local building department before starting.
Permit rules vary by city, so check with your local building department before you begin.
How deep should the burial trench be?
Depth depends on the frost line and soil conditions in your area. Aim to keep the pipe below frost depth if possible and protect it with bedding material. Local guidance or a professional can provide specific depths for your climate.
Depth depends on frost depth and soil; go below frost depth when possible.
Can I use flexible tubing for burial?
Rigid PVC is generally preferred for buried discharge lines due to durability and code compatibility. If you use flexible tubing, ensure proper fittings and protective burial and verify code allowance.
Rigid PVC is usually best; flexible tubing can be tricky and may not meet code.
What slope should the buried pipe have?
Maintain a constant downward slope away from the house to ensure gravity-assisted drainage. Avoid flat sections that can trap water and cause backflow.
Keep a steady slope away from the house for proper drainage.
Where should the discharge exit the yard?
Exit at a lawn edge or safe exterior area where runoff won’t flow back toward the foundation or neighboring properties. Do not discharge into crawl spaces or basements.
Exit the pipe at a safe outdoor spot away from the house.
Is a check valve always required?
A check valve is generally recommended and often required by code to prevent backflow into the sump and piping. Verify local requirements and install accordingly.
Yes, a check valve is usually required or highly recommended.
Watch Video
Top Takeaways
- Plan route before digging to avoid utilities.
- Use Schedule 40 PVC with a proper slope away from the house.
- Install a check valve and a cleanout for maintenance.
- Test the system before backfilling to catch leaks early.
- Restore landscape and document maintenance for future reference.