Sump Pump Discharge Outside: A Practical How-To Guide
Learn how to discharge a sump pump outside safely and legally. This guide covers routing, code considerations, proper piping, testing, and maintenance to protect your home and landscape.

According to Sump Pump Check, discharging a sump pump outside correctly protects your home and landscape while complying with code and local regulations. This quick answer outlines the safe, legal discharge outside workflow and key considerations, including routing choices and testing. The full guide provides step-by-step instructions, tools, and safety tips.
Why discharge outside matters for sump pump discharge outside
Discharging water from a sump pump outdoors is about more than just moving moisture away from your basement. Proper outdoor discharge protects your foundation, reduces the risk of basement flooding during heavy rainfall, and minimizes erosion or pooling near your home. When water is directed to an inappropriate spot—such as into a crawl space, under a deck, or onto the neighbor’s yard—it can cause long-term damage and potential liability. A well-planned discharge also helps prevent freezing in cold months by keeping the water away from living areas and entry points. By understanding how the water travels from the sump to its final outdoor destination, homeowners can design a simple, reliable system that reduces maintenance and prevents nuisance issues. The keyword sump pump discharge outside should appear here to anchor the topic and improve relevance for readers searching for practical guidance.
Local codes and practical considerations
Local drainage codes and homeowner association rules often govern how and where sump pump water may be discharged. Some jurisdictions require a minimum slope to the discharge line, a check valve to prevent backflow, or a minimum distance from foundations and foundations’ footings. In many places, you’ll need an outdoor outlet or a dedicated drainage area that leads water away from the house and sidewalks. The Sump Pump Check team emphasizes checking permit requirements and any restrictions on discharge direction, seasonal flooding rules, and nuisance protections for neighbors. In practice, this means you may need to coordinate with a building inspector or HOA before drilling through a foundation or routing piping through an exterior wall. If the plan complies with local rules and uses a simple, robust piping path, you’ll reduce the chance of later rework and fines.
Discharge routing options and best practices
There are several common routing options for the sump pump discharge outside. A straight run through a foundation wall into a dedicated vertical pipe is often the simplest solution for wells located near the house. If routing to the side yard, a gravity-fed PVC pipe with a clear slope ensures water exits consistently. A splash pad or gravel bed can help dissipate the water’s velocity and protect delicate landscaping. In some cases a buried perforated drain tile or a small dry well can be used, but these options must be planned with proper drainage capacity and local codes in mind. Always ensure the discharge end terminates away from windows, doors, and air intakes, and avoid directing water toward neighboring properties, sidewalks, or driveways that could cause slip hazards or moisture damage.
Protecting landscape and drainage during discharge
Directing sump pump water outdoors requires mindful landscape design. Use a splash pad, rock bed, or a short section of durable rock to slow the flow and prevent soil erosion. Keep the discharge line clear of gravel beds or mulch that can clog or degrade over time. If you route through the soil, ensure the trench is deep enough to avoid freezing or damage from frost heave. Installing a check valve is common practice to prevent backflow into the pump if rainfall or irrigation changes the water pressure in the line. In all cases, maintain at least a few inches of clearance from structural soil and plant roots to avoid future issues. The goal is a clean, persistent outlet that withstands seasonal temperature changes without creating hazards for your family or neighbors.
Testing and troubleshooting discharge performance
After installation, test the system by filling the sump and observing the discharge flow. Look for consistent flow, no leaks, and proper discharge distance from the foundation. If water pools near the house, recheck slope and seal penetrations. In winter, check for ice buildup at the outlet and consider rewiring or adding insulation around exposed piping to prevent freezing. Regular checks after heavy storms help catch issues early, such as degraded seals, loose connections, or dirt buildup. Record observations and adjust the routing as needed to keep the outlet functioning smoothly and safely.
Maintenance plan to keep discharge outside effective
Create a simple maintenance schedule that includes a quarterly visual inspection of hoses and joints, a biannual check of the exterior termination point, and an annual review of code requirements or HOA rules. Replace worn components promptly and keep the discharge area free of debris. By keeping the discharge path clean and secure, you’ll reduce the likelihood of leaks and blockages that could lead to water damage or erosion over time. The Sump Pump Check team recommends documenting maintenance activities to demonstrate ongoing compliance and to help with future upgrades.
Tools & Materials
- Sump pump discharge hose/pipe (outdoor-rated)(Choose 1.5 in to 2 in diameter; ensure material is UV-resistant and corrosion-resistant)
- PVC piping (1.5(PVC schedule 40 or similar; use solvent cement and primer)
- PVC fittings (elbows/tees)(Appropriate angles to route outside)
- Check valve or backflow preventer(Reduces backflow risk during heavy rainfall)
- Hose clamps and sealing tape(Secure connections and seal penetrations)
- Silicone exterior sealant(Waterproof seal around wall penetrations)
- Exterior wall sleeve or flashing(Protects the wall opening from moisture)
- Meter/level to confirm slope(Useful for confirming gravity-driven flow)
- Safety gloves and eye protection
- Shovel or trenching tool(For shallow trenches if routing through soil)
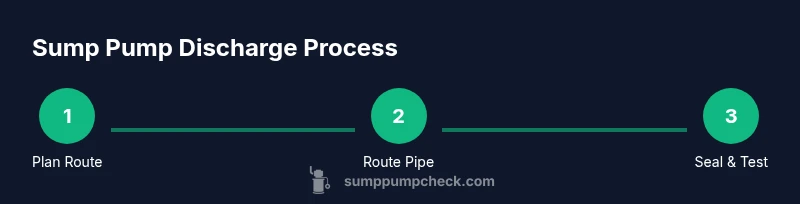
Steps
Estimated time: 2-6 hours
- 1
Plan your discharge route
Evaluate basement layout, yard slope, and local regulations. Decide a path that maintains proper gravity and avoids foundations, windows, and sidewalks. Mark the exit point and any required foundation penetrations.
Tip: Document the chosen route and check for underground utilities before drilling. - 2
Gather materials and safety gear
Collect all piping, fittings, sealant, a check valve, clamps, and exterior sealant. Put on gloves and eye protection. Confirm all parts match the planned route dimensions.
Tip: Double-check that outdoor-rated components are used to prevent weather damage. - 3
Create the outdoor outlet path
Drill or cut through the exterior wall, install a sleeve or flashing, and route pipe toward the discharge area. Ensure a continuous slope away from the foundation.
Tip: Use vertical or slightly inclined sections to avoid standing water behind the wall penetration. - 4
Assemble and seal connections
Glue PVC components with primer and cement, install elbows/tees as needed, and add a check valve to prevent backflow. Seal penetrations with exterior-grade silicone and sealant around the wall exit.
Tip: Test each joint for leaks before moving on. - 5
Finish the outlet termination
Install a splash pad or rock bed to dissipate velocity and prevent erosion. Clear the area of debris and keep the exit free of obstructions.
Tip: Ensure the discharge point ends at least 3–4 feet from any structure or walkway. - 6
Test the system and adjust
Fill the sump and observe the discharge flow. Check for leaks, ensure consistent exit, and verify the slope remains intact after a test run.
Tip: Run multiple cycles to catch slow leaks and verify stability under load.
FAQ
Is it legal to discharge sump pump water outside on my property?
In many areas, yes, but rules vary by local codes and HOAs. Check setback distances from foundations, sidewalks, and property lines. Always confirm with local authorities before drilling or extending piping outside.
Most places allow outdoor discharge with proper routing and distances, but confirm local codes before starting.
Can I discharge onto the lawn or into a neighbor's yard?
Discharging onto lawns or neighbor properties can cause damage and disputes. Direct water to a designated drainage area that drains away from structures and property lines. Consider a shared agreement if you must route near a boundary.
Discharge away from structures and property lines; avoid neighbor properties unless permitted.
What slope should the discharge line have?
Aim for a steady gravity slope of about 1/8 inch per foot (approximately 1 cm per 0.3 m) away from the foundation. Slope helps ensure consistent drainage and prevents standing water.
Keep a gentle, consistent slope away from the house.
Should I install a check valve on the discharge line?
A check valve is commonly recommended to prevent backflow into the sump during high groundwater or rainfall. Install it according to the manufacturer’s instructions and local codes.
Yes, a check valve helps prevent backflow and protects the sump.
What happens if the discharge line freezes in winter?
Frozen lines can block flow and cause backups. Insulate exposed piping, consider routing further from heated areas, and ensure the outlet point remains above grade to reduce freezing risk.
Insulate pipes and keep outlets accessible to prevent freezing.
Do I need professional help for outdoor discharge?
For complex routes, underground routing, or building penetrations, a licensed plumber or contractor can ensure code compliance and long-term reliability. Simple above-ground routes are often doable as a DIY project with proper precautions.
DIY is possible for simple setups; consult a pro for complex routes.
Watch Video
Top Takeaways
- Plan your route with code compliance in mind
- Route water away from the foundation and living spaces
- Test thoroughly after installation and seal penetrations
- Maintain the discharge path for long-term reliability