Sump Pump Running Every 30 Seconds: Troubleshooting Guide
Learn how to diagnose and fix a sump pump that runs every 30 seconds. Practical checks, safety tips, and step-by-step fixes to stop short cycling and protect your basement.

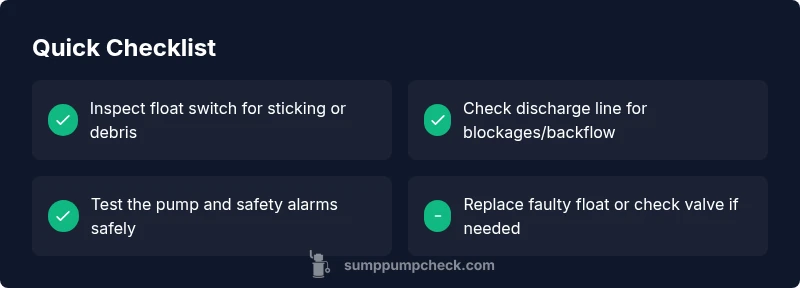
Most likely the sump pump is short cycling because the float switch sticks or there is an excess water source in the pit. Start by inspecting and freeing debris from the float, then reposition it so it moves freely. If the cycle continues, check the discharge line for backflow, verify the check valve, and test the unit safely. If unresolved, contact a professional.
Understanding the symptom: sump pump running every 30 seconds
If you notice your sump pump running every 30 seconds, you’re likely dealing with a short cycling issue. According to Sump Pump Check, this symptom is most often caused by a stuck float switch or sudden water inflow. Begin by powering down the system safely and inspecting the float for debris or misalignment that prevents it from rising and triggering shutdown. Clean gently, reposition, and test by simulating a brief rise in water. If the pump continues to cycle, you’ll move into discharge path checks, valve integrity, and potential replacement considerations. Recognize that short cycling isn’t just noisy; it can wear the motor and shorten pump life if left unaddressed.
As you work through the checks, keep safety front and center. Wear rubber-soled shoes, avoid touching wet electrical components, and never bypass safety features to force the pump to run longer than necessary. The goal is to identify the root cause and restore proper cycling so the system signals when water is present and stops when it's not.
Primary causes to check first
Before diving into complex diagnostics, check the simplest explanations. Common culprits include a float switch that sticks or sits too low in the pit, excessive water inflow from rain or groundwater, a blocked or partially blocked discharge line causing pressure buildup, and a faulty check valve allowing backflow into the pit. For each cause, use the following quick checks: verify float movement, inspect pit for standing water, feel for restricted pipes, and listen for discharge sounds when the pump cycles. If debris is present in the float chamber, remove it carefully and retest. If you notice water pooling in the pit despite a dry forecast, there may be a larger drainage issue requiring further assessment.
By starting with the easiest, most visible problems, you can often resolve short cycling without expensive repairs. If the pump continues to run every 30 seconds after these checks, continue with more detailed tests on the discharge line, check valve, and electrical system. Remember: stubborn basements demand thorough, stepwise troubleshooting rather than one-off fixes.
Safety first: hazards and precautions
Working with a sump pump involves electricity and water, so safety must guide every step. Always unplug the unit before reaching into the pit, wear non-slip footwear, and keep the area dry. If the outlet lacks GFCI protection or you spot damaged wiring, stop and contact a licensed electrician. Do not operate or test the pump with wet hands or while the pit cover is removed for extended periods. When in doubt, pause and seek professional guidance to prevent electrical shock, flooding, or equipment damage. Regularly inspect cords, plugs, and the sump pit cover to maintain safe operation.
This is also a good moment to gather the right tools: a flashlight, rubber gloves, a small brush, and a clean container for testing water levels. A cautious, methodical approach reduces risk and speeds up resolution. If the risk feels high, do not proceed without a pro on site.
Diagnostic flow overview
A clear, repeatable diagnostic flow helps you move from symptom to diagnosis without getting lost in the weeds. Start with the most common causes (float switch, inflow) and rule them out one by one. If you reach a dead end, expand to discharge path checks, backflow prevention, and electrical components. At every step, document what you test and the result so you don’t repeat steps. This approach minimizes guesswork and highlights the exact intervention required, whether it’s a simple float adjustment or a component replacement.
Step-by-step tests you can perform safely
- Visually inspect the float switch for sticking or obstruction. 2) Wiggle the float to confirm it rises freely to trigger shutdown. 3) Pour a small amount of water into the pit to observe cycling and ensure the float reacts promptly. 4) Inspect the discharge line for kinks, obstructions, or roof drainage issues that push water back into the pit. 5) Check the check valve and ensure the discharge path cannot backflow. 6) Reassemble and run a controlled test to confirm the cycle returns to normal.
Fixes for the most likely causes
- Float switch stuck or misaligned: clean, reposition, or replace if it does not respond. This is the most frequent fix for short cycling and usually resolves the symptom quickly.
- Excess inflow to the pit: identify rainwater leaks or groundwater entry, seal leaks, and redirect water away from the pit. Persisting inflow may require a follow-up assessment of drainage design.
- Discharge line or backflow issues: clear obstructions and confirm proper slope and air gap. Replace a faulty check valve if backflow is detected.
- Electrical issues: ensure a grounded outlet, inspect cords for wear, and use a GFCI-protected receptacle. If the outlet or wiring is compromised, call an electrician and avoid DIY electrical repairs.
- When to replace: if the pump continues to short cycle after fixes or shows signs of wear (bearing noise, overheating), plan for a pump replacement as a long-term solution.
Prevention and maintenance tips
- Establish a regular maintenance routine: visually inspect the pump, clean the pit, and test cycling monthly or after heavy rainfall.
- Keep the pit clean and free of debris that could block the float or impeller.
- Verify the discharge path annually to ensure it drains away from the home and doesn’t create a backflow condition.
- Install or verify a functional battery backup system to protect against power outages and ensure continued operation during storms.
Key takeaways and next steps
- Start with float switch checks and discharge path verification.
- If the pump still short cycles, proceed with a controlled test of the entire system and seek professional help if you encounter electrical concerns or persistent cycling.
- Document findings to guide future maintenance and prevent recurrence.
Steps
Estimated time: 45-60 minutes
- 1
Power down and safety check
Unplug the pump and remove the pit cover to access the float and wiring. Verify your hands are dry and you’re standing on a dry surface. This step prevents electrical shock while you inspect the components.
Tip: Always unplug before touching internal parts. - 2
Inspect the float switch
Look for debris, obstruction, or a misaligned float. Gently move the float by hand to see if it rises and falls smoothly. If it sticks, clean or replace as needed.
Tip: Take a photo of the float position before adjusting so you can return it if needed. - 3
Check the discharge line
Inspect for kinks, blockages, or partial closures that could cause backpressure. Clear any debris you find. Ensure the line slopes downward away from the pit.
Tip: Be careful with hot water or cleaning agents that could corrode pipes. - 4
Test the check valve
Ensure the valve prevents backflow. If you hear air or water moving back toward the pit during cycling, replace the valve.
Tip: Only replace if you have the right tools and know how to reseal the joints. - 5
Reassemble and test
Plug the unit back in and pour a controlled amount of water to simulate a flood condition. Observe whether the pump cycles normally and stops as water clears.
Tip: Test in a well-ventilated area to avoid fumes or odors. - 6
Evaluate the outcome
If short cycling persists, escalate to professional service focusing on electrical components or pump replacement.
Tip: Document symptoms, tests performed, and results for the technician.
Diagnosis: Sump pump running every 30 seconds
Possible Causes
- highStuck or mis-adjusted float switch
- mediumExcess water inflow into the pit
- lowBlockage or backflow in the discharge line
- lowFaulty check valve allowing backflow
Fixes
- easyInspect and clean the float switch; reposition so it moves freely
- easyIdentify and reduce water inflow (seal leaks, divert water away from pit)
- mediumClear discharge line; verify slope and test valve operation; replace valve if needed
- mediumTest and, if required, replace the float switch or pump to restore proper cycling
FAQ
Why does my sump pump run every 30 seconds?
Short cycling is most often caused by a stuck float switch or excessive inflow into the pit. Inspect the float, clear debris, and verify the discharge path. If the problem continues, follow the step-by-step guide or consult a professional for a safe resolution.
Short cycling usually comes from a sticking float or extra water in the pit. Check the float and discharge path, and if it persists, follow the guide or call a pro.
Can a faulty float switch cause short cycling?
Yes. A defective or stuck float can trigger the pump repeatedly. Clean, reposition, or replace the float switch as needed and re-test.
Yes, a bad float switch often causes the pump to cycle on and off too quickly. Clean or replace as needed and test again.
How do I test the discharge line for backflow?
Inspect the discharge line for blockages and ensure it slopes away from the pit. If you hear water backing up, check the check valve and repair or replace if necessary.
Check for blockages and backflow in the discharge line, and test the valve if you hear back pressure.
When should I replace the sump pump instead of repairing?
If short cycling persists after fixes or the pump shows wear, overheating, or persistent motor noise, replacement is usually the best long-term option.
If it keeps short cycling after fixes or looks worn, replacement is the safer choice.
Is beeping from a sump pump normal?
Beeping can indicate alarm conditions or a low battery backup. Check the manual for alarm meanings and ensure backup systems are functional.
Beeping usually signals an alarm or backup issue—check the manual and test backups.
Watch Video
Top Takeaways
- Identify float switch issues first
- Check discharge path and backflow prevention
- Test safely and document results
- Call a professional if electrical safety is at risk
- Prevent recurrence with regular maintenance