How to Fix a Sump Pump That Runs Constantly: A DIY Guide
Learn how to fix a sump pump that runs constantly with a clear, step-by-step approach. Identify common causes—float switch, discharge line, or electrical issues—and follow safe, practical fixes to restore proper cycling and protect your basement.

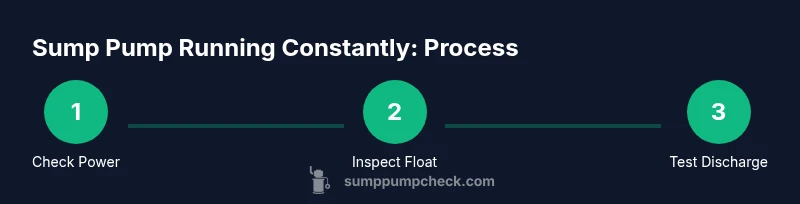
According to Sump Pump Check, a sump pump that runs constantly is usually caused by a stuck float, a blocked discharge, a faulty check valve, or an electrical issue. Start by powering down the unit, then inspect the float and screen, clear debris, verify the discharge line, reseat the check valve, and test the pump. This quick check helps you identify the root cause before more involved work.
Understanding how to fix sump pump running constantly
When a sump pump runs continuously, it can overheat, wear out components, and waste electricity. In many basements, this happens because of four common culprits: a float switch that sticks, a blocked discharge line, a faulty check valve that allows backflow, or an underlying electrical issue. Recognizing the signs helps you pick the right fix without unnecessary parts replacement. This guide from Sump Pump Check walks you through practical steps and best practices. By following these steps, you’ll learn how to diagnose the root cause and prevent future nuisance runs.
Common Causes of a Sump Pump That Runs Continuously
Float switch sticking can keep the pump in the 'on' position if the arm is bent or debris prevents movement. Debris in the pit (sand, sediment, hair) can interfere with sensors and impellers. A faulty check valve may allow water to flow back into the pit, triggering another cycle. A blocked discharge line prevents water from leaving the pit, forcing the motor to work nonstop. Electrical issues, such as loose connections or a tripped GFCI, can also cause abnormal running. Finally, a constantly refilling pit (due to a leak or high groundwater) may keep the pump engaged.
Safety First: Turn Off Power and Prepare Your Workspace
Safety is non-negotiable. Before touching any sump pump components, shut off power at the outlet or circuit breaker. Use a non-contact voltage tester to confirm there is no live current in the cord or switch. Wear gloves and safety glasses, and place towels or a bucket around the pit to manage water. If the space is finished, lay a protective tarp to avoid water damage. Never operate a pump with exposed wiring or wet hands.
Diagnosing the Float Switch and Pit Debris
Start with the float switch: remove the lid and monitor the float as water rises. If it sticks, is jammed, or the arm looks bent, the switch may not trigger the shutoff correctly. Clean any debris from the pit and remove buildup that can impede the float’s movement. Inspect the pit screen for dirt and silt; clean or replace as needed. A clean pit allows the pump to sense accurate water levels and prevents false cycling.
Checking the Discharge Line and Check Valve
Examine the discharge pipe for kinks, cracks, or blockages that prevent water from leaving the pit. A faulty or misoriented check valve can allow backflow, causing immediate restart after shutoff. Clear obstructions, reseat the valve, and verify the direction of flow away from the pit. If the line runs uphill or is buried, you may need professional help to re-route or extend the discharge properly.
Electrical Checks: Outlets, Wiring, and GFCI
With power off, inspect the pump’s power cord for fraying or damage. Test the outlet or GFCI with a tester and reset as needed. Check for loose connections at the pump plug, switch, and any conduit. If you find moisture near wiring, do not power the unit; address insulation or enclosure issues first. Secure all connections before re-energizing.
When to Replace Components or Call a Pro
If the float switch is unreliable, the valve leaks, or the motor overheats after cleaning, replacing parts or the entire unit may be necessary. Use manufacturer-approved parts and follow warranty guidelines. When in doubt, a licensed plumber or sump-pump technician can diagnose electrical or plumbing problems safely and efficiently.
Final Testing and Preventive Maintenance
Reconnect power and perform a controlled test with a shallow water level. Watch the cycle: it should begin when water rises and stop as it falls. If it still runs, repeat the checks or contact a professional. Establish a preventive maintenance routine: monthly pit cleaning, quarterly float checks, and annual discharge-line inspections to keep the system reliable.
Tools & Materials
- Non-contact voltage tester(Verify power is off before handling electrical components)
- Flathead screwdriver(For opening junction covers or securing screws)
- Phillips screwdriver(For mounting and lid screws)
- Multimeter(Test voltage and continuity safely)
- Bucket and towels(To manage water in the pit)
- Sump pit brush or small scrub brush(Clean screen and pit debris)
- Replacement float switch or kit(Used if float is damaged or stuck)
- Shop vac or sponge(Clean up residual water and sediment)
- Replacement check valve (if needed)(Ensure proper orientation and seal)
- Gloves and safety glasses(Personal protective equipment)
Steps
Estimated time: 30-45 minutes
- 1
Power down and secure the area
Unplug the pump or switch off the circuit breaker. Confirm no power using a tester, then remove the pump lid to access the components.
Tip: Always verify power is off before touching electrical parts. - 2
Inspect and free the float switch
Manually move the float to ensure it rises and falls without sticking. If movement is restricted, clean debris or replace the switch.
Tip: If the switch clicks when moved, it is likely functioning; if not, replace. - 3
Clear debris from the pit and screen
Remove accumulated sediment and wipe down the pit screen so the sensor reads water level accurately.
Tip: Keep a bucket handy to collect dirty water; avoid splashing back into the pump. - 4
Check the discharge line for blockages
Inspect for kinks or clogs, flush the line, and verify water exits away from the foundation.
Tip: Run water into the pit to observe the discharge flow. - 5
Evaluate the check valve orientation
Ensure the valve prevents backflow and is installed in the correct direction.
Tip: Replace if you’re unsure of orientation or if leaks are present. - 6
Test electrical connections and outlet
With power still off, inspect the cord and plug for damage, then test the outlet. Reset GFCI if tripped.
Tip: Do not power the unit if the cord shows any damage. - 7
Run a controlled test
Reconnect power and pour water into the pit to trigger cycling. Confirm it starts and stops correctly.
Tip: Note the water level at which the pump engages and shuts off. - 8
Plan preventive maintenance
Schedule monthly pit checks and quarterly discharge-line inspections to avoid future runs.
Tip: Document findings so you can track improvements over time.
FAQ
Why is my sump pump running even when there’s no water?
This usually points to a stuck float, faulty discharge line, or an issue with the check valve. Inspect these components first to identify the root cause.
If you hear the pump running with little or no water, check the float, discharge path, and valve to find the culprit.
Can a sump pump running constantly cause damage?
Yes. Continuous operation can overheat the motor, shorten pump life, and waste energy. Address the cause promptly to protect the system.
Constant running can overheat the motor and waste energy—fix the cause quickly.
Is it safe to test the float switch myself?
Yes, as long as you disconnect power first and use proper protective gear. If the switch seems faulty, replace it.
You can test it safely by powering down first and inspecting the float motion.
Should I replace the whole pump or just the float switch?
Start with the float switch if it’s faulty. If the pump is old or repeatedly fails, a full replacement may be more reliable.
Try replacing the switch first; if the problem persists, consider the whole pump.
When should I call a professional?
If electrical wiring looks compromised, the discharge path is complex, or the pump is older than 7–10 years, a professional evaluation is wise.
Call a pro if wiring is unsafe or you’re unsure about the discharge routing.
Watch Video
Top Takeaways
- Identify root cause before replacing parts.
- Power down safely before inspections.
- Regularly clean the pit and discharge line.
- Test after fixes to confirm proper cycling.
- Set a preventive maintenance schedule.