Short Cycle Sump Pump Troubleshooting Guide
Learn how to diagnose and fix short cycle sump pumps with a practical, safety-first approach. Follow a structured flow, start with simple fixes, and prevent future cycling for reliable basement water removal.

Short cycling a sump pump is usually caused by a sticking float switch, a clogged intake or discharge, or an overly sensitive pressure switch. Start with the simplest checks: verify the float moves freely, clear the inlet screen, and inspect the discharge line for blockages. If the pump still cycles quickly, adjust the pressure switch or consult a professional.
Understanding the Phenomenon of a Short Cycle Sump Pump
A short cycle sump pump is one that turns on and off more frequently than it should during normal operation. This behavior not only wastes electricity but can shorten the life of the pump and fail to keep basement water at bay when rainfall spikes. In many homes, the root cause starts with simple, tangible components like the float switch, the inlet, or the discharge path. By understanding how the system should behave, homeowners can quickly distinguish between a minor hiccup and a more serious mechanical issue. The term short cycle refers to the pump’s rapid cycling pattern, often triggered by a sensor or flow condition that triggers the switch sooner than expected. The Sump Pump Check team has observed that most instances begin with easy fixes and progress to more involved repairs if needed. The goal is to restore steady, quiet operation and prevent repeated startups that stress the motor.
Common Causes of Short Cycling
There are several frequent culprits behind short cycling. Beginning with the easiest fixes helps homeowners avoid wasted time and unnecessary service calls.
- Floating switch issues: A stuck or misaligned float can falsely signal that the basin is full, causing the pump to restart rapidly.
- Debris in the inlet or impeller: Dirt, lint, or sludge can obstruct water flow, causing the pump to sense high pressure and shut off prematurely.
- Discharge path restrictions: A blocked discharge line or a clogged check valve creates back pressure that the pump fights against, triggering rapid restarts.
- Incorrect pressure switch setting: If the pressure switch requires a different air gap or cut-in pressure, the pump may cycle more often than intended.
- External factors: High groundwater levels or drainage problems can overwhelm the system and lead to frequent starts. Each case often begins with a quick inspection and progresses to targeted fixes.
Understanding these common causes helps homeowners approach maintenance methodically and reduces the chance of overlooking a simple solution. The key is to verify each potential issue in a logical order, starting with the float and the discharge line, then moving to electrical or sensor-related components.
Quick Checks You Can Do Right Now
Before diving into deeper diagnostics, perform these quick checks that often resolve short cycle symptoms:
- Manually inspect the float switch: Ensure it moves freely without sticking against the basin wall. If it binds, gently reposition or replace the float assembly.
- Inspect the inlet screen and sump basket: Remove any debris that could restrict water intake.
- Examine the discharge line and check valve: Look for kinks, crushed sections, or blockages. A misaligned check valve can cause back pressure that prompts rapid restarts.
- Listen for irregular electrical noise: Buzzing or intermittent power can indicate wiring issues or a failing switch. If you hear arcing or a burning smell, stop and unplug the unit immediately.
- Check the pit size and pump capacity: An undersized pit or an oversized pump installed into a small basin often leads to rapid cycling as water levels oscillate quickly. If you notice the problem after a heavy rainfall, assess drainage capacity and consider upgrading if needed.
Diagnostic Flow Overview
A structured diagnostic flow helps you avoid guessing and missing root causes. Start with the simplest physical checks, then verify electrical components, and finally test under simulated load conditions. If a step reveals a fault, fix it before moving on. This approach saves time and reduces the risk of creating new problems during inspection. Remember to unplug the unit when you handle any interior components and to work in a dry area to protect against electrical hazards. The diagnostic flow below mirrors a practical homeowner approach and aligns with common patterns observed by Sump Pump Check analysts.
Step-by-Step Fix for the Most Common Cause: Float Switch
The float switch is the most frequent unlock for short cycle symptoms. Follow these steps to restore proper operation without specialized tools:
- Power off and unplug the pump. Disconnect any cords from the GFCI outlet. 2) Access the float assembly and wiggle the arm to confirm it moves without obstruction. If sticky, clean away mineral buildup with a soft brush. 3) Realign the float so that it rises with the water level and fully disengages at the correct cutoff. 4) Reconnect power and run a controlled test by adding water to the pit until the switch triggers. 5) Observe cycle behavior; if it resumes normal operation, the float is the culprit.
Tip: Keep the float free of debris by cleaning the basin monthly and after heavy rainfall. If the float is worn or damaged, replace it with a compatible kit.
Other Causes and How to Fix Them
If the float switch checks out, move on to other frequent drivers of short cycling. Debris in the inlet or impeller and a blocked discharge path are the next most common culprits. Clearing these obstructions is straightforward but must be done carefully to avoid injuring hands or damaging components. After clearing the path, test the pump again. If the problem persists, you may be dealing with an incorrect pressure switch setting or an external water pressure issue that requires more in-depth assessment. Document observed cycle times to help you and any professionals track progress over time.
Safety and Precautions When Servicing a Sump Pump
Electrical safety is paramount around any sump pump work. Always unplug the unit and, if possible, switch off the circuit breaker before touching any electrical parts. Wear eye protection and gloves to guard against sharp metal edges and dirty water. Do not attempt repairs in a flooded area; instead, address the water level and restart only after the area is safe. If you notice burning smells, smoke, or damaged cords, stop immediately and call a licensed electrician or plumber. Ensure the discharge path is clear and that the area around the pump is dry to prevent slip hazards.
Prevention and Maintenance to Stop Short Cycling
Proactive maintenance helps prevent short cycling from returning. Create a simple schedule that includes monthly basins checks, quarterly discharge line inspection, and annual professional inspection if you notice persistent issues. Consider upgrading to a battery-backed system to ensure operation during power outages, and verify that the pump size matches your basement drainage needs. Keep spare parts, like float switches and gaskets, on hand for quick replacements. A well-maintained sump pump delivers consistent performance and longer life.
When to Call a Professional and What to Expect
If you are unable to diagnose or fix the short cycle sump pump issue after performing the above steps, contact a qualified technician. A professional can verify wiring continuity, motor health, and the integrity of the check valve and discharge line. Expect a thorough inspection, including testing under load, checking for unseen leaks, and assessing the overall drainage system. A professional assessment can prevent recurring short cycling and safeguard your basement from water damage.
Steps
Estimated time: 30-60 minutes
- 1
Power down and unplug
Safety first. Disconnect the pump from power at the outlet or circuit breaker to prevent shocks while you inspect components.
Tip: Verify the area is dry before touching anything. - 2
Inspect the float switch
Check that the float moves freely through its entire range without snagging on the basin or wires. If it sticks, gently clean or replace.
Tip: A smooth, full range of motion is essential for accurate on/off cycling. - 3
Clear the inlet and impeller
Remove debris from the sump basin and screen. Spin the impeller by hand to ensure it moves without obstruction.
Tip: Wear gloves to protect hands and avoid damaging blades. - 4
Check discharge path and check valve
Inspect for blockages, kinks, or leaks in the discharge line. Ensure the check valve operates freely and prevents backflow.
Tip: Clear any debris around the valve and test movement. - 5
Test the pressure switch setting
With power restored, observe the switch action and compare with the manufacturer’s cut-in/cut-out pressures. Adjust if required following the manual.
Tip: Make small adjustments and test after each change. - 6
Run a controlled test
Add water gradually to the sump and verify the pump starts and stops at appropriate levels without rapid cycling.
Tip: Record cycle times to gauge improvement. - 7
Inspect for leaks and external factors
Look for groundwater intrusion or drainage problems that cause persistent water load. Address leaks or reroute drainage if necessary.
Tip: Sometimes a drainage upgrade is needed for long-term relief. - 8
Decide on next steps
If the cycling issue persists after these steps, consider professional service or pump replacement.
Tip: Avoid overworking the pump; prolonged cycling shortens motor life.
Diagnosis: Short cycling sump pump (frequent on/off cycles)
Possible Causes
- highSticking or misadjusted float switch
- mediumClogged inlet or impeller
- mediumBlocked discharge line or faulty check valve
- mediumIncorrect pressure switch setting
- lowExternal high water level or drainage problems
- lowElectrical issue or failing motor
Fixes
- easyInspect and free the float switch; reseat or replace if worn
- easyClear inlet screen and check impeller for debris
- easyUnblock discharge line and inspect check valve alignment
- mediumAdjust or replace the pressure switch to the correct range
- mediumAddress external water sources or drainage issues
- hardTest electrical components; replace faulty motor or wiring if needed
FAQ
Why does my sump pump short cycle?
Short cycling is commonly caused by a sticking float, a clogged inlet, or an overly sensitive pressure switch. Start with the simplest checks and move to electrical components if needed.
Short cycling usually comes from a stuck float, blocked intake, or too-sensitive pressure switch. Begin with simple checks and then inspect electrical parts if needed.
Can a blocked discharge cause short cycling?
Yes. A blocked discharge line creates back pressure that makes the pump restart quickly. Clear the line and check the valve to restore proper flow.
A blocked discharge can cause rapid restarts. Clear it and verify the valve to restore normal cycling.
How do I test the float switch safely?
Power off the unit, access the float, and gently move it through its full range to confirm it triggers the switch correctly. Reconnect power and observe cycling.
Power off, test the float through its full range, then test cycling with power on.
Is short cycling dangerous for my home?
While not immediately dangerous, frequent cycling stresses the pump and can fail during heavy rain. It also wastes electricity and may indicate drainage issues.
It isn't dangerous on its own, but it can lead to pump failure and higher bills during storms.
Should I replace my sump pump if it keeps short cycling?
If troubleshooting doesn’t resolve the cycling after multiple attempts, replacement may be the most reliable solution. A professional can assess whether sizing or motor health warrants replacement.
If troubleshooting fails, replacement may be the best option; a pro can confirm sizing and motor health.
How can I prevent short cycling in the future?
Schedule regular maintenance, keep the discharge path clear, and ensure the float and switch are properly aligned. Consider upgrades like a backup system for power outages.
Keep up with maintenance and ensure proper float alignment to prevent future cycling.
Watch Video
Top Takeaways
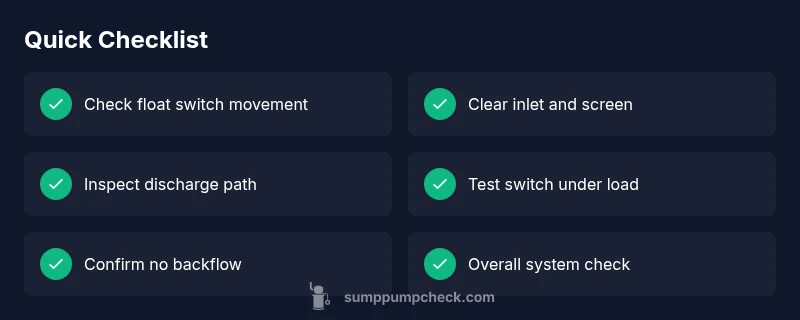
- Diagnose with a logical flow, not guesswork.
- Start with the float switch and discharge line first.
- Always prioritize safety and power down before work.
- Maintenance reduces future short cycling.
- Know when to call a pro to prevent damage.