Sump Pump Backing Up: A Practical Troubleshooting Guide
Urgent, practical troubleshooting guide to diagnose and fix a sump pump backing up, with a clear diagnostic flow, step-by-step fixes, safety tips, and guidance on when to call a pro.

Most often, a sump pump is backing up due to a clogged discharge line, a full sump pit, or a stuck float switch. Quick steps: power off the unit, remove debris from the pit, inspect the discharge hose for kinks or clogs, verify the check valve works, and test the pump with a controlled fill to confirm drainage.
What sump pump is backing up really means
When a sump pump is backing up, it means the system is unable to move incoming water out of the basement fast enough. For homeowners, this situation feels urgent because water can spill into living spaces and cause damage within minutes. According to Sump Pump Check, the most common reasons are a clogged discharge line, a full or blocked sump pit, or a float switch that sticks or fails to rise when water level increases. In this section we’ll explain how each problem manifests and how to verify what’s happening in your own home. The goal is to identify the root cause quickly so you can apply the right fix and prevent a repeat event in the next storm. As you work, remember to keep kids and pets away from the pit, and never reach into the sump basin while the system is powered. A cautious approach reduces the risk of electric shock or injury.
Immediate safety steps you should take
First, prioritize safety. If water is actively rising near electrical outlets, evacuate the area and shut off power to the sump pump at the main breaker or disconnect. With power off, do not touch wet surfaces. Next, locate the sump pit and remove loose debris such as dust, leaves, hair, or sediment that might be blocking the intake screen. Then, inspect the discharge line for obvious kinks, cracks, or frost closures. If you can access the exterior discharge, make sure the line runs freely away from the foundation. Finally, verify the outdoor valve (the check valve) is installed correctly to prevent backflow. If you smell sewage or suspect sewer backup, stop and call a professional immediately.
Common causes of a backing up sump pump
- Clogged discharge line or blocked check valve: Debris or mineral buildup can restrict water flow.
- Full or cluttered sump pit: Silt and sediment raise the water level and strain the pump.
- Faulty or stuck float switch: The float may fail to rise, keeping the pump off when water level climbs.
- Electrical issues: A tripped breaker or a faulty outlet can stop the pump from running even when water arrives.
- Worn impeller or aging pump: Over time, performance declines and water isn’t evacuated quickly enough.
- Sewer or drainage interference: A backed-up sewer line can push drainage back toward the sump pit. While this list covers the main culprits, your home’s layout and local climate can add other factors.
Diagnostic checks you can perform now
Start with simple checks you can safely perform. Look at the float; gently move it through its range and observe if the pump starts and stops. Check the power connection and reset any GFCI if needed. Inspect the discharge line for visible blockages or frost, and ensure the line is sloping away from the house. Confirm the check valve is oriented properly and not allowing backflow. If available, listen for the pump’s motor and impeller sound; unusual grinding or humming can indicate wear. If your tests show water rising in the pit while nothing is flowing out, the problem likely lies with the line, valve, or pit rather than the pump motor itself. Remember: never run the pump if you see standing water near electrical outlets.
Step-by-step fix for the most common cause: discharge line clog
- Power off the pump at the breaker and unplug it.
- Put on gloves, remove the lid, and clear visible debris from the intake screen.
- Detach the discharge hose at the pump and inspect for clogs.
- Flush the line with water to verify flow; if you find a clog, clear it with a snake or flexible probe.
- Reconnect the hose and verify the line has a clean path to the exterior.
- Check the check valve orientation, ensuring it seals when water runs in one direction.
- Restore power and pour a small amount of water into the pit to test full drainage. If water backs up again, proceed to diagnose the pit, valve, or pump. Tip: take photos of hose connections before disassembly to simplify reassembly.
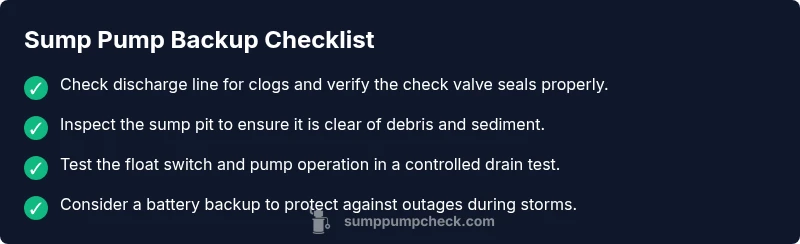
Maintenance tips to prevent future backups
- Schedule quarterly inspections of the discharge line, check valve, and sump pit screen to catch clogs early.
- Keep the pit clear of debris and use a grate or mesh lid to minimize sediment entering the pit.
- Test the pump at least twice a year by pouring water into the pit and observing drainage.
- Consider a battery backup sump pump for power outages; this reduces the chance of a backup during storms.
When professional help is required
Some situations require licensed help. If the discharge line remains clogged after you’ve cleared it, the pit overflows during rain, or you notice burning smells, unusual noises, or melted wiring, contact a plumber or pump technician promptly. A professional can inspect the impeller, motor, wiring, and verify the electrical circuit is safely installed with proper GFCI protection. They can also assess whether your pump is undersized for your basement’s flow, or if a backup pump or water-powered device is warranted.
Quick testing and monitoring after a fix
After completing repairs, monitor the system for 24-72 hours during rain events or heavy watering. Check the pit after a strong flow to ensure water drains away quickly. If the water level rises again, recheck the discharge line and valve and verify the exterior outlet has no blockage. Document dates of tests and maintenance to establish a simple schedule for future care.
Steps
Estimated time: 30-60 minutes
- 1
Power down the system
Turn off the breaker and unplug the pump to ensure safety before touching any components.
Tip: Do not touch wet metal parts after powering down. - 2
Inspect the sump pit
Remove the lid and clear debris from the intake screen; ensure the pit is free of large objects.
Tip: Wear rubber gloves to protect your hands. - 3
Check the discharge line
Detach the hose at the pump and look for clogs or kinks that restrict flow.
Tip: Have a bucket ready in case water drains suddenly. - 4
Evaluate the check valve
Verify the valve orientation and seal; replace if it’s stuck or damaged.
Tip: Valve failure often causes backflow and repeated backups. - 5
Test the float switch
Move the float through its range to confirm the pump starts and stops smoothly.
Tip: If it sticks, you may need a replacement switch. - 6
Run a controlled drain test
Pour water into the pit gradually and observe whether water exits the line cleanly.
Tip: Stop the test if water nears electrical outlets.
Diagnosis: Sump pump is backing up
Possible Causes
- highDischarge line or check valve blockage
- highFull or clogged sump pit
- mediumStuck or faulty float switch
- mediumElectrical issues (tripped breaker/outlet)
- lowWorn pump or age-related failure
Fixes
- easyClear discharge line and ensure check valve is properly oriented
- easyEmpty/pit clean and remove sediment
- mediumTest or replace float switch
- easyReset power, test outlet/GFCI, and inspect wiring
- hardReplace pump if aging or failed impeller
FAQ
What are the most common causes of a sump pump backing up?
The main causes are a clogged discharge line, a blocked check valve, a full sump pit, a faulty float switch, or general wear on the pump. Debris and sediment can also impede performance. Start with the discharge path to identify the fault.
Common causes include clogs, a stuck float, or an aging pump. Start by checking the discharge path.
How can I tell if the float switch is stuck?
Observe whether the float moves freely and triggers the pump. If the pump won’t start when water rises or if it runs continuously, the float switch or wiring may be at fault.
If the float won’t move or the pump won’t start when water rises, the switch may be stuck.
Should I call a professional if the problem persists after basic fixes?
Yes. If line clearing, pit cleaning, and basic electrical checks don’t solve the issue, a licensed plumber or pump technician should inspect the motor, impeller, wiring, and overall setup.
If it still backs up after you try the basics, call a professional.
Can a sump pump backup affect sewer lines?
In some homes, improper backflow prevention can let drainage push toward the sump pit. A functional check valve helps prevent backflow, but if sewer concerns exist, stop pumping and contact a pro.
Backups can raise sewer concerns; check backflow prevention and consider expert help.
Is it safe to run a backup sump pump during heavy rain?
Backup pumps can help during storms, but ensure you have proper power or battery backup and never overload circuits. Keep discharge lines clear to avoid reintroduction of water.
Yes, but only with a proper backup and clear, safe discharge.
When should I replace a sump pump?
If the pump is old, makes unusual noises, frequently trips breakers, or fails to evacuate water effectively, replacement is usually more cost-effective than continuous repairs.
If it keeps failing or sounds worn out, replacement is wise.
Watch Video
Top Takeaways
- Identify the root cause before replacing parts.
- Start with discharge line, then pit, then float switch.
- Test drainage after every fix to confirm success.
- Call a professional if backups persist or safety concerns arise.
- Implement routine maintenance to prevent future backups.