Sump Pump Float Not Triggering: Troubleshooting Guide
Urgent guide to diagnose and fix a sump pump float not triggering. Step-by-step checks, safety tips, and prevention from Sump Pump Check.

Most often, a sump pump float not triggering is caused by a stuck or obstructed float, debris in the sump, a misaligned float arm, or a faulty switch. Start with the simplest checks: remove debris, gently free the float, confirm the arm moves freely, and test the switch. If it still won’t trigger, proceed with electrical tests or call a professional.
The Start: Quick Reality Check on a Stuck Float
When a sump pump float not triggering becomes apparent, homeowners should assess the most common, easily fixable issues first. The float can stall against the pit wall, be blocked by sediment, or hang up if the float arm is bent or misaligned. Water levels and pump cycling patterns give clues: if the pit is full of debris or the float never rises, a blockage or misalignment is likely. In many homes, simply cleaning the pit and freeing a jammed float resolves the problem without needing tools or disassembly. Throughout this process, maintain a calm, methodical approach—rushing can miss subtle signs and safety steps. Remember, a quick inspection now can prevent a flooded basement later, and the Sump Pump Check team recommends staying cautious when the device is connected to power.
Quick Checks You Can Do Before You Dig Deeper
- Inspect the pit for mud, gravel, or sump rinsing residues that can trap the float. - Wipe away obstruction and ensure the float can travel vertically without snagging. - Gently move the float up and down to confirm a clear pathway and a responsive switch. - Look at the arm linkage; if it’s bent, straightened, or misaligned, restore it to a level, straight position. - If you have a dual or battery backup system, test its float as well to ensure coordinated operation. These steps prevent unnecessary disassembly and reduce shock risk from electrical components.
Safety First: Power Down and Safe Handling
Before performing any hands-on checks, unplug the sump pump and switch off the circuit breaker, especially if you’ll be touching exposed wiring or the pump housing. Avoid standing water with wet hands, and never rely on a single quick fix if you hear buzzing, crackling, or see scorch marks near the outlet. Safety gear like gloves and rubber-soled shoes improves grip and protection. After you restore power, test the device using the test button or by simulating water rise to observe the float movement. If the device does not respond, proceed to further diagnostics or contact a professional.
Common Causes Behind a Non-Triggering Float
The following causes cover the majority of failures for a float not triggering:
- Float gets stuck against the pit wall or debris blocks the float cage. This is the most frequent, easy-to-fix issue.
- Float arm is bent, misaligned, or jammed, preventing upward travel.
- Float switch is worn or damaged, failing to complete the circuit.
- Electrical power issues, including a tripped GFCI outlet, blown fuse, or a loose plug.
- Discharge line restrictions or pump overheating can indirectly affect triggering in some setups.
Address each cause in order of likelihood, testing after each fix to confirm progression.
Diagnostic Flow in Practice (Overview)
A structured approach helps prevent unnecessary replacements. Start with the simplest physical checks (blockage, movement, alignment), then verify electrical power and wiring, and finally assess the switch’s integrity. Use a step-by-step testing routine to differentiate between a mechanical problem and an electrical fault. If the float triggers after physical fixes but fails during water tests, you likely have an electrical or controller issue that needs more advanced attention.
Step-by-Step: Fixes for the Most Likely Cause
- Clear the sump pit: Remove visible debris and rinse the pit when possible to reduce residue that can trap the float.
- Free and realign the float: Gently move the float in its track and straighten the arm so it travels freely from bottom to top.
- Test the float mechanism: With power off, manually lift the float to ensure the switch activates and the pump begins to run.
- Inspect wiring connections: Check for loose wires at the switch, the outlet, and the control box. Re-seat any loose connections.
- Check the discharge path: Ensure the discharge pipe is free of obstruction and not re-submerging the pump, which can delay triggering.
- Re-test with water: Slowly fill the pit and watch the float rise to the trigger level, confirming a proper cycle. If it doesn’t activate, proceed to step: electrical checks or professional help.
Testing After Fixes: What to Observe
After performing fixes, run a controlled water test to verify the float triggers the pump reliably. Observe repeated cycles over several minutes to ensure consistent operation. If the pump cycles correctly but stops abruptly or hums without pumping, there may be a motor issue or misconfiguration that calls for deeper inspection. Keep monitoring during the next few rainfall events to ensure reliability.
Long-Term Prevention and Maintenance
Preventive care reduces future float-trigger failures. Schedule periodic pit cleanouts and visual inspections of the float arm and linkage. Keep the area dry and clear of clutter to minimize debris entry. Test the float and switch monthly or seasonally, particularly before anticipated heavy rain. If you have a backup sump pump, test its float alongside the primary unit to ensure dual-system readiness. Regular maintenance plus cautious operation is the best defense against repeated float-trigger issues.
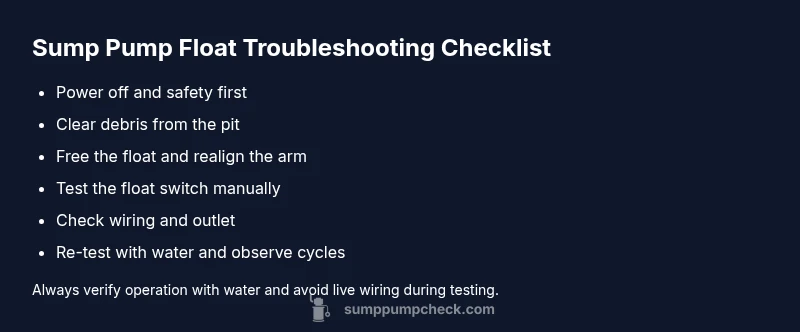
Steps
Estimated time: 45-60 minutes
- 1
Power down and safety prep
Unplug the sump pump and switch off the circuit to prevent shocks. Wear gloves and use a non-slip mat. This ensures you can inspect safely and reduces the risk of electrical injury.
Tip: Double-check the breaker before touching any wiring. - 2
Clear debris from the pit
Remove visible debris and rinse the pit if possible. A clean pit reduces float obstruction and helps the unit rise freely.
Tip: Use a utility flashlight to spot hard-to-see debris near the float cage. - 3
Inspect and realign the float
Check that the float moves up and down smoothly without snagging. Realign the float arm if it’s bent or binding.
Tip: Gently bend the arm back to a straight position; avoid forcing movement. - 4
Test the float switch manually
With power still off, lift the float to see if the switch clicks and the pump would start when powered. If there’s no click, the switch may be faulty.
Tip: Note the exact point at which the switch engages during testing. - 5
Check wiring and outlet
Inspect all connections for looseness; verify the outlet is functioning or try a known-good outlet. Check for damaged cords or scorched marks.
Tip: Use a voltage tester to confirm power availability without relying on guesswork. - 6
Reassemble and re-test with water
Power up, simulate water rise, and observe a full cycle. Repeat several times to confirm reliability before relying on the unit.
Tip: If the pump does not trigger during the test, stop and seek professional evaluation.
Diagnosis: Sump pump does not start when water rises
Possible Causes
- highFloat stuck against wall or debris obstructing travel
- mediumFloat arm misalignment or mechanical jam
- mediumWorn or damaged float switch
- highElectrical power issue (outlet, cord, GFCI)
Fixes
- easyFree the float and clean the pit debris; realign the float arm
- mediumTest and replace the float switch if needed
- easyCheck power supply, reset GFCI, inspect wiring connections
FAQ
Why is my sump pump float not triggering at all?
A non-triggering float is usually due to physical obstruction, misalignment, or an electrical fault. Start with the simplest checks—clear debris, verify free float movement, and test the switch—and then inspect wiring and power supply if needed.
A float that won’t trigger is most often caused by a jam, misalignment, or power issue. Start with debris cleanup and test the switch before looking at wiring.
How can I tell if the float switch is damaged?
If the float does not click when raised and lowered or fails to start the pump during a manual test, the switch may be worn or broken. Replacement is often straightforward but should be done with power off.
If you don’t hear a click when moving the float or it won’t start the pump in a test, the switch could be bad.
What should I do about debris in the sump pit?
Remove debris and rinse the pit to restore a clear path for the float. Regular pit cleaning reduces future jams and improves overall reliability.
Remove debris and rinse the pit to keep the float path clear. Regular cleaning helps reliability.
Is it safe to test the float switch myself?
Yes, with precautions: unplug the unit, wear protective gear, and avoid touching live wires. If you’re unsure, consult a professional to test the wiring and switch safely.
You can test it safely if you unplug first and avoid touching live wiring. If unsure, get a pro to test it.
How often should I test my sump pump?
Test the sump pump at least monthly, and more often before the rainy season. Regular testing helps catch issues before they lead to flooding.
Test it monthly, especially before heavy rain, to catch issues early.
When should I replace a sump pump due to float issues?
If the float or switch repeatedly fails after fixes, or the pump shows signs of wear or burning smells during operation, replacement may be the safest option.
Replace the pump if the float keeps failing after fixes or there are signs of wear.
Watch Video
Top Takeaways
- Identify debris as the primary culprit for float jams.
- Test the float mechanism before replacing components.
- Prioritize safety and cut power before any inspection.
- Regular maintenance reduces future float-trigger issues.