No Water in Sump Pump Pit: Troubleshooting Guide
Urgent guide for diagnosing why no water is entering your sump pump pit, with a step-by-step diagnostic flow, safe checks, and practical fixes to prevent basement flooding.

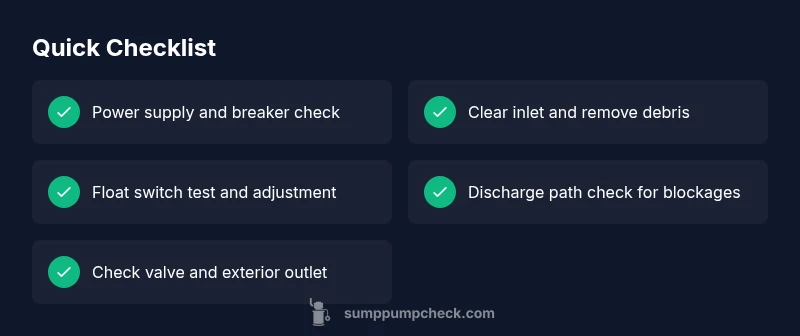
When you have no water in the sump pump pit, the issue is usually with water intake or flow rather than a failed pump. Start with the simplest checks: confirm power, inspect the inlet for debris, and verify the discharge line isn’t blocked. If water still won’t enter, follow the step-by-step diagnostic flow to identify the cause.
Why no water in the sump pump pit happens
According to Sump Pump Check, a dry sump pit is typically a symptom rather than a failure of the pump itself. If there hasn’t been significant rainfall or water input from downstream drainage, the pit may stay dry simply because water hasn't reached it yet. But more often, several common culprits stop the flow from entering the pit: a clogged inlet screen, a stuck or misadjusted float switch, or a blocked discharge line. Understanding these factors helps you act quickly and prevent basement flooding when storms return or heavy rain begins. If you notice no water in the sump pump pit, start with the simplest checks before you assume the pump is dead. Verify that the power source is active, the outlet is delivering current, and the pit itself is free of debris that could anchor or corner the inlet. By focusing on entry points—the intake screen, float mechanism, and discharge path—you can usually restore proper function without expensive service calls.
Safety-first: quick checks you can do without tools
Safe operation matters as you troubleshoot. Safe practice begins with powering down the unit at the circuit breaker or unplugging it to prevent accidental starts. Next, inspect the pit for loose debris or items that could block water from reaching the pump. Clean any mud, leaves, or sediment out of the pit and rinse the inlet area if you can. Check the sump pit cover to ensure it's seated correctly and not pinching the inlet. Finally, verify the discharge line is visible and free of obvious kinks or frost blocks that could trap water outside the home. If you see standing water or a visible blockage, address it before re-energizing the system. The goal is to ensure a clear water path from intake to discharge.
Check the intake and float switch for proper operation
The intake screen and inlet grate are the first barriers to a dry pit. Remove the grate carefully and inspect for sediment, algae, leaves, or mineral buildup. Clean with a brush and rinse with clean water. For the float switch, identify whether your system uses a tethered or vertical float. Gently move the float by hand and listen for the pump to start; if it runs freely and the pit fills, the float is likely functioning. If the pump does not start even when the float is raised, you may have a power issue or a failed switch. Realign or replace the float as needed, following the manufacturer’s instructions. This step often resolves situations where the pit remains dry despite rainfall.
Discharge path, check valve, and drainage system
A blocked discharge line or a failed check valve can keep water out of the pit even when it’s raining. Inspect the external discharge pipe for kinks, blockages, or ice. If you find a blocked section, clear it and test the system again. Check the valve between the house and the outdoors to ensure it’s allowing water to exit, not return. If your discharge runs uphill or through a long run, examine for sediment buildup that reduces flow. After clearing the discharge, re-test by triggering the pump and observing whether water reaches and drains from the pit. Addressing the discharge path often eliminates the no-water-in-pit condition.
When to call a professional and maintenance tips
If power is verified, the intake is clean, and the discharge path is clear but the pit still stays dry, the issue may be a faulty switch or a failing pump that needs replacement. Schedule professional service before risking basement flooding during heavy rain. Regular maintenance—testing the float, cleaning the pit quarterly, and inspecting checks valves—keeps your system reliable. Consider a battery-backed sump pump or a secondary backup system for added protection during outages. Safety tip: never work inside the pit with the unit energized; always disconnect power first.
Steps
Estimated time: 30-45 minutes
- 1
Power down and safety check
Switch off the sump pump at the circuit breaker or unplug the unit. Remove jewelry and wear gloves if you access the pit. This protects you from accidental startup during inspection.
Tip: Always confirm the power is off at the panel before touching the pump. - 2
Clear the pit and inspect the inlet
Remove the grate and any debris from the bottom of the pit. Check the inlet screen for sediment or algae and clean it with a soft brush
Tip: Use a flashlight to spot hidden debris in the corners. - 3
Test the float switch
Identify whether your float is tethered or vertical. Gently lift the float to see if the pump engages. If it doesn’t, the switch may be faulty or misadjusted.
Tip: If unsure, consult the manufacturer’s instructions for float testing. - 4
Check the discharge path
Follow the discharge pipe to the exterior. Look for kinks, ice, or blockages. Ensure the check valve is present and unobstructed.
Tip: A blocked discharge is a common reason for a dry pit. - 5
Reassemble and power up
Secure the pit cover, reconnect power, and run a test cycle to confirm water enters the pit and is pumped away.
Tip: Observe for 1–2 minutes of operation to ensure stable flow. - 6
If it still fails, call a pro
If none of the above steps restore function, the pump or switch may need professional service or replacement.
Tip: A licensed technician can safely diagnose electrical or mechanical issues.
Diagnosis: No water in sump pump pit
Possible Causes
- highPower issue to the sump pump or switch
- highIntake screen clogged or debris in the pit
- mediumFloat switch faulty or misadjusted
- mediumDischarge line blocked or valve closed
Fixes
- easyVerify power supply: unplug, check the outlet, reset the breaker, and confirm the unit is receiving power.
- easyRemove debris from the pit, clean the inlet screen, and ensure the grate sits properly.
- easyTest the float switch by raising it manually and listening for the pump; replace or adjust if it doesn’t respond.
- mediumInspect and clear the discharge pipe and confirm the check valve allows flow outward; repair as needed.
FAQ
What does it mean if there is no water in the sump pit?
It usually means water isn’t reaching the pit due to intake or flow problems rather than a failed pump. Check power, inlet, float, and discharge path. If the pit remains dry after these checks, professional diagnosis may be needed.
No water in the sump pit typically points to intake or flow issues, not a dead pump. Start with power, inlet, float, and discharge checks. If unresolved, a pro can help.
Can a stuck float switch cause the pit to stay dry?
Yes. A float that is stuck or misadjusted may prevent the pump from turning on even when water is present, leaving the pit dry. Inspect and replace if necessary.
A stuck float can stop the pump from starting, making the pit stay dry. Check both types of floats and replace if needed.
How do I safely test my sump pump?
Power off the unit, inspect the pit for debris, test the float by raising it, and then re-energize the system to observe operation. Always follow manufacturer instructions.
Turn the power off, inspect, test the float, then power back on to see if it runs properly.
Is a blocked discharge line dangerous?
A blocked discharge can cause water to back up and damage the unit or basement. Clear blockages and ensure the line drains properly.
Yes, blockages can cause flooding or pump failure. Clear the line and test again.
When should I replace my sump pump?
If the pump is old, noisy, or fails multiple tests, replacement may be more reliable than repair. Consider a backup system for added protection.
If it keeps failing or is very old, replacement is often the best bet. A backup pump is a good precaution.
Do I need a professional for a dry sump pit issue?
If basic checks don’t resolve the issue or you’re unsure about electrical work, call a licensed technician. They can safely diagnose electrical, mechanical, and drainage problems.
If basic checks don’t fix it, it’s wise to call a pro who can diagnose electrical or mechanical problems safely.
Watch Video
Top Takeaways
- Check power and safety first
- Clean inlet and pit debris
- Test float switch, then inspect discharge
- Address discharge path before pump replacement
- Call a pro if the problem persists