Sump Pump Pit Fills With No Rain: Troubleshooting Guide
Learn how to diagnose and fix a sump pump pit that keeps filling even when there’s no rain. Step-by-step checks, diagnostic flow, safety tips, and prevention strategies for DIY homeowners.

The pit filling without rain is most likely caused by a stuck float, a failing check valve, or a blocked discharge line allowing backflow. Start by confirming the float moves freely and shuts off, inspect the check valve for leaks or a stuck seat, and ensure the discharge line drains away from the pit. If the problem persists, inspect exterior grading or drainage issues.
Why a sump pump pit keeps filling without rain
When you notice the sump pump pit keeps filling no rain, it triggers immediate concern for homeowners. According to Sump Pump Check, a non-weather-related fill can arise from simple mechanical faults or from drainage dynamics around your home. The most common culprits are a float that sticks or fails to rise, a discharge system that allows backflow due to a faulty check valve, or a blocked discharge line that prevents water from leaving the sump pit. In many cases, this isn’t a sign of an imminent flood, but of a misbehaving system that isn’t evacuating water efficiently. You’ll want to verify that the pit is level and that the surrounding floor and drainage are pitched away from the opening. A consistently filling pit can also indicate groundwater ingress or an underground leak feeding water into the basin. Identifying the correct trigger is essential because it governs the sequence of fixes and safety steps you’ll take next. The goal is to restore reliable operation without creating safety hazards or damaging the pump.
Common causes to inspect first
Begin with the simplest explanations before moving to more involved issues. For a sump pump pit that fills without rain, prioritize checks that involve the mechanical components and discharge path. A stuck float is a frequent offender—safely remove the cover and manually lift the float to see if the switch reverses and power to the pump stops. If the float operates normally, inspect the float rod and linkage for corrosion or obstruction. Next, examine the check valve on the discharge pipe. A leaky or seated-out valve can allow water to siphon back into the pit as soon as the pump turns off. Ensure the valve is clean, oriented correctly (usually a spring-loaded side facing upwards), and that the gasket seats snugly. If both float and valve look good, trace the discharge line for clogs, kinks, or a crushed section, and check for any nearby Figure-8 or U-shaped bends that could trap air and reduce flow. Finally, compare the discharge outlet’s slope to the outside ground grade to ensure water is directed away from the foundation rather than pooling near the pit.
Safety and initial steps you can take
Before touching mechanical parts, power down the sump pump to avoid any risk of shock or unintended activation. Use a non-conductive tool to inspect the pit cover and verify there are no exposed wires or damp areas that could pose a hazard. If you must remove the cover, keep pets and children away and place the unit on a dry, stable surface. Wear eye protection and gloves, especially if you’re handling rusty components or damp concrete. Never work on wiring or the float mechanism if you’re unsure of electrical safety practices. If you detect a scorch smell, a flicker of a breaker, or signs of moisture in the electrical panel, stop and call a licensed electrician. After you complete initial checks, water test the system by pouring a small amount of water into the pit to observe how the float and switch respond while the pump is powered. This controlled test helps confirm whether the mechanism triggers correctly and stops the water ingress.
Diagnostic-flow: a practical testing framework
A structured approach helps you narrow the root cause without guessing. Start with observable symptoms: is the float stuck, is there backflow through the discharge, or is water entering the pit from an external source? For each potential cause, map a diagnosis and a set of fixes. If the discharge line is blocked, clearing it should stop backflow. If the float sticks, cleaning and lubrication can free movement. If the check valve fails, replacement is often straightforward. Finally, if water enters from outside the pit due to groundwater intrusion, you’ll need to explore sealing options and drainage improvements around the foundation. By following a symptom-to-diagnosis-to-solution flow, you minimize unnecessary disassembly and reduce risk.
Step-by-step fixes for the most common cause
The most common non-rain-related issue is a stuck float or a faulty check valve. Here’s a focused fix plan you can follow:
- Power off the unit and remove the sump cover. Inspect the float and rod; gently shake the float to see if it smoothly moves and shuts off the switch. If it sticks, remove buildup with a soft brush and reinstall.
- Inspect the discharge check valve. Unscrew the valve from the discharge pipe, clean the gasket surface, and reseat it according to the manufacturer’s orientation. Replace if there is cracking or obvious wear.
- Clear the discharge line. Use a plumber’s snake or a long flexible brush to remove obstructions. Check for kinks or crushed segments and ensure the line exits away from the house’s foundation.
- Reassemble, power on, and perform a controlled water test to verify the pit no longer fills unexpectedly.
- If backflow persists after these steps, check for external sources such as groundwater seepage and consider partial drainage improvements around the lot.
Tip: Keep a spare check valve and float assembly on hand for quick future replacements if you notice recurring issues.
Prevention and maintenance to stop future fills
Prevention is more efficient than repeated fixes. Schedule regular inspections of the sump pit, float, and discharge components at least twice a year, ideally in the spring and fall. Clean the sump pit every few months to remove sediment and debris that could impede float movement or clog the valve. Ensure the discharge path remains clear and that the exterior area around the discharge exit is graded to promote water away from the foundation. If you have a basement drainage system, verify that it is adequately connected and that head pressure from groundwater isn’t pushing water back toward the sump. Consider upgrading to a more reliable backflow prevention device, especially in homes with high water tables or older piping. Finally, keep the nearby electrical components dry and accessible, with a GFCI outlet for protection and a clear access path for service.
When to call a professional for sump pump pit issues
If you encounter persistent filling after performing the basic checks, or if you notice electrical components getting warm, signs of water leakage around your panel, or strange noises during operation, it’s time to call a licensed plumber or electrician. A professional can perform a pressure-test, inspect for hidden leaks, verify the integrity of the drainage system, and ensure code-compliant installation. Professional assessment is especially recommended when you’re dealing with possible foundation or groundwater problems that require more specialized mitigation strategies.
Steps
Estimated time: 60-90 minutes
- 1
Power down and open the pit
Turn off the power at the breaker and remove the sump cover. Check for any exposed wiring or wet surfaces. This keeps you safe while you inspect the internals.
Tip: Use a non-conductive tool and wear gloves. - 2
Inspect float and linkage
Gently move the float to see if it rises smoothly and triggers the switch. Look for corrosion, grime, or obstructions that would prevent full motion.
Tip: Do not force the float; if it sticks, proceed to cleaning or replacement. - 3
Check the discharge valve
Locate the check valve on the discharge line. Remove and inspect the gasket seating; look for wear or cracks and replace if necessary.
Tip: Ensure correct valve orientation during reassembly. - 4
Clear the discharge line
Inspect the entire path for clogs, kinks, or crushed areas. Use a flexible snake or brush to clear obstructions and verify water flows freely.
Tip: Test the line by manually pouring water and watching drainage. - 5
Test the system
Power the unit back on and perform a controlled test by adding water to the pit. Confirm that the pump activates and then stops when the float rises.
Tip: Record results for future reference.
Diagnosis: Sump pit fills with water even when it hasn’t rained
Possible Causes
- highStuck or dirty float switch
- highLeaky or mis-seated discharge check valve
- mediumDischarge line blockage or backflow
- lowGroundwater intrusion or exterior drainage issues
Fixes
- easyTest and lubricate/replace float switch to restore proper shutoff
- easyInspect, clean, or replace the discharge check valve to prevent backflow
- easyClear obstructions in the discharge line and ensure proper slope away from the pit
- mediumAssess exterior drainage and grading; install drainage improvements if needed
FAQ
Why would a sump pit fill if it hasn't rained recently?
Non-rain causes usually involve the float, valve, or discharge. A stuck float, failed check valve, or line backflow can push water back into the pit. Inspect these components, then test the system after each fix.
A sump pit can fill without rain when the float sticks, the discharge valve leaks, or water backs up through the line. Check these parts and test as you go.
Is it safe to test the sump pump myself?
Yes, with precautions. Power off before opening the lid, use dry tools, and wear protective gloves. If you smell burning, see sparks, or there’s moisture in the electrical panel, stop and call a professional.
You can test it yourself safely if you shut it off first and stay mindful of electricity and water around the unit.
What’s the first thing to check when the pit fills without rain?
First check the float operation. If the float rises and shuts off the pump, move to the discharge valve and line. If the float won’t rise properly, focus on cleaning or replacing the float assembly.
Start with the float, then move to the valve and discharge line if needed.
Can exterior drainage cause a sump pit to fill on its own?
Yes. Poor exterior grading or a blocked exterior drain can push groundwater toward the pit. Inspect grading and consider drainage improvements if water consistently flows toward the foundation.
Groundwater and bad grading can push water toward your sump pit even without rain.
When should I replace a sump pump component rather than repair it?
If a component shows visible wear, cracking, or persistent failure after cleaning, replace it. This avoids repeated, unreliable repairs and protects your home during wet periods.
If a part is worn out, replace it rather than keep repairing it.
Is professional help required for groundwater intrusion?
Groundwater intrusion may require deeper excavation or drainage mitigation. If you suspect this, consult a licensed plumber or drainage contractor to assess foundation work and external seals.
For groundwater seepage, professionals can assess foundation and drainage changes.
What maintenance can prevent future sump pit fills?
Regularly clean the sump pit, inspect the float and valve, keep the discharge line clear, and verify exterior grading. A maintenance schedule helps prevent backflow and keeps your system reliable.
Set a regular cleaning and inspection routine to keep the system reliable.
If I still have a problem after following the guide, what’s next?
Document the symptoms, recent weather, and changes you made. Contact a licensed professional for a hands-on inspection and potential upgrades to your sump system.
If it still fills, get an expert to inspect your setup.
Watch Video
Top Takeaways
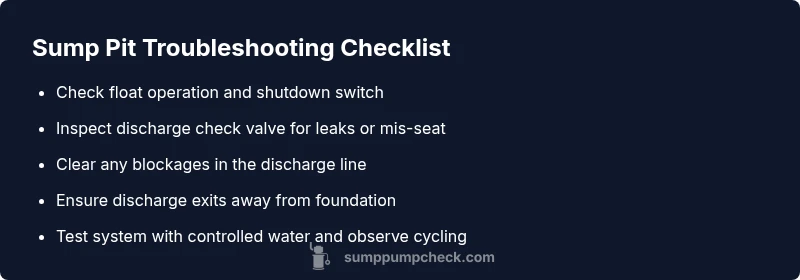
- Start with simple checks: float, valve, then line.
- Backflow is a common non-rain trigger—fix the valve first.
- Dry safety first: power off before touching electrical parts.
- Test after each fix to confirm results.
- Prevent future fills with proper drainage and maintenance.