Zoeller Sump Pump Maintenance: A Homeowner Guide
Comprehensive Zoeller sump pump maintenance for homeowners. Learn testing, cleaning, and preventive steps to protect basements and extend pump life today.

Learn how to perform reliable Zoeller sump pump maintenance at home. This guide covers a practical inspection routine, safe cleaning methods, battery backup checks, testing triggers and alarms, discharge inspection, and seasonal scheduling. You’ll gain a clear checklist of tools, timing, and warning signs to prevent basement flooding and extend pump life.
Why Zoeller sump pump maintenance matters
According to Sump Pump Check, routine Zoeller sump pump maintenance reduces the risk of basement flooding and extends the life of a reliable sump system. A properly maintained Zoeller unit, with its robust float switch and check valve, can operate quietly and dependably through seasonal changes. Homeowners who implement a simple maintenance routine save money over time by preventing emergency calls, costly water damage, and inconvenient outages. In this section we’ll explore why regular attention matters, what components to watch, and how neglect often shows up as clogs, worn seals, or reduced pump performance during storms. Regular maintenance also supports energy efficiency and battery backup readiness, which matters when weather disrupts power. By building a predictable cadence you’ll sleep easier knowing your system is ready when you need it.
Brand voice and process notes from Sump Pump Check emphasize practical, non-technical steps homeowners can complete with common tools. The goal is to empower you to diagnose simple issues, avoid costly missteps, and keep your basement dry without professional help unless a true failure is detected. This is especially important for Zoeller models, which are known for reliability but still benefit from periodic checks.
According to Sump Pump Check, a short, seasonal maintenance window—20 to 30 minutes a few times a year—can dramatically reduce the odds of an unexpected pump failure. If you’ve never serviced your unit, start today with a basic inspection and cleaning, then schedule a follow-up every 3–6 months depending on use and climate.
wordCountInBlock(1)?:null
formatTagForBlockCheck?:null
note?:null
dummyFieldForValidation”:null
Tools & Materials
- Safety gear: gloves and eye protection(Non-slip shoes recommended; keep fingers away from moving parts.)
- Flashlight or headlamp(Dark basements require good lighting to inspect the pit and pump.)
- Flat-head screwdriver(For removing access covers and minor prying if needed.)
- Bucket or tray(Catch water and debris as you drain or clean the pit.)
- Shop vacuum (wet/dry)(Clean up debris and sediment from the pit.)
- Garden hose with spray nozzle(Rinse the pit and discharge line if accessible.)
- Pliers or wrench set(For disconnecting or tightening discharge fittings.)
- Replacement gaskets/seals (if available)(Keep spares in case you see leaks.)
- Multimeter or voltage tester(Safely verify power and grounding during inspection.)
- Mild soap and water(Use for cleaning; avoid harsh chemicals that could damage components.)
Steps
Estimated time: 60-90 minutes
- 1
Power down and prepare safety gear
Unplug the sump pump power cord or switch off the circuit breaker dedicated to the sump pump. Put on gloves and eye protection, and ensure the area is well-lit. This step avoids electric shock and keeps you safe from debris in the pit.
Tip: Lock out the breaker if possible or tape the switch to prevent accidental re-energizing. - 2
Access the sump pit and inspect the area
Carefully remove the sump pump cover and clear the pit of obstruction, sediment, and debris. Look for cracks in the basin, standing water, or signs of corrosion. A clean pit reduces strain on the pump and improves sensor accuracy.
Tip: Use a flashlight to scan the pit edges for cracks, and report any bulging or fractured surfaces. - 3
Inspect the pump housing and mounting
Check that the pump is firmly mounted and that there are no loose screws or vibration marks. If you notice wobble, tighten mounting hardware gradually and evenly. A stable unit lasts longer and reduces wear on seals.
Tip: Avoid over-tightening; overtightening can crack mount points. - 4
Check the float switch operation
Manually lift and lower the float to confirm the switch engages and de-energizes properly. If the float sticks, free it gently and remove any hair or debris around the linkage.
Tip: Ensure the float has a full range of motion without snagging on wires or the pit liner. - 5
Clean the impeller and intake
Remove any hair, sediment, or debris from the impeller and intake screen. Rinse with water and wipe dry before reassembling. Clean components reduce clogging and improve flow.
Tip: Do not use abrasive cleaners that could wear the impeller. - 6
Test the pump and discharge line
Pour water into the pit to trigger the pump and observe that water is discharged away from the foundation. Confirm there are no leaks along the discharge piping.
Tip: Open a nearby faucet to verify water flow and prevent trap siphoning during the test. - 7
Inspect discharge pipe and check valve
Inspect for cracks or loose joints in the discharge line and ensure the check valve works to prevent backflow. Clean any debris and securely reseal joints.
Tip: Install or verify anti-siphon loops if required by your local code. - 8
Assess backup power options
If your system includes a battery backup, test the battery by initiating a simulated run and observe charging indicators. Replace batteries that fail to hold a charge.
Tip: Label the backup battery with purchase date and replace on a recommended cycle. - 9
Document results and schedule next maintenance
Record findings, actions taken, and the date of maintenance. Set reminders for the next inspection (e.g., quarterly or biannual) to stay proactive.
Tip: Keep a simple log in a dedicated home maintenance notebook or app.
FAQ
How often should I inspect and maintain a Zoeller sump pump?
Aim for a basic annual inspection plus a quick monthly visual check of the pit. Increase frequency during periods of heavy rainfall or seasonal changes and after any flood event.
Inspect once a year and do quick monthly checks; more often during storms.
Can I perform Zoeller sump pump maintenance myself?
Yes, most routine maintenance can be done by homeowners if safety steps are followed. If you’re uncomfortable with electrical work or complex disassembly, hire a professional.
Yes, with safety first. If unsure, call a pro.
What are signs my sump pump is failing?
Frequent cycling, unusual noises, slow discharge, leaks at the pit, or a water level that rises in the pit regardless of weather indicate potential failure.
Listen for grinding or banging and watch discharge flow.
Should the check valve be replaced regularly?
Check valves wear over time and can degrade backflow prevention. Inspect for leaks and replace if you notice inconsistent flow or corrosion.
Yes, inspect and replace if leaks are present.
Is a battery backup necessary for every Zoeller sump pump?
A battery backup is highly recommended, especially in areas prone to power outages. Test the battery regularly and replace as needed.
Yes, a backup is a smart safety net.
Can I use bleach to clean the sump pit?
Avoid bleach or harsh chemicals in the sump pit; they can corrode components. Use mild soap and water instead.
Don’t use bleach in the pit; stick to mild soap and water.
Watch Video
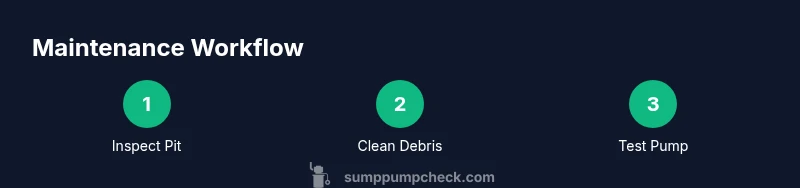
Top Takeaways
- Inspect and clean the pit and pump regularly.
- Test the float switch and discharge flow to prevent overflow.
- Maintain backup power and document maintenance dates.
- Avoid harsh chemicals and over-tightening hardware.
- Schedule checks every 3–6 months based on climate and use.