How to Check a Sump Pump Check Valve
Learn how to check a sump pump check valve to prevent backflow and protect basement drainage. This step-by-step guide covers inspection, testing, and replacement tips for homeowners and DIY enthusiasts.

With this guide you will learn how to check a sump pump check valve to prevent backflow and protect basement drainage. The process covers visual inspection, a hands-on functional test, and straightforward replacement steps if the valve is faulty. You’ll need basic tools, a dry workspace, and strict safety precautions before you begin.
What a sump pump check valve does and why it matters
A sump pump check valve is a one-way gate attached to the discharge line that prevents pumped water from flowing back into the sump pit. When it works correctly, it keeps water moving away from your home and reduces the risk of basement flooding during heavy rain or power interruptions. Common valve styles include swing, ball, and lever designs; each relies on proper orientation and tight connections. For homeowners, checking valve integrity is a core maintenance task that can save costly repairs later. To perform a solid evaluation, look for visible corrosion, ensure the valve seats fully when the pump stops, and confirm water exits the discharge line without backflow. A faulty valve can undermine the entire pumping system, so address issues promptly. According to Sump Pump Check, regular inspection is the best defense against backflow and basement water damage.
Symptoms of a faulty check valve and why they matter
A failing check valve may show backflow into the sump pit, audible gurgling as air escapes through the discharge, or unusually rapid cycling as the pump turns on and off to compensate for backpressure. You might notice damp spots around the discharge area or dampness inside the pit after the pump stops. Sump Pump Check analysis shows that a corroded or poorly seated valve is a common cause of backflow, especially in areas with hard water or mineral buildup. If you observe any of these signs, it’s time to inspect the valve more closely and plan a repair or replacement to restore proper drainage. Early detection helps prevent basement moisture, mold growth, and higher electricity use from a pump that cycles frequently.
Safety first: prepare your workspace and tools
Before you touch electrical components or plumbing, set up a dry, well-lit workspace and gather your tools. Always shut off power to the sump pump at the circuit breaker before approaching the unit to avoid shock. Use a non-conductive flashlight, wear rubber gloves and safety glasses, and keep a bucket and towels handy for spills. If you must drain the pit, do so slowly to avoid a sudden rush of water that could splash or cause a slip. Secure loose clothing and remove any standing water around the area. A careful setup reduces the risk of injury and makes the inspection more accurate. Remember: never bypass safety steps for speed; this is where many DIY projects go wrong.
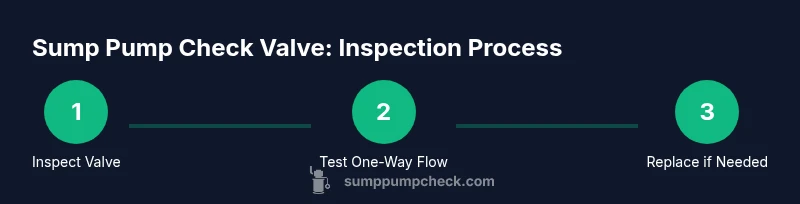
Step-by-step: how to inspect and test the check valve
- Power down and secure the area. Unplug the sump pump or switch off the breaker and place the unit in a dry, stable position. This ensures you won’t be shocked while examining the discharge valve.
- Locate the check valve on the discharge line. Follow the pipe from the pump to the exterior vent or outlet and identify the valve’s orientation. If the pipe is hard to reach, you may need to loosen clamps or gently reposition components for access.
- Visually inspect for corrosion, cracks, or leaks. Look at the valve body, seals, and connections. A swollen or discolored seal often indicates deterioration that warrants replacement.
- Test the valve’s one-way function. With the pump off, observe whether water can backflow into the pit when you gently push a small amount of water toward the discharge side. If water returns to the pit or you hear air leaking through, the valve may be failing. For a more accurate test, re-energize the pump and watch the discharge: water should flow out and stop cleanly when the pump stops.
- Replace the valve if it sticks, leaks, or fails the one-way test. Carefully remove the old valve, clean the pipe ends, apply appropriate thread sealant or PTFE tape to threaded joints, and install the new valve in the correct orientation. Re-tighten clamps securely to prevent leaks.
- Reconnect power and perform a final test. Run the pump for several cycles, observing smooth operation and no backflow. Check all joints for leaks and ensure the discharge line remains clear during operation.
When to replace the valve and how to select a replacement
If the valve shows persistent leakage, corrosion, cracks, or if it fails the one-way test repeatedly, replacement is the safest option. When selecting a replacement, consider valve type (swing, ball, or lever), pipe size, and material compatibility with your discharge piping. Ensure the valve is rated for your pipe diameter and that the orientation arrow points away from the sump. If the pipe is PVC, use PVC-rated valves and appropriate cement or threaded adapters. In some cases, upgrading to a dual-check valve or adding a backflow prevention device may offer greater long-term reliability, especially in flood-prone areas. Take measurements after removal to ensure an exact fit when buying a new valve. Regularly replacing a worn valve is often more cost-effective than repairing repeated leaks.
Maintenance tips to extend valve life and prevent future failures
Create a quick maintenance schedule that includes annual visual inspections and a mid-season test after heavy rainfall. Keep the discharge path clear of debris and flush the line to prevent mineral buildup from hindering valve operation. Avoid using chemical cleaners that could corrode seals; instead, rinse with clean water and inspect seals for wear. If your system experiences frequent backflow, consider upgrading to a higher-quality valve or a backwater prevention device. Document each inspection so you can track the valve’s condition over time and plan replacements before failures occur. By staying proactive, you can extend the life of the check valve and maintain reliable basement drainage.
Tools & Materials
- Bucket or catch tray(Place under discharge outlet to catch water during testing)
- Flashlight or headlamp(Bright, hands-free lighting to inspect valve area)
- Adjustable wrench(Loosen/tighten hose clamps and fittings)
- Channel-lock pliers(Grip slippery fittings securely)
- Screwdriver set(Flathead or Phillips for removing clamps or faceplates)
- Replacement check valve(Only if inspection indicates failure or wear)
- Towels or rags(Dry surrounding area and clean up spills)
- Rubber gloves(Protection when handling wet components)
- Safety glasses(Eye protection when working near water or splashes)
- PTFE tape or pipe thread sealant(Only for threaded joints if needed)
Steps
Estimated time: 45-60 minutes
- 1
Power down and secure the area
Turn off the sump pump at the breaker or unplug the unit. Confirm there is no live electricity near the sump; use a non-contact voltage tester if available. This ensures your safety as you inspect the valve and pipes.
Tip: Verify power is off before touching any metal parts to prevent shocks. - 2
Locate the check valve on the discharge line
Follow the pipe from the sump pump to where it exits the house. Identify the check valve, typically a brass or PVC body with two ends and a directional indicator. If obscured, gently loosen nearby clamps to expose the valve area.
Tip: Note valve orientation before removing anything; arrows should point away from the sump. - 3
Inspect visually for wear and leaks
Check the valve body and seals for corrosion, cracks, or cracks around the joints. A mint condition valve should be clean, dry, and free of mineral buildup. If you see discoloration or a crusty ring, replace or service the valve.
Tip: Use a flashlight to catch tiny cracks or buildup that aren’t obvious at a glance. - 4
Test the valve’s one-way function
With the pump off, push a small amount of water toward the discharge side and watch for backflow into the pit. Re-power the pump and observe discharge; water should flow out, then stop when the pump stops, with no water returning to the pit.
Tip: Perform the test with the area dry and be prepared to catch any overflow. - 5
Replace the valve if necessary
If the check valve fails the test,xx remove the old unit, clean the pipe ends, and install a replacement in the correct orientation. Use PTFE tape on threaded joints and tighten clamps securely to prevent leaks.
Tip: Double-check that the replacement matches pipe size and type (PVC vs metal). - 6
Re-test and finalize connections
Reconnect power and run multiple cycles to ensure proper operation. Check joints for leaks and confirm the discharge path remains clear. Keep an eye on the system for a full cycle to ensure stability.
Tip: Keep towels handy during the first post-repair run in case of minor leaks.
FAQ
What is a check valve and why do I need one?
A check valve is a one-way valve on the sump pump discharge that prevents water from flowing back into the sump pit. It protects basement drainage and reduces pump cycling. According to Sump Pump Check Team, a functioning check valve is essential for reliable water removal.
A check valve is a one-way valve on the discharge line to stop backflow. It's essential for protecting your basement drainage, and regular checks help keep your sump pump reliable.
How often should I test the check valve?
Test the valve during routine maintenance, and after heavy rainfall or power outages. A quick check every 6–12 months is a sensible baseline; more frequent checks may be needed in areas with hard water or mineral buildup. Regular testing helps catch issues before they become floods.
Test it during routine maintenance, especially after heavy rain. A 6–12 month baseline works well for most homes.
Can a faulty check valve cause smells or mold problems?
Yes. If backflow occurs, damp conditions can promote mold and a musty odor. Regular valve checks reduce moisture in the sump area and help prevent mold growth in basements.
Backflow can lead to damp basements and mold, so keep your valve in good shape with regular checks.
Is replacing a check valve a DIY job?
Yes, replacing a valve is commonly a DIY task for homeowners with basic plumbing skills. Ensure you follow safety steps, match the valve size, and seal threaded joints properly. If you’re unsure, consult a plumber.
Replacing a check valve is doable for a handy homeowner, but don’t hesitate to call a professional if unsure.
What are common signs that the valve needs replacement?
Persistent leaks, corrosion, cracks, or repeated backflow indicate replacement is needed. If the valve cannot hold a seal or shows rust, plan for a new unit promptly.
Leaks, corrosion, or regular backflow mean the valve should be replaced.
Watch Video
Top Takeaways
- Identify the check valve and confirm one-way flow.
- Test for backflow after any maintenance or replacement.
- Safety first: disconnect power and protect yourself.
- Replace worn valves to protect basement drainage.